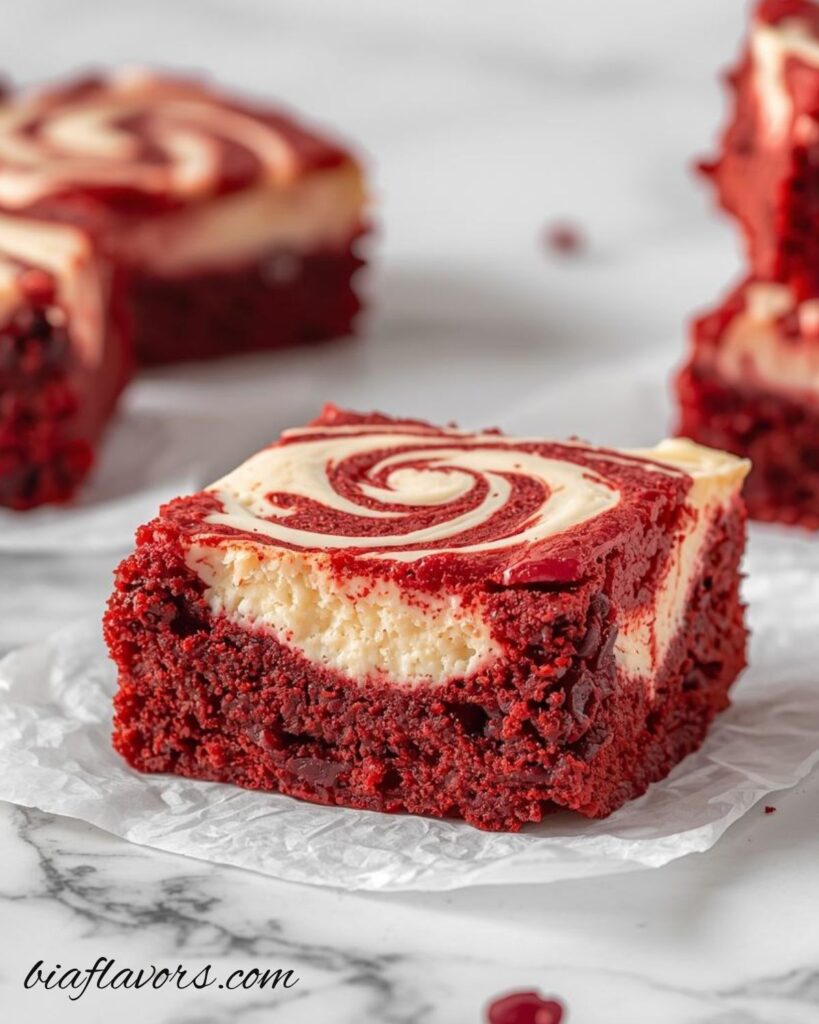
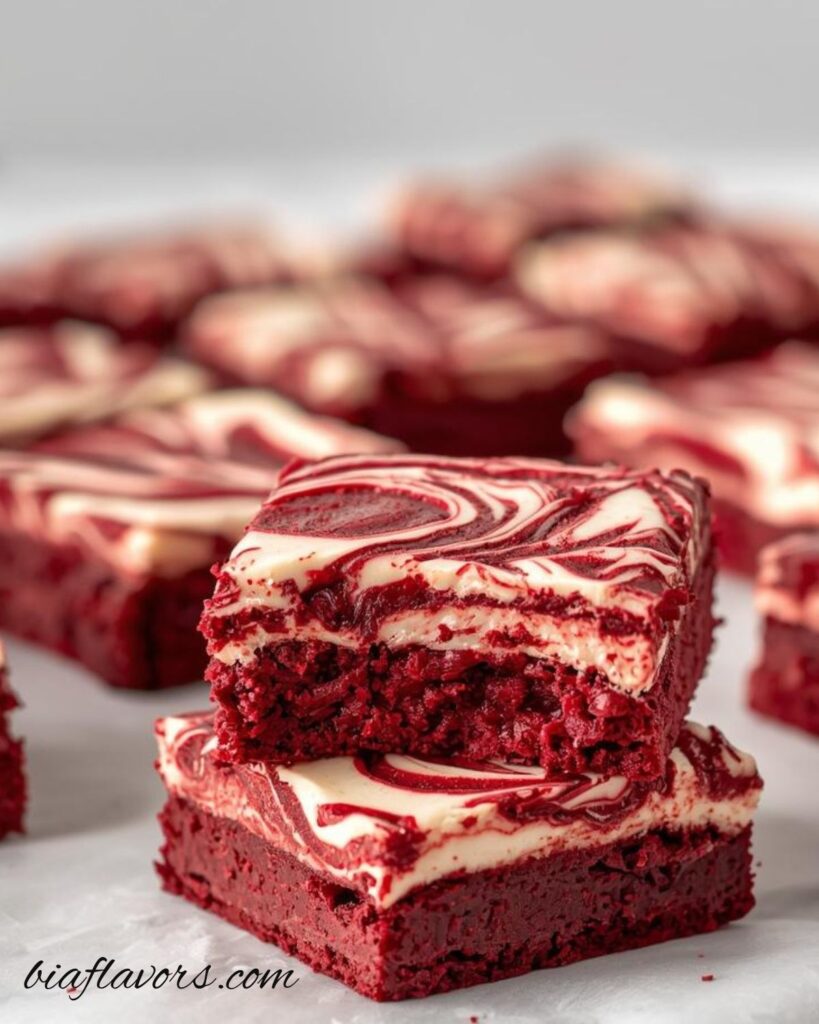
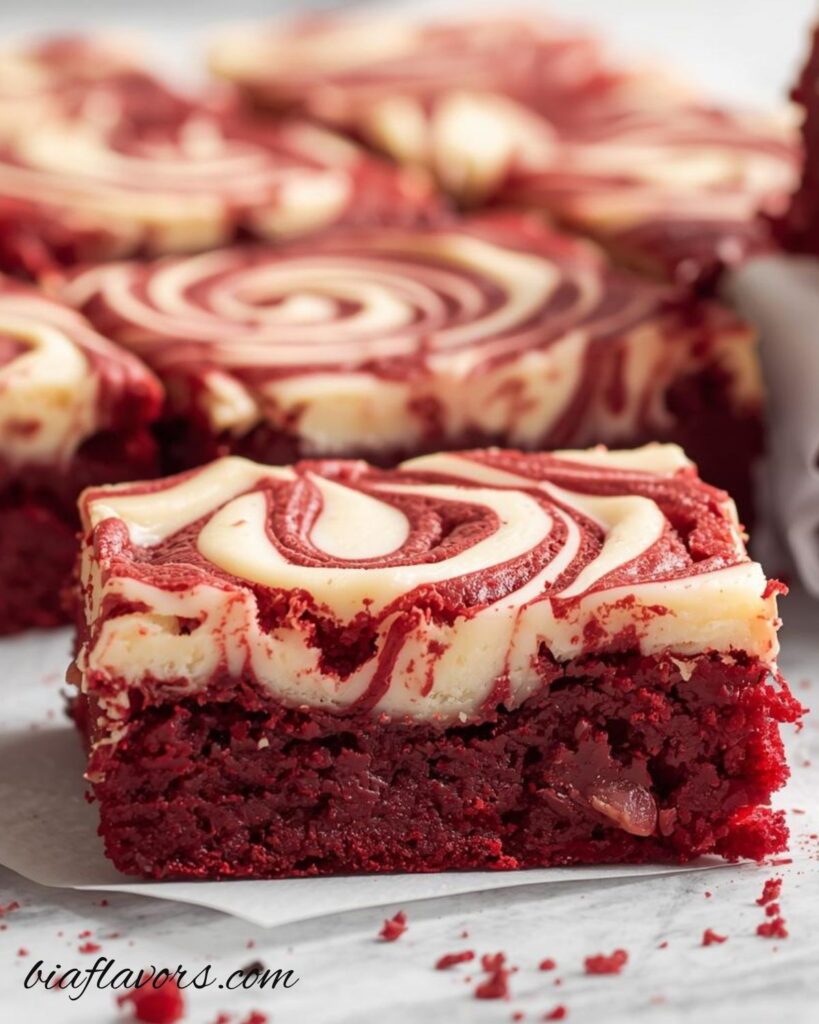
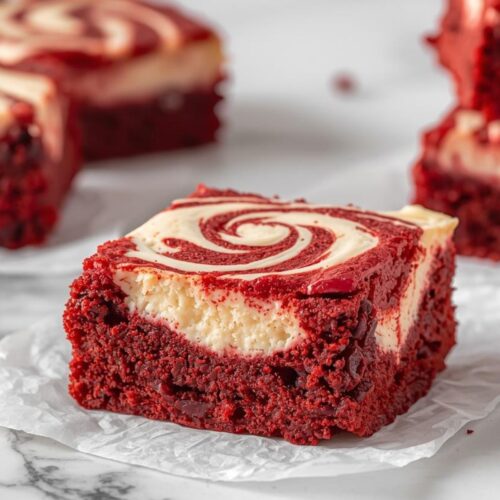
You know those desserts that just feel a little extra special the moment you see them? These Red Velvet Cheesecake Swirl Brownies are exactly that kind of treat. Rich, fudgy red velvet brownie on one side and a creamy cheesecake swirl running through it it’s the kind of combo that makes you pause after the first bite.
What I love about this recipe is how it brings together two favorites in one pan. The brownie layer is soft and chocolatey with that light red velvet touch, while the cheesecake swirl adds a smooth, slightly tangy creaminess that balances everything perfectly. It’s not overly complicated either, which makes it even better for home baking days.
If you’re baking for a special occasion, a small get-together, or just because you’re craving something sweet and homemade, this recipe fits right in. It looks impressive, tastes even better, and honestly feels like something straight from a bakery but made right in your own kitchen.
Why You’ll Love This Recipe
There are so many reasons this recipe is worth saving, but the biggest one is how perfectly everything comes together in every bite. You get that soft, fudgy red velvet brownie base paired with a smooth, creamy cheesecake swirl and the contrast is just so satisfying.
Another reason you’ll love it is how simple it actually is. It looks like something you’d buy from a fancy bakery, but the steps are easy enough for a regular baking day at home. No complicated techniques, just basic mixing and swirling.
It’s also one of those desserts that works for almost any occasion. Whether you’re baking for guests, holidays, or just a quiet night at home, these brownies always feel a little special without being too much effort.
And let’s not forget they slice beautifully and look stunning on a dessert table. That red and white swirl really does all the talking.
Ingredients You’ll Need For Red Velvet Cheesecake Swirl Brownies
- 1/2 cup (112g) unsalted butter, melted – gives richness and that soft, fudgy texture
- 1 cup (207g) sugar – adds sweetness and helps create that shiny, crackly top
- 1 tsp vanilla extract – adds warmth and enhances overall flavor
- 1 tsp white vinegar – reacts with cocoa and helps give that classic red velvet softness
- 2 large eggs – bind everything together and add structure
- 1 1/2 tbsp red food coloring – gives that signature deep red velvet color
- 2 tbsp (14g) cocoa powder – adds light chocolate flavor without making it too rich
- 3/4 cup (98g) all-purpose flour – provides structure to the brownies
- 1/8 tsp salt – balances sweetness and enhances flavor
Cheesecake Swirl Layer
- 8 oz cream cheese (room temperature) – creates the smooth, creamy cheesecake layer
- 1/2 cup (104g) sugar – sweetens and balances the tang of cream cheese
- 1 egg white – helps set the cheesecake layer lightly without making it heavy
- 1/2 tsp vanilla extract – adds a soft, sweet aroma and flavor
How to Make Red Velvet Cheesecake Swirl Brownies
1. Prepare your pan
First things first, set your oven to 350°F (176°C) so it can preheat while you prepare everything. Take a 9×9 inch baking pan, line it with parchment paper, and lightly grease the sides. This step might feel small, but it really helps later when you lift the brownies out without them sticking or breaking.
2. Melt the butter
Place the unsalted butter in a microwave-safe bowl and melt it until smooth. Don’t overheat it — just melt it enough so it’s liquid and easy to mix. Once done, pour it into a large mixing bowl where all your wet ingredients will come together.
3. Mix the wet ingredients
Now add sugar into the melted butter and whisk it well until it looks slightly thick and combined. Then add vanilla extract, white vinegar, eggs, and red food coloring. Whisk everything together until the mixture becomes smooth and evenly red. This is the point where that classic red velvet color really starts to show, so take your time here and make sure everything is fully blended.
4. Add the dry ingredients
In a separate bowl, mix together all-purpose flour, cocoa powder, and salt. Slowly add this dry mixture into your wet ingredients in batches, not all at once. Gently fold and mix until just combined. Try not to overmix you want a thick, smooth brownie batter without overworking it, so the texture stays soft and fudgy after baking.
5. Make the cheesecake layer
In another bowl, add cream cheese and sugar and beat until it becomes completely smooth and creamy with no lumps. Then add egg white and vanilla extract, and mix again until everything is silky. This layer should feel light, smooth, and spreadable almost like a soft frosting texture.
6. Layer the batter
Now take your prepared brownie batter and spread about three-quarters of it evenly into the pan. Try to smooth it out so it reaches all corners. Next, spoon the cheesecake mixture on top in small dollops. Don’t worry about perfection here uneven spoonfuls actually help create a prettier swirl effect later.
7. Swirl it
Take a toothpick or skewer and gently swirl the cheesecake layer into the brownie batter underneath. Move slowly and lightly you don’t want to fully mix it, just create that marbled pattern. Then add the remaining brownie batter on top in small spoonfuls and swirl again. This is what gives you that beautiful bakery-style red velvet cheesecake look.
8. Bake
Place the pan in your preheated oven and bake for 25–30 minutes. Keep an eye on it near the end — the edges should look set while the center still has a slight softness. That’s what keeps the brownies fudgy instead of dry.
9. Cool and chill
Once baked, remove the pan and let it cool at room temperature first. After that, place it in the fridge for a while. This step helps the cheesecake layer firm up and makes cutting much cleaner. If you skip chilling, the brownies might feel too soft when slicing.
10. Slice and serve
Once fully chilled, lift the brownies out using the parchment paper and cut them into neat bars. You’ll notice clean layers of red velvet and creamy cheesecake swirl in every slice. Serve them cold or slightly chilled for the best texture and flavor.
Expert Tips For the Perfect Red Velvet Cheesecake Swirl Brownies
These little tips can really make a difference in how your brownies turn out. They’re simple, but they help you get that bakery-style texture and swirl at home.
- Don’t overmix the batter – Once you add the dry ingredients, mix only until everything is combined. Overmixing can make the brownies dense instead of soft and fudgy.
- Use room temperature cream cheese – This is important for a smooth cheesecake layer. Cold cream cheese can leave lumps and make swirling harder.
- Don’t over-swirl – It’s tempting to keep swirling, but less is more here. A few gentle swirls are enough to create that pretty marbled look.
- Check baking time carefully – Every oven is slightly different, so start checking around the 25-minute mark. The center should look just set, not overly firm.
- Chill before slicing – This step is worth the wait. Chilling helps the cheesecake layer set properly and gives you clean, sharp brownie squares.
- Line your pan properly – Parchment paper with a little overhang makes it so much easier to lift the brownies out without breaking them.
If you keep these in mind, your brownies will not only taste amazing but also look like they came straight from a bakery display.
Ingredients Variations
One of the best things about this recipe is how easy it is to switch things up depending on your mood or what you already have in your kitchen. Here are a few simple ideas you can try without changing the whole recipe.
- Extra chocolate twist – If you want a deeper chocolate flavor, you can slightly increase the cocoa powder in the brownie layer or add a handful of chocolate chips into the batter. It makes the brownies even richer and more indulgent.
- White chocolate swirl – Add a few white chocolate chips on top before baking. They melt slightly and give little creamy bites throughout the brownies.
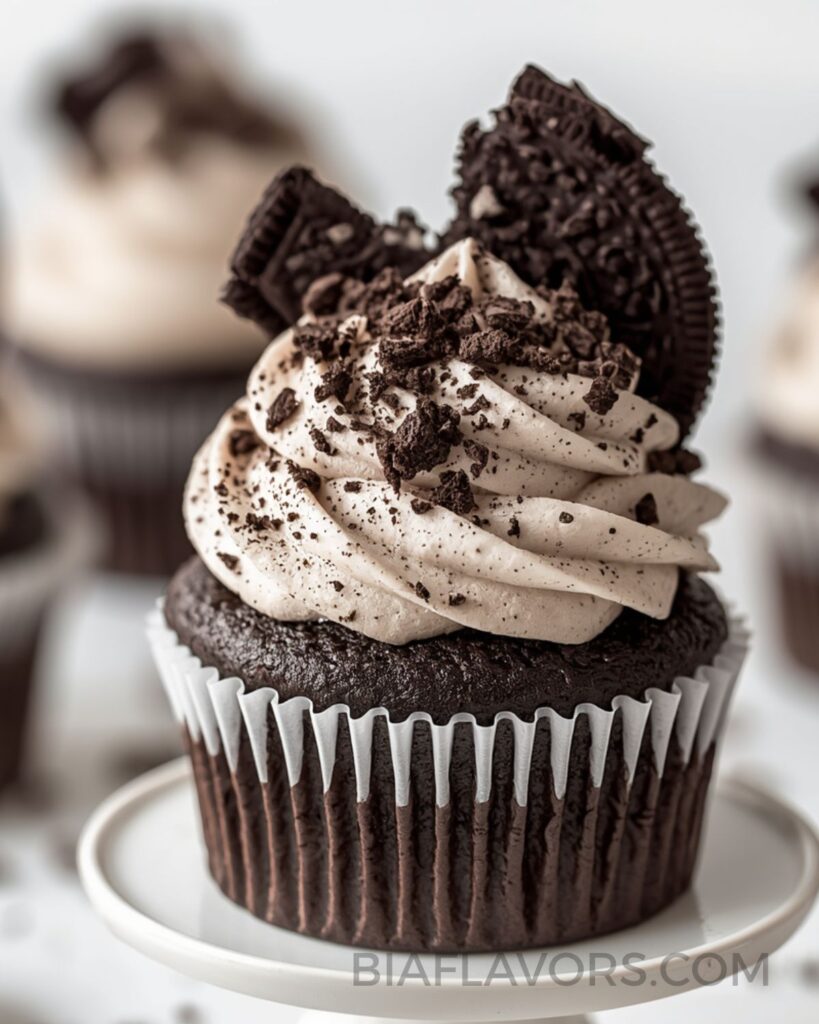
- Oreo cheesecake version – Crush a few Oreos and mix them into the cheesecake layer. It adds crunch and a cookies-and-cream vibe that works really well with red velvet.
- Less sweet version – If you prefer desserts that are not overly sweet, you can slightly reduce the sugar in the cheesecake layer. The tang from the cream cheese still keeps it balanced.
- Mini brownie bites – Instead of a 9×9 pan, you can bake this in a muffin tray for individual portions. Just reduce the baking time slightly and keep an eye on them.
- Holiday version – Add a tiny touch of festive sprinkles on top after baking for a fun seasonal look, especially for Christmas or Valentine’s Day.
These small changes keep the recipe exciting, so you can make it a little different every time without losing that classic red velvet cheesecake feel.
Storage Instructions
These brownies store really well, which makes them great for baking ahead of time or enjoying over a few days.
Once the brownies are completely cooled and chilled, transfer them into an airtight container. Keep them in the refrigerator, where they’ll stay fresh for about 4–5 days. The cheesecake layer needs to stay chilled, so fridge storage is important here.
If you prefer eating them slightly soft, just take them out of the fridge about 10–15 minutes before serving. This brings back that fudgy texture while still keeping the cheesecake layer set and creamy.
You can also freeze them if you want to store them longer. Wrap each brownie bar individually in plastic wrap, then place them in a freezer-safe container or bag. They’ll last for about 2 months in the freezer. When you’re ready to enjoy, just thaw them in the fridge overnight.
One small tip always cut them into bars before freezing. It makes it so much easier to grab a piece whenever you’re craving something sweet.
Common Mistakes to Avoid
Even though this recipe is pretty simple, a few small things can affect the final result. Here are some common mistakes and how to avoid them so your brownies turn out perfect every time.
- Overmixing the batter – This is one of the biggest mistakes. Once you add the flour, mix only until everything comes together. Overmixing can make the brownies dense and heavy instead of soft and fudgy.
- Using cold cream cheese – If your cream cheese isn’t soft enough, the cheesecake layer won’t turn smooth. You might end up with lumps, which makes swirling harder and affects the texture.
- Overbaking the brownies – It’s better to slightly underbake than overbake here. If you leave them in too long, they can turn dry instead of fudgy. The center should still look a little soft when you take them out.
- Skipping the chilling step – I know it’s tempting to cut them right away, but chilling is what helps the cheesecake layer set properly. Without it, the brownies can fall apart when slicing.
- Swirling too much – If you overdo the swirling, the layers will blend completely and you won’t get that pretty marbled effect. A few gentle swirls are enough.
- Not lining the pan properly – If you skip parchment paper or don’t grease the pan well, the brownies can stick and break when you try to remove them.
Avoiding these small mistakes really helps you get clean slices, beautiful swirls, and that perfect bakery-style texture at home.
More Brownie Recipes
- Nutella Fudge Brownies
- Peanut Butter Brownies
- Reese’s Marshmallow Brownies
- Flourless Brownies
- Oatmeal Caramel Truffle Brownies
- Pecan Pie Bark
- Guinness Brownies
- Pecan Pie Bars
FAQs About This Recipe
1. Can I make these brownies without red food coloring?
Yes, you can. The brownies will still taste delicious, but they won’t have that classic red velvet color. If you prefer, you can skip it or use natural coloring alternatives like beetroot powder, though the shade may be lighter.
2. Why did my cheesecake layer sink or mix into the brownie?
This usually happens if the brownie batter is too thin or if the cheesecake layer is too runny. Make sure your cream cheese mixture is smooth but not overly liquid, and don’t over-swirl when layering.
3. Can I use low-fat cream cheese?
You can, but full-fat cream cheese gives a much richer and creamier texture. Low-fat versions may make the cheesecake layer slightly less smooth.
4. Do I need to chill the brownies before cutting?
Yes, chilling is really important here. It helps the cheesecake layer set properly and gives you clean, neat brownie squares instead of messy cuts.
5. Can I double this recipe?
Absolutely. Just use a larger baking pan (like 9×13 inch) and slightly increase the baking time. Keep an eye on the center so it doesn’t overbake.
6. How do I know when the brownies are done baking?
The edges should look set, and the center should still be slightly soft but not jiggly. A toothpick inserted should come out with a few moist crumbs, not wet batter.
7. Can I freeze these brownies?
Yes, they freeze very well. Just wrap them individually and store in an airtight container. Thaw in the fridge before serving for the best texture.
Final Thoughts
These Red Velvet Cheesecake Swirl Brownies are one of those desserts that feel a little special without being complicated. You get the richness of a fudgy brownie and the creaminess of cheesecake all in one bite, which honestly makes them hard to stop eating.
They’re perfect for baking when you want something homemade that still looks impressive enough for guests or special occasions. And the best part is, even beginners can pull this off with great results if they just take it step by step.
If you do try them, don’t rush the process especially the swirling and chilling. Those two steps really bring everything together. Happy baking
Red Velvet Cheesecake Swirl Brownies
Ingredients
Red Velvet Brownie Layer
- 1/2 cup 112g unsalted butter, melted
- 1 cup 207g sugar
- 1 tsp vanilla extract
- 1 tsp white vinegar
- 2 large eggs
- 1 1/2 tbsp red food coloring
- 2 tbsp 14g cocoa powder
- 3/4 cup 98g all-purpose flour
- 1/8 tsp salt
Cheesecake Swirl
- 8 oz cream cheese room temperature
- 1/2 cup 104g sugar
- 1 egg white
- 1/2 tsp vanilla extract
Instructions
- Preheat your oven to 350°F (176°C) so it’s ready when your batter is done. Line a 9×9 inch baking pan with parchment paper and lightly grease the sides. This helps the brownies come out cleanly without sticking.
- In a mixing bowl, combine melted butter and sugar and whisk until the mixture looks smooth and slightly glossy. Then add eggs, vanilla extract, white vinegar, and red food coloring, and whisk again until everything is fully blended and evenly colored.
- In a separate bowl, mix together the flour, cocoa powder, and salt. Slowly add the dry ingredients into the wet mixture and stir gently until just combined. Try not to overmix so the brownies stay soft and fudgy.
- In another bowl, beat the cream cheese and sugar until completely smooth and creamy. Add the egg white and vanilla extract, then mix again until the cheesecake batter is silky with no lumps.
- Spread about three-quarters of the brownie batter into your prepared pan and smooth it out evenly so it reaches all corners.
- Spoon the cheesecake mixture over the brownie layer in small dollops. Take a toothpick or skewer and gently swirl it into the batter to create a marbled effect. Don’t over-swirl — you want visible layers.
- Add the remaining brownie batter on top in small spoonfuls, then lightly swirl again to create a beautiful red velvet cheesecake pattern.
- Bake for 25–30 minutes, or until the edges are set and the center still looks slightly soft. Avoid overbaking to keep the brownies fudgy.
- Let the brownies cool completely at room temperature, then place them in the fridge for at least a while to help the cheesecake layer set properly.
- Once chilled, slice into neat bars and serve. The texture will be rich, creamy, and perfectly fudgy in every bite.
Notes
- Make sure your cream cheese is at room temperature so the cheesecake layer turns out smooth and lump-free.
- Don’t overmix the brownie batter after adding flour — it keeps the texture soft and fudgy.
- Swirl gently for that pretty marbled look; overdoing it will mix the layers too much.
- The brownies need chilling time after baking, so don’t skip it if you want clean slices.
- For best flavor and texture, serve them slightly chilled or after resting at room temperature for 10–15 minutes.