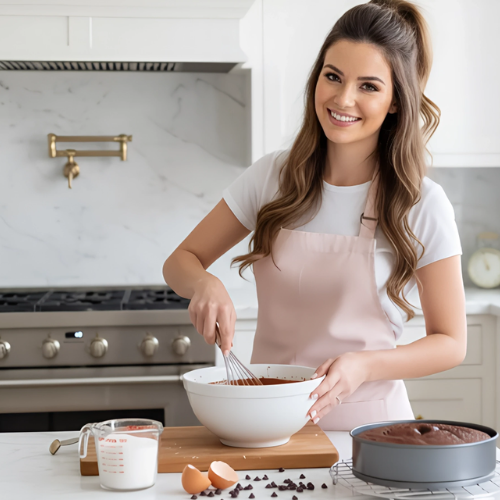
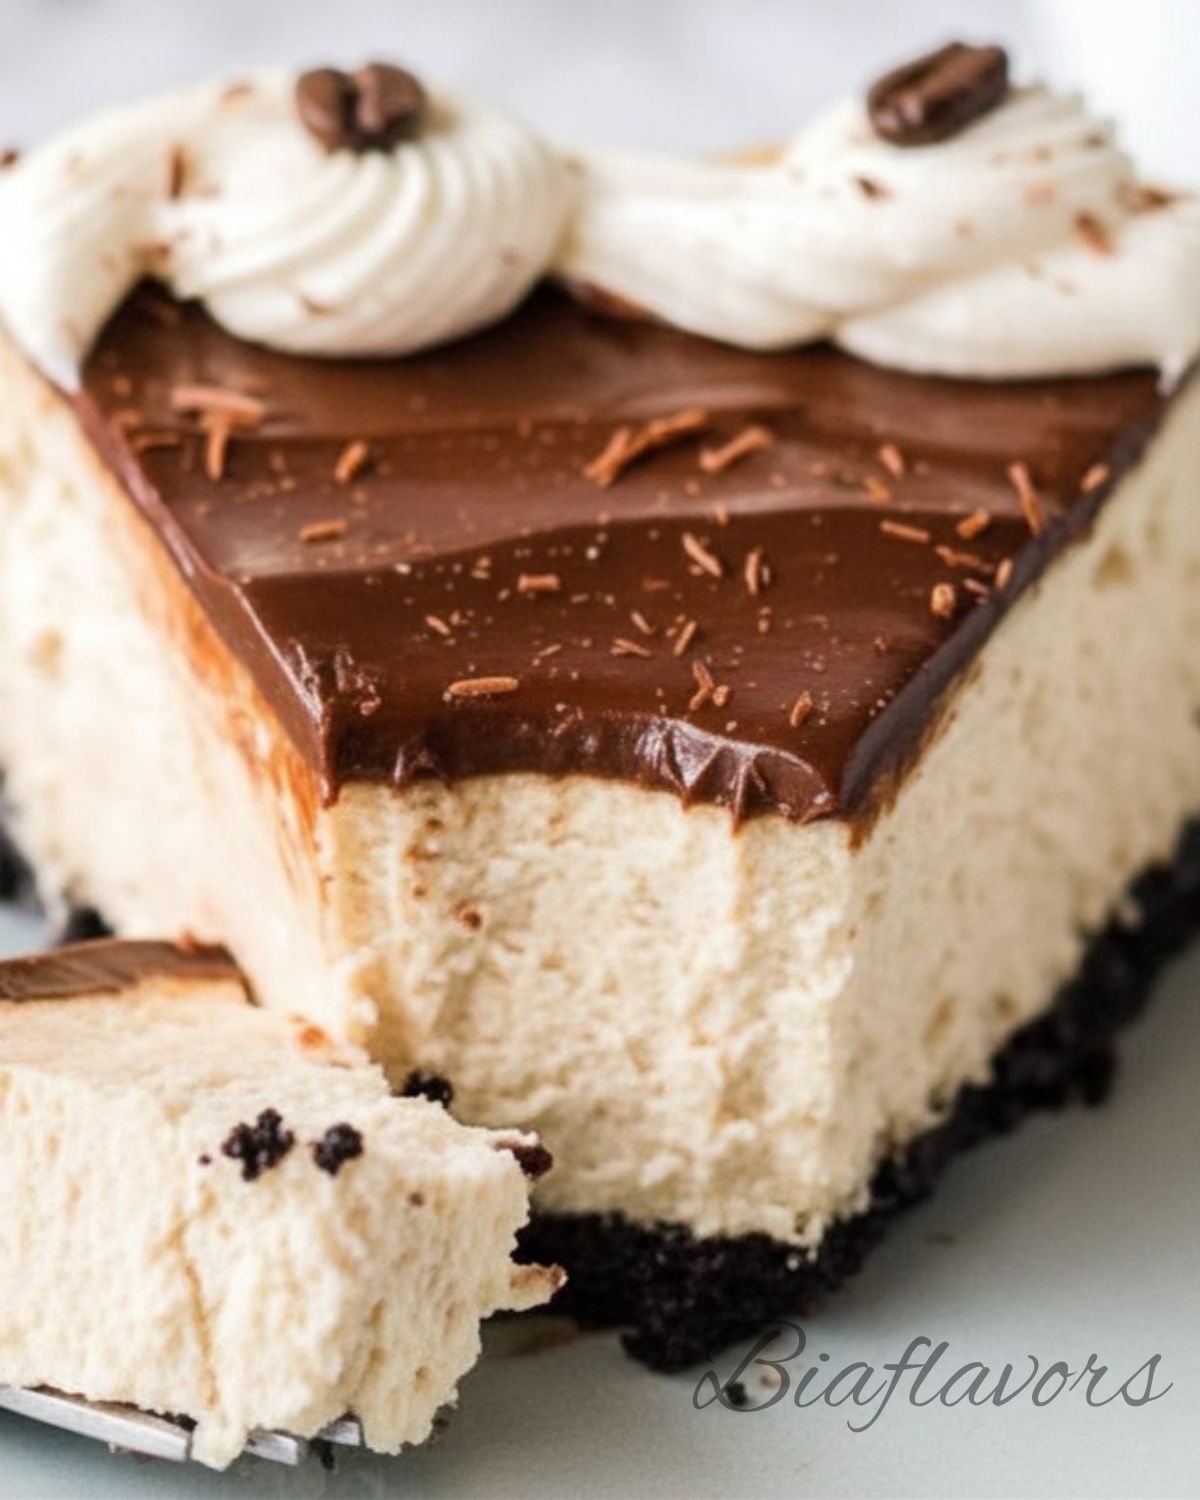
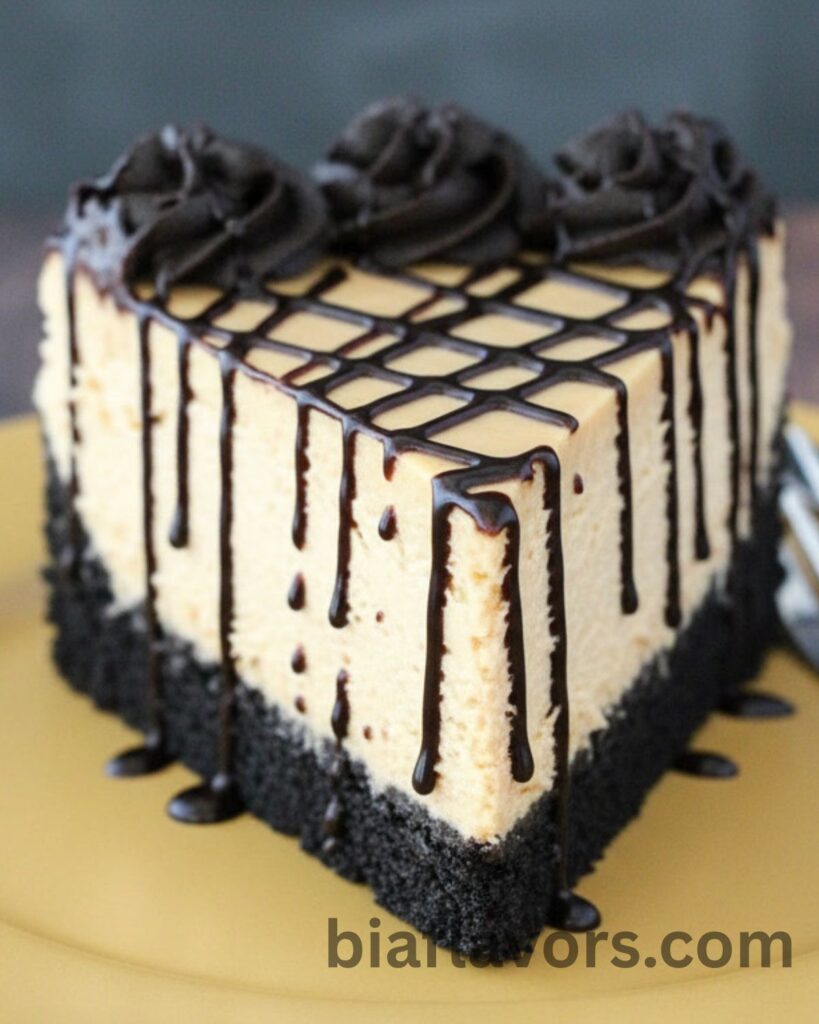
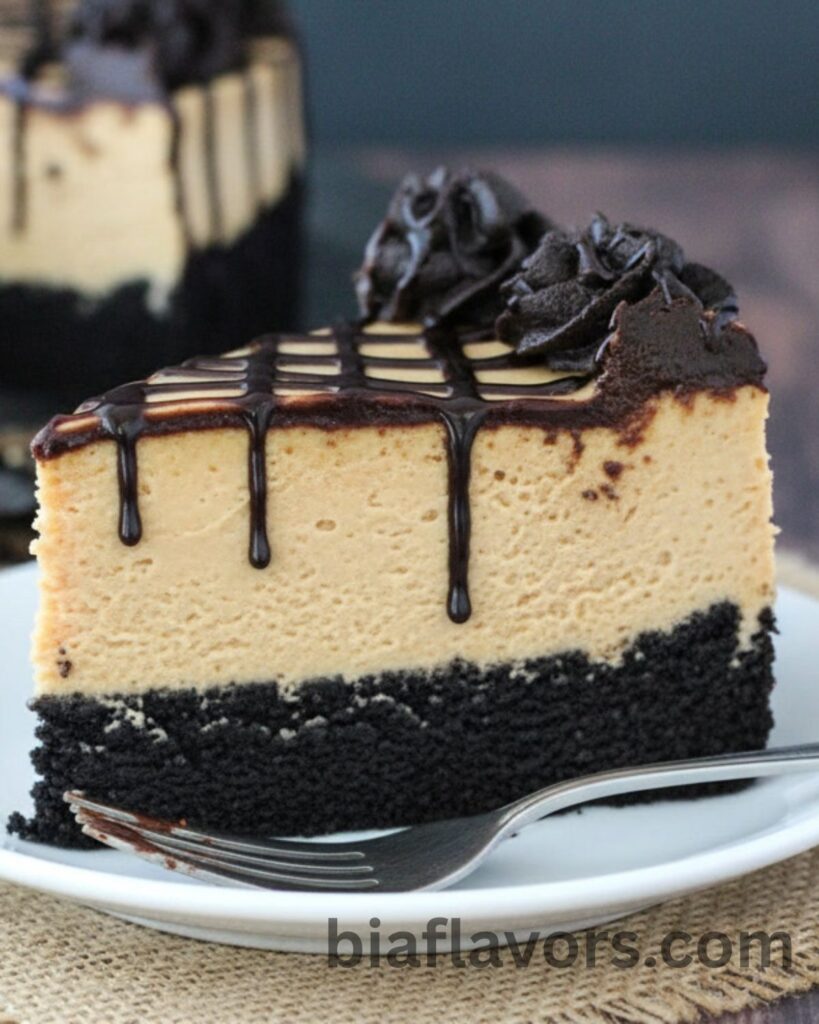
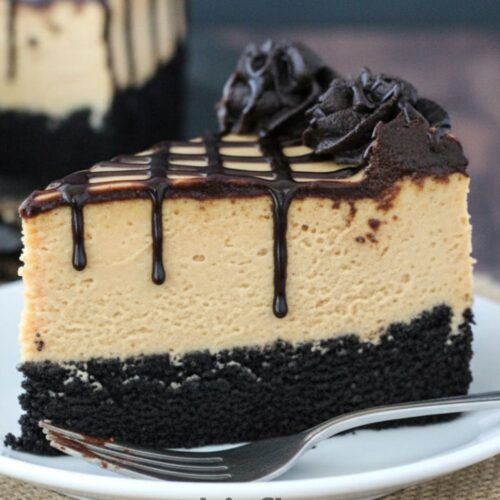
This peanut butter truffle chocolate cake is rich, moist, and deeply chocolatey with layers of smooth peanut butter filling and a silky chocolate ganache. Every bite is soft, creamy, and perfectly balanced between sweet chocolate and nutty peanut butter, making it an indulgent treat for any occasion.
I tested this recipe a few times to get the texture just right because sometimes chocolate cakes can turn dry or the filling can feel too heavy. After a few small adjustments, the result came out perfectly moist with a light, fluffy crumb and a creamy filling that holds its shape without being too thick.
It’s a simple, beginner-friendly layer cake that uses basic ingredients and easy steps, yet gives you a bakery-style dessert that looks impressive and tastes even better.
Why You’ll Love This Peanut Butter Truffle Chocolate Cake
This cake is incredibly rich, moist, and full of deep chocolate flavor, perfectly paired with a smooth and creamy peanut butter filling. The combination creates a balanced taste that’s not overly sweet but still feels indulgent and satisfying in every bite.
It’s also easier to make than it looks, with simple steps and basic ingredients that come together into a stunning layer cake. Whether you’re making it for birthdays, special occasions, or just to treat yourself, it always feels like a bakery-style dessert made right at home.
Ingredients You’ll Need for Peanut Butter Truffle Chocolate Cake
For the Chocolate Cake
- All-purpose flour (1 cup): Provides structure and forms the base of the cake.
- Granulated sugar (1 cup): Adds sweetness and keeps the cake soft and moist.
- Dark cocoa powder (¼ cup + 2 tablespoons): Gives a deep, rich chocolate flavor.
- Baking soda (1 teaspoon): Helps the cake rise and stay light.
- Salt (½ teaspoon): Balances sweetness and enhances the chocolate flavor.
- Egg (1 large): Binds ingredients together and adds structure.
- Buttermilk (½ cup): Keeps the cake tender and moist.
- Vegetable oil (½ cup): Adds moisture and creates a soft texture.
- Vanilla extract (¾ teaspoon): Enhances overall flavor.
- Boiling water (½ cup): Helps bloom the cocoa and creates a smooth batter.
For the Peanut Butter Truffle Layer
- Peanut butter chips (20 oz): Melt into a smooth, creamy base with rich peanut butter flavor.
- Heavy whipping cream (2¼ cups): Creates a silky, truffle-like texture when combined with the chips.
- Mascarpone cheese (1 cup / 8 oz): Adds creaminess and helps stabilize the filling.
For the Chocolate Icing
- Shortening (¼ cup): Helps create a smooth and stable icing texture.
- Butter (¼ cup): Adds richness and flavor.
- Powdered sugar (2 cups): Sweetens and thickens the icing.
- Dark cocoa powder (¼ cup): Adds deep chocolate flavor.
- Water (2–3 teaspoons): Adjusts consistency to make the icing smooth and pipeable.
How to Make Peanut Butter Truffle Chocolate Cake
Prepare and Bake the Cake
Preheat your oven to 300°F (150°C) and prepare a 9-inch cake pan by lining the bottom with parchment paper and lightly greasing the sides. In a large bowl, whisk together the flour, sugar, cocoa powder, baking soda, and salt until evenly combined.
Add the egg, buttermilk, and vegetable oil to the dry ingredients and mix until smooth. In a separate cup, combine the vanilla extract with boiling water, then carefully add it to the batter and mix well until fully combined. The batter will be thin, which is normal.
Pour the batter into the prepared pan and bake for 33–35 minutes, or until a toothpick inserted in the center comes out with a few moist crumbs. Let the cake cool in the pan for about 10 minutes, then transfer it to a wire rack to cool completely.
Make the Peanut Butter Truffle Layer
Place the peanut butter chips in a mixing bowl. Heat the heavy cream in the microwave until it just begins to boil, then pour it over the peanut butter chips. Cover the bowl and let it sit for 5–7 minutes so the chips can melt.
Whisk the mixture until smooth and creamy, then cover and refrigerate for 45 minutes to 1 hour, or until it thickens but is still easy to stir. Once slightly thickened, add the mascarpone cheese and mix until smooth and fully combined.
Assemble the Cake
Once the cake is completely cool, use a serrated knife to gently trim off the domed top so you have a flat surface. Place the cake into a 9-inch springform pan and line the sides with parchment paper, allowing it to extend above the top of the pan.
Pour the peanut butter truffle mixture over the cake and spread it evenly. It may rise above the cake layer, which is fine as long as the parchment paper is high enough. Place the cake in the refrigerator and chill for 3–4 hours, or until the truffle layer is fully set and firm.
Make the Chocolate Icing
In a bowl, beat together the butter and shortening until smooth and creamy. Add the powdered sugar, cocoa powder, and 1 teaspoon of water, then mix until smooth. Add more water, a little at a time, until the icing reaches a soft, pipeable consistency.
Decorate and Serve
Remove the cake from the springform pan and carefully peel away the parchment paper. Pipe the chocolate icing around the edges of the cake and drizzle with chocolate sauce if desired for a decorative finish.
Refrigerate until ready to serve. Before serving, let the cake sit at room temperature for 15–20 minutes so the truffle layer softens slightly for the best texture and flavor.
Expert Tips for the Perfect Peanut Butter Truffle Chocolate Cake
Use Good Quality Cocoa Powder
Since chocolate is the main flavor, using a rich, high-quality cocoa powder makes a big difference. It gives the cake a deeper, more intense chocolate taste instead of a mild one.
Don’t Overmix the Batter
Once you combine the wet and dry ingredients, mix just until everything is smooth. Overmixing can make the cake dense instead of soft and tender. The batter will be thin, and that’s completely normal.
Heat the Cream Properly for the Truffle
Make sure the cream is hot enough when poured over the peanut butter chips so they melt smoothly. If it’s not hot enough, the mixture may turn lumpy. Letting it sit covered for a few minutes helps everything melt evenly.
Chill the Truffle Layer Until Just Right
When refrigerating the peanut butter mixture before assembling, it should be thick but still easy to stir. If it becomes too firm, it won’t spread smoothly over the cake.
Use a Springform Pan for Easy Assembly
Using a springform pan makes it much easier to build and remove the cake without damaging the layers. Lining the sides with parchment paper also helps create clean edges.
Be Patient with Chilling Time
The truffle layer needs enough time to fully set in the fridge. I’ve tried cutting it early before, and it didn’t hold its shape properly. Giving it a full 3–4 hours makes a huge difference.
Let It Sit Before Serving
Take the cake out of the fridge about 15–20 minutes before serving. This allows the truffle layer to soften slightly, giving you the perfect creamy texture in every bite.
Common Mistakes to Avoid
Overbaking the Cake
Baking the cake too long can make it dry instead of soft and moist. Start checking a few minutes early and remove it when a toothpick comes out with a few moist crumbs.
Not Letting the Cake Cool Completely
Adding the truffle layer on a warm cake can cause it to melt and lose structure. Always make sure the cake is fully cooled before assembling.
Using Cold Cream for the Truffle
If the cream isn’t hot enough, the peanut butter chips won’t melt properly, leading to a lumpy mixture. Always heat the cream until just boiling before pouring.
Skipping Chill Time
Rushing the chilling step can cause the truffle layer to stay too soft and not hold its shape. Give it enough time in the fridge so it sets properly.
Not Leveling the Cake
If you don’t trim the dome from the cake, the truffle layer may sit unevenly. A flat surface helps create clean, even layers.
Making the Icing Too Thick or Thin
If the icing is too thick, it will be hard to pipe. If too thin, it won’t hold shape. Add water slowly to reach a smooth, pipeable consistency.
Cutting the Cake Too Early
Cutting before the truffle layer is fully set can make the cake messy. Let it chill completely for clean, neat slices.

Storage Tips
At Room Temperature
This cake is best not kept at room temperature for long because of the creamy truffle layer. You can leave it out for about 1–2 hours while serving, but after that, it should be refrigerated to maintain its texture and freshness.
In the Refrigerator
Store the cake in an airtight container in the refrigerator for up to 4–5 days. The truffle layer will stay firm and fresh. Before serving, let the cake sit at room temperature for 15–20 minutes so it softens slightly and tastes its best.
Freezing Option
You can freeze this cake for up to 1–2 months. Wrap it tightly in plastic wrap and then in a freezer-safe container. For best results, freeze without the icing and add it after thawing. Thaw overnight in the refrigerator before serving.
Best Serving Tip
For the best texture and flavor, always let the cake sit out for a few minutes before serving. This softens the truffle layer and makes each bite creamy, smooth, and perfectly balanced.
Serving Suggestions
Serve Slightly Chilled or at Room Temperature
This cake tastes best when it’s slightly chilled or left at room temperature for 15–20 minutes. This allows the peanut butter truffle layer to soften just enough for a creamy, melt-in-your-mouth texture.
Pair with Coffee or Milk
The rich chocolate and peanut butter flavors pair perfectly with a hot cup of coffee or a glass of cold milk. The slight bitterness of coffee balances the sweetness beautifully.
Add Extra Chocolate Drizzle
For a more indulgent presentation, drizzle melted chocolate or chocolate sauce over each slice before serving. It adds extra flavor and gives a bakery-style look.
Top with Whipped Cream
A dollop of fresh whipped cream on the side makes this dessert feel lighter and adds a soft, creamy contrast to the rich layers.
Perfect for Special Occasions
This cake is ideal for birthdays, celebrations, or gatherings. Its layered look and rich flavor make it a standout dessert that feels both homemade and impressive.
More Cake Recipes You’ll Love
- Red Velvet Cake Roll
- Reese’s Peanut Butter Cookie Cake
- Hawaiian Carrot Pineapple Cake
- Chocolate Cake Recipe
- Brown Butter Carrot Cake
- Chocolate Raspberry Layer Cake
FAQs About Peanut Butter Truffle Chocolate Cake
Can I use natural peanut butter instead of peanut butter chips?
Yes, but peanut butter chips give a smoother truffle texture. If using natural peanut butter, the filling may be softer and less stable, so chilling time becomes more important.
Why is my cake dry?
This usually happens if the cake is overbaked or the batter is overmixed. Make sure to bake just until a toothpick comes out with a few moist crumbs for the best soft texture.
Can I make this cake ahead of time?
Yes, this cake is perfect for making ahead. In fact, it tastes even better the next day after the layers have fully set and the flavors have blended together.
Why didn’t my truffle layer set properly?
This can happen if the cream wasn’t hot enough or if it wasn’t chilled long enough. Make sure to refrigerate until it is thick and firm before assembling.
Can I skip the mascarpone cheese?
You can, but mascarpone helps create a rich, creamy, and stable truffle layer. Without it, the filling may be slightly softer.
How do I get clean slices?
Chill the cake well before slicing and use a sharp knife. Wiping the knife between cuts will give you neat, bakery-style slices.
Final Thoughts
This peanut butter truffle chocolate cake is a rich, indulgent dessert that combines moist chocolate cake with a creamy peanut butter layer and smooth chocolate icing. It’s perfect for special occasions or anytime you want a truly impressive homemade cake that feels bakery-quality but is still simple to make.
Peanut Butter Truffle Chocolate Cake
Ingredients
Chocolate Cake
- 1 cup all-purpose flour
- 1 cup granulated sugar
- ¼ cup + 2 tbsp dark cocoa powder
- 1 tsp baking soda
- ½ tsp salt
- 1 large egg
- ½ cup buttermilk
- ½ cup vegetable oil
- ¾ tsp vanilla extract
- ½ cup boiling water
Peanut Butter Truffle
- 20 oz peanut butter chips
- 2 ¼ cups heavy whipping cream
- 1 cup 8 oz mascarpone cheese
Chocolate Icing
- ¼ cup shortening
- ¼ cup butter
- 2 cups powdered sugar
- ¼ cup dark cocoa powder
- 2 –3 tsp water as needed for consistency
Instructions
- Preheat oven to 300°F (150°C). Prepare a 9-inch pan with parchment paper and greased sides.
- Whisk dry ingredients for the cake in a bowl.
- Add egg, buttermilk, and oil; mix until smooth.
- Add vanilla to boiling water, then mix into batter.
- Pour into pan and bake for 33–35 minutes. Cool completely.
- For truffle, pour hot cream over peanut butter chips. Cover 5–7 minutes, then whisk smooth.
- Chill until thickened, then mix in mascarpone cheese.
- Level cake, place in springform pan, and line sides with parchment.
- Spread truffle layer over cake and chill 3–4 hours.
- Beat icing ingredients until smooth and pipeable.
- Decorate cake with icing and chocolate drizzle.
- Chill until ready to serve; let sit 15–20 minutes before slicing.