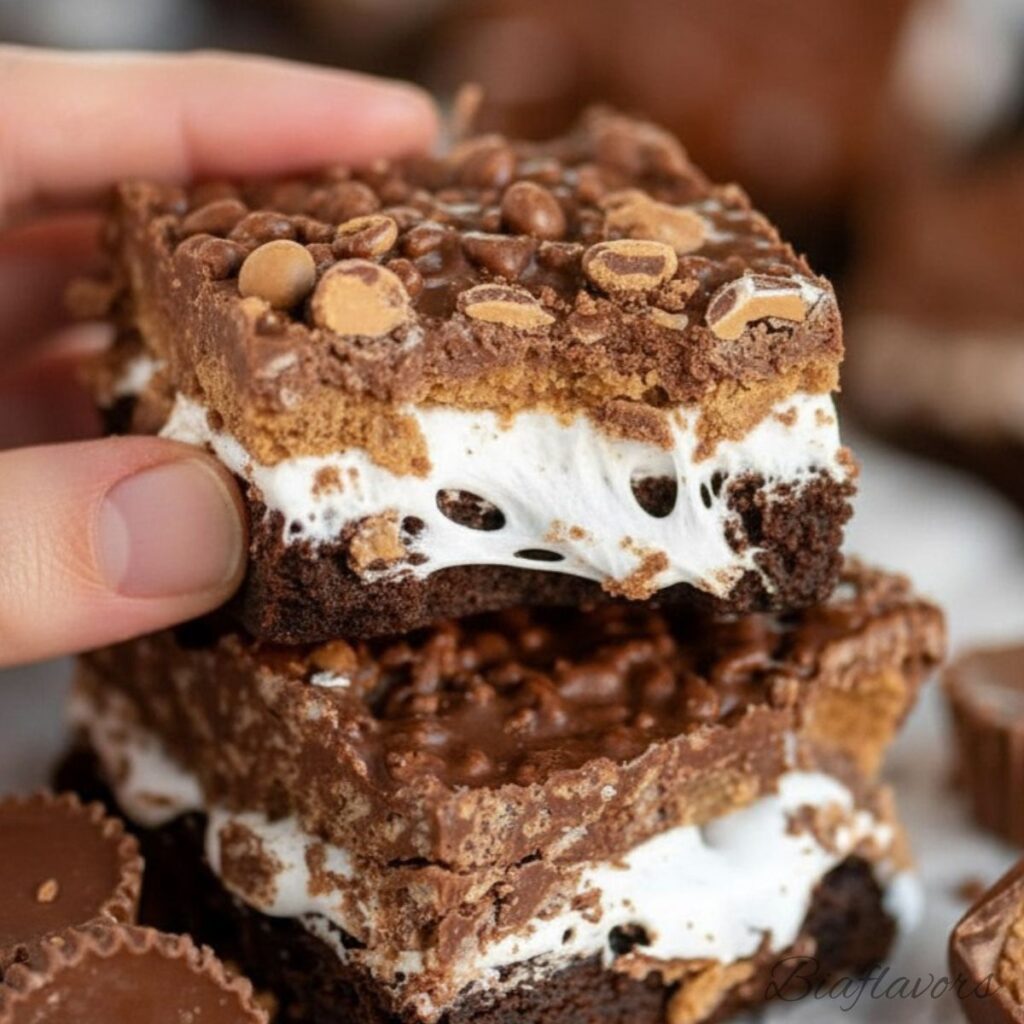
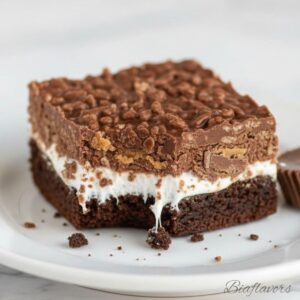
These Reese’s Marshmallow Brownies are the kind of dessert that instantly grabs attention the moment you see them. With a fudgy chocolate brownie base, a soft layer of melted marshmallows, and chunks of Reese’s on top, every bite is rich, gooey, and packed with chocolate peanut butter flavor.
I first made these when I wanted something a little more fun than regular brownies, and honestly, they turned out even better than expected. The combination of warm chocolate, sticky marshmallow, and creamy peanut butter just works so well together.
They’re indulgent, slightly messy in the best way, and perfect for when you want a dessert that feels extra special without too much effort.

Why We Love These Reese’s Marshmallow Brownies
We love these brownies because they combine three amazing things chocolate, marshmallow, and peanut butter into one irresistible dessert. The base is soft and fudgy, the marshmallow layer adds that gooey stretch, and the Reese’s pieces bring a rich, creamy bite.
They’re easy to make, perfect for sharing, and always a hit at gatherings. Plus, they look impressive without requiring any complicated steps, which makes them a go-to recipe when you want something quick but memorable.
Ingredients for Reese’s Marshmallow Brownies
- 18 ounces brownie mix (plus ingredients listed on the box) – forms the rich, fudgy base
- 7 ounces marshmallow creme (or fluff) – creates a soft, gooey layer
- 25 Reese’s miniatures, halved – adds chocolate peanut butter richness in every bite
Chocolate Crunch Topping:
- 12 ounces semi-sweet chocolate chips – forms a smooth chocolate coating
- 1 cup creamy peanut butter (not natural) – adds creamy texture and flavor
- 3 cups crispy rice cereal – gives a light, crunchy texture on top
How to Make Reese’s Marshmallow Brownies
Bake the brownies
Start by preparing the brownie mix according to the package instructions using a 9×13 baking dish. Mix the batter until smooth, making sure there are no dry pockets. Pour it into the prepared pan and spread evenly so it bakes uniformly. Once baked, let the brownies cool completely at room temperature—this step is important so the layers don’t melt later. After cooling, place the pan in the refrigerator for at least 1 hour so the brownies become firm and easy to layer.
Add marshmallow layer
Take the chilled brownies out of the fridge and spread the marshmallow fluff evenly over the top. Since it can be sticky, use a spatula and work gently to spread it without pulling up the brownie layer. Try to cover the entire surface so every bite gets that soft, gooey texture. Once done, return it to the fridge for about 30 minutes so the marshmallow layer sets slightly and becomes easier to handle.
Add Reese’s layer
Now place the halved Reese’s miniatures on top of the marshmallow layer. Arrange them evenly across the surface so each slice gets a good amount of peanut butter chocolate. Press them down lightly so they stick into the marshmallow and don’t move when you add the next layer.
Make chocolate topping
In a microwave-safe bowl, combine the chocolate chips and peanut butter. Heat in 30-second intervals, stirring in between each round until the mixture becomes smooth and fully melted. Take your time here to avoid burning the chocolate. Once smooth, add the crispy rice cereal and gently mix until all the cereal is coated in the chocolate mixture.
Assemble and chill
Carefully spoon the chocolate cereal mixture over the Reese’s layer. Use a spatula to spread it evenly, but work gently so you don’t disturb the layers underneath. Once the top is evenly covered, place the pan back in the refrigerator for about 1 hour, or until everything is fully set and firm to touch.
Slice and serve
Once chilled, remove the brownies from the fridge and let them sit for about 5–10 minutes to soften slightly. This makes slicing easier and cleaner. Use a sharp knife to cut into bars, wiping the knife between cuts for neat edges. Now they’re ready to serve rich, gooey, and packed with chocolate peanut butter goodness.
Expert Tips for Perfect Reese’s Marshmallow Brownies

- Chill the brownie base properly: Make sure the brownies are fully cooled and chilled before adding any layers. This helps everything stay neat and prevents the marshmallow from melting.
- Spread marshmallow gently: Marshmallow fluff can be sticky, so use a spatula and spread slowly. If needed, lightly grease the spatula to make it easier.
- Don’t rush the chilling steps: Each layer needs time to set. This makes a big difference in how clean and structured your final bars look.
- Cut Reese’s evenly: Halving the Reese’s miniatures ensures better distribution so every piece gets a balanced chocolate peanut butter bite.
- Melt chocolate slowly: Always melt chocolate and peanut butter in intervals, stirring in between. This prevents burning and keeps the mixture smooth.
- Mix cereal gently: Fold the crispy rice cereal carefully so it stays light and crunchy instead of getting crushed.
- Press topping lightly: When spreading the chocolate cereal layer, press it down gently so it sticks without flattening too much.
- Let it sit before cutting: After chilling, let the brownies rest at room temperature for a few minutes. This helps avoid cracking when slicing.
Common Mistakes to Avoid
- Not chilling the brownies first: If the base isn’t fully cooled and chilled, the marshmallow layer can melt and become messy. Always give it enough time to firm up.
- Spreading marshmallow too roughly: Pulling or pressing too hard can tear the brownie surface. Work gently and spread slowly for an even layer.
- Adding toppings too quickly: Each layer needs a bit of time to set. Rushing can cause layers to slide or mix together instead of staying distinct.
- Overheating chocolate: Heating chocolate too fast or too long can make it thick or grainy. Always melt in short intervals and stir in between.
- Crushing the cereal: Mixing too aggressively can break the cereal and ruin the crunchy texture. Fold it in gently.
- Skipping final chill time: If you cut too early, the bars won’t hold their shape. Let everything set properly for clean slices.
- Cutting straight from the fridge: Very cold brownies can crack while cutting. Let them sit out for a few minutes before slicing for smoother cuts.
Storage Tips
- Refrigerator: Store the brownies in an airtight container in the fridge for up to 3–4 days. The layers stay firm and the texture holds well.
- Bring to room temperature before serving: Let the brownies sit out for about 10 minutes before eating. This softens the chocolate layer slightly and improves the overall texture.
- Freezer option: These brownies freeze very well. Wrap individual bars or the whole batch tightly in plastic wrap, then aluminum foil, and place in a freezer-safe container. Freeze for up to 3 months.
- Thawing tip: Let frozen brownies thaw at room temperature until soft and ready to eat. Avoid microwaving, as it can affect the texture of the layers.
- Best freshness tip: For the best flavor and texture, enjoy within the first couple of days when the layers are still fresh and perfectly balanced.
Serving Suggestions
- Serve slightly chilled: These brownies taste best when they’re firm but not too cold. Let them sit at room temperature for a few minutes before serving for the perfect texture.
- Dessert platter idea: Cut into small squares and serve on a dessert tray with cookies or brownies for parties and gatherings.
- With ice cream: Pair with a scoop of vanilla or chocolate ice cream for an extra indulgent dessert.
- Drizzle option: Add a light drizzle of melted chocolate or peanut butter on top just before serving for a richer presentation.
- Party treat: These bars are perfect for birthdays, holidays, or potlucks because they’re easy to serve and always a crowd favorite.
- Sweet craving fix: Keep a batch in the fridge and grab a piece whenever you want a quick, chocolatey treat.
More Brownie Recipes
- Nutella Fudge Brownies
- Peanut Butter Brownies
- Flourless Brownies
- Oatmeal Caramel Truffle Brownies
- Pecan Pie Bark
- Guinness Brownies
- Pecan Pie Bars
FAQs About Reese’s Marshmallow Brownies
Can I make these brownies ahead of time?
Yes, and they’re actually a great make-ahead dessert. You can prepare them a day in advance and keep them in the refrigerator. This gives all the layers time to set properly, making them easier to cut and even better in texture. Just take them out a few minutes before serving so they’re not too firm.
Why is my marshmallow layer messy or hard to spread?
Marshmallow fluff is naturally sticky, so it can be tricky to spread. Try using a spatula and working slowly, or lightly grease the spatula to help it glide smoothly. Also, make sure your brownies are fully chilled this makes spreading much easier.
Can I use regular marshmallows instead of fluff?
Yes, you can use mini marshmallows as a substitute. Just sprinkle them evenly over the brownies and briefly warm them in the oven until they soften, then gently spread. Keep in mind the texture will be slightly different but still delicious.
How do I get clean, neat slices?
For the best results, chill the brownies until firm before cutting. Use a sharp knife and wipe it clean between each cut. Letting the brownies sit at room temperature for a few minutes also helps prevent cracking.
Can I use crunchy peanut butter?
Yes, you can use crunchy peanut butter if you like extra texture. It will add a slight crunch to the topping, which some people really enjoy.
Why are my layers not setting properly?
This usually happens if the brownies weren’t chilled long enough or if the chocolate topping didn’t cool completely. Give each layer enough time to set in the fridge, especially the final step, to get firm, structured bars.
Final Thoughts
These Reese’s Marshmallow Brownies are one of those desserts that feel fun, indulgent, and just a little over the top in the best way. You’ve got that rich fudgy brownie base, the soft gooey marshmallow layer, and then that crunchy chocolate peanut butter topping that brings everything together.
What I really like about this recipe is how it turns simple ingredients into something that looks and tastes like a proper treat. It’s not complicated, but the layers make it feel special enough for parties, gatherings, or even just when you’re craving something extra chocolatey.
If you try it once, there’s a good chance it’ll become one of those recipes you keep coming back to especially when you want something sweet, satisfying, and a little bit different from regular brownies.
Reese’s Marshmallow Brownies
Ingredients
- 18 ounces brownie mix plus ingredients listed on the box
- 7 ounces marshmallow creme or fluff
- 25 Reese’s miniatures halved
- 12 ounces semi-sweet chocolate chips
- 1 cup creamy peanut butter not natural
- 3 cups crispy rice cereal
Instructions
- Prepare brownie mix according to package directions in a 9×13 baking dish. Cool completely, then refrigerate for at least 1 hour.
- Spread marshmallow fluff evenly over chilled brownies. Return to fridge for 30 minutes.
- Arrange halved Reese’s miniatures over the marshmallow layer.
- Melt chocolate chips and peanut butter in a microwave-safe bowl in 30-second intervals, stirring until smooth.
- Stir in crispy rice cereal until fully coated.
- Spread the mixture over the Reese’s layer evenly.
- Refrigerate for about 1 hour until fully set.
- Let sit at room temperature for a few minutes, then cut into bars and serve.
Notes
- Make sure the brownie layer is fully cooled and chilled before adding the marshmallow. This keeps the layers neat and prevents melting.
- Marshmallow fluff can be sticky, so spread it slowly using a spatula. Lightly greasing the spatula can make this step easier.
- When placing Reese’s on top, spread them evenly so every piece gets a good balance of chocolate and peanut butter.
- Melt the chocolate and peanut butter in short intervals and stir in between to avoid burning and keep the mixture smooth.
- Gently fold in the cereal so it stays light and crunchy instead of getting crushed.
- Let each layer set properly in the fridge before moving to the next step. This helps create clean, defined layers.
- Before slicing, let the brownies sit at room temperature for a few minutes for smoother, cleaner cuts.