If you love desserts that are rich, creamy, and full of flavor, this Biscoff cheesecake is something you’ll likely fall in love with from the first bite. The smooth, velvety cheesecake paired with that warm, caramelized Biscoff taste creates a combination that feels both indulgent and comforting at the same time. Honestly, it’s one of those desserts that instantly feels special without being complicated to make.
What makes this recipe even better is how simple and reliable it is. You don’t need any advanced baking skills, and the results still turn out impressive every time. That’s why I keep coming back to this cheesecake whenever I want something that looks beautiful, tastes amazing, and feels like a treat worth sharing.
Why We Love This Recipe
This Biscoff cheesecake is loved for its rich, creamy texture and that unique caramelized flavor that Biscoff brings. The smooth filling paired with a slightly crunchy base creates a perfect balance that feels satisfying in every bite. It’s not overly sweet, which is why it feels light enough to enjoy even after a full meal.
Another reason this recipe stands out is how easy it is to make. You don’t need complicated steps or special techniques, yet the final result looks and tastes like something from a bakery. Honestly, it’s one of those desserts that always impresses without requiring too much effort.
What I also like about this recipe is how versatile it is. You can serve it for birthdays, small gatherings, or even as a weekend treat when you want something a little special. Trust me, once you make it, it quickly becomes one of those go-to desserts that everyone asks for again.
Ingredients You’ll Need For Biscoff Cheesecake
For the Crust
- Biscoff cookie crumbs – form a rich, slightly crunchy base with that signature caramelized flavor
- Light brown sugar – adds sweetness and enhances the deep flavor of the crust
- Unsalted butter (melted) – binds the crumbs together and gives a firm, buttery texture
For the Cheesecake Filling
- Cream cheese – creates a smooth, creamy, and rich base for the cheesecake
- Biscoff cookie spread – adds that signature caramelized, spiced flavor
- Light brown sugar – sweetens the filling and adds a slight depth of flavor
- All-purpose flour – helps stabilize the cheesecake and gives it a firm texture
- Sour cream – adds moisture and a slight tang that balances the sweetness
- Vanilla extract – enhances the overall flavor and aroma
- Eggs – bind everything together and give the cheesecake structure
For the Topping
- Biscoff cookie spread – creates a smooth, glossy topping with rich flavor
- Biscoff cookie crumbs – add texture and a decorative finish on top
How to Make Biscoff Cheesecake
Prepare the Crust
Preheat your oven to 325°F (163°C). Line the bottom of a 9-inch springform pan with parchment paper and lightly grease the sides. In a bowl, mix the Biscoff cookie crumbs, brown sugar, and melted butter until everything is evenly combined. Press this mixture firmly into the bottom of the pan to form an even layer. Bake for 7–9 minutes, then set it aside to cool.
Once cooled, wrap the outside of the pan with aluminum foil. This step is important because it prevents water from leaking in during the water bath later.
Make the Cheesecake Batter
Reduce the oven temperature to 300°F (148°C). In a large bowl, beat the cream cheese and Biscoff spread on low speed until smooth and creamy. Mixing on low speed helps avoid adding too much air, which can cause cracks later.
Add the brown sugar and flour, then mix until well combined. Next, add the sour cream and vanilla extract and mix gently until smooth.
Now add the eggs one at a time, mixing slowly after each addition. Make sure everything is well combined, but avoid overmixing. Scrape down the sides of the bowl as needed to keep the batter smooth.
Bake the Cheesecake
Pour the cheesecake batter over the prepared crust and spread it evenly. Place the springform pan inside a larger pan and fill the outer pan with warm water until it reaches about halfway up the sides. This water bath helps the cheesecake bake evenly and prevents cracking.
Bake for about 1 hour 25 minutes. The center should be set but still slightly jiggly—that’s exactly what you want.
Cool the Cheesecake Slowly
Turn off the oven and let the cheesecake sit inside with the door closed for 30 minutes. Then slightly open the oven door and let it cool for another 30 minutes. This slow cooling process helps prevent cracks and keeps the texture smooth.
After that, remove the cheesecake from the oven and let it cool completely. Then refrigerate it for at least 5–6 hours or overnight until fully set.
Add Topping and Serve
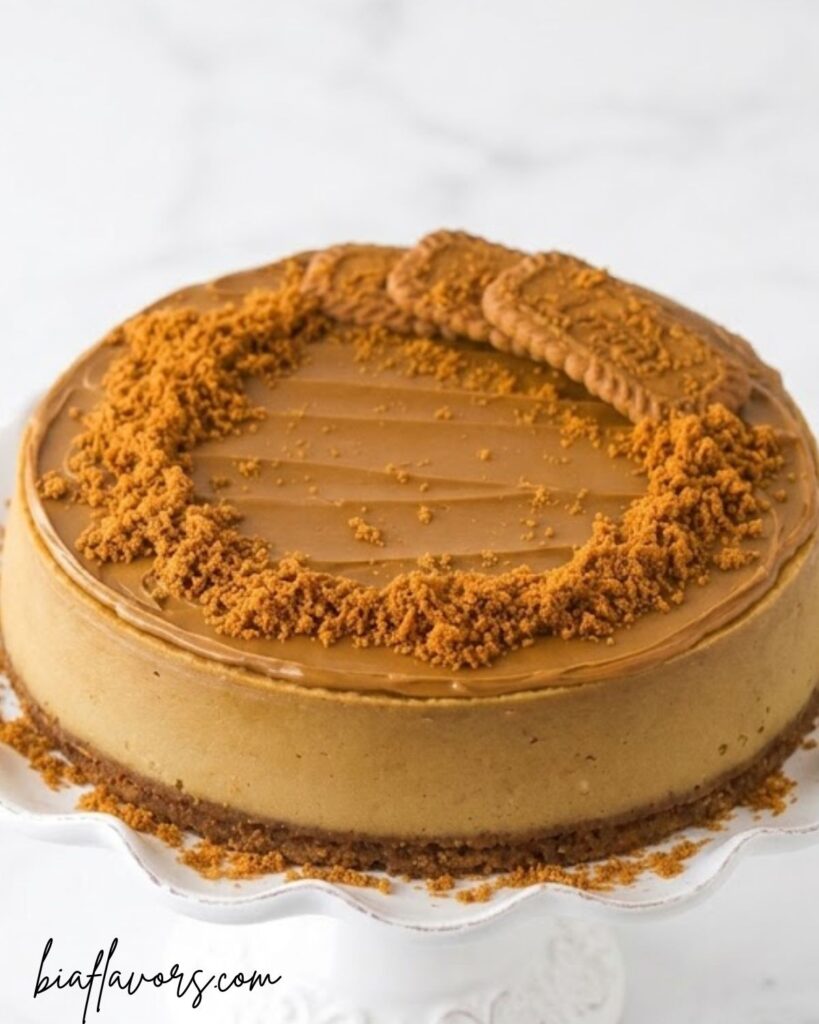
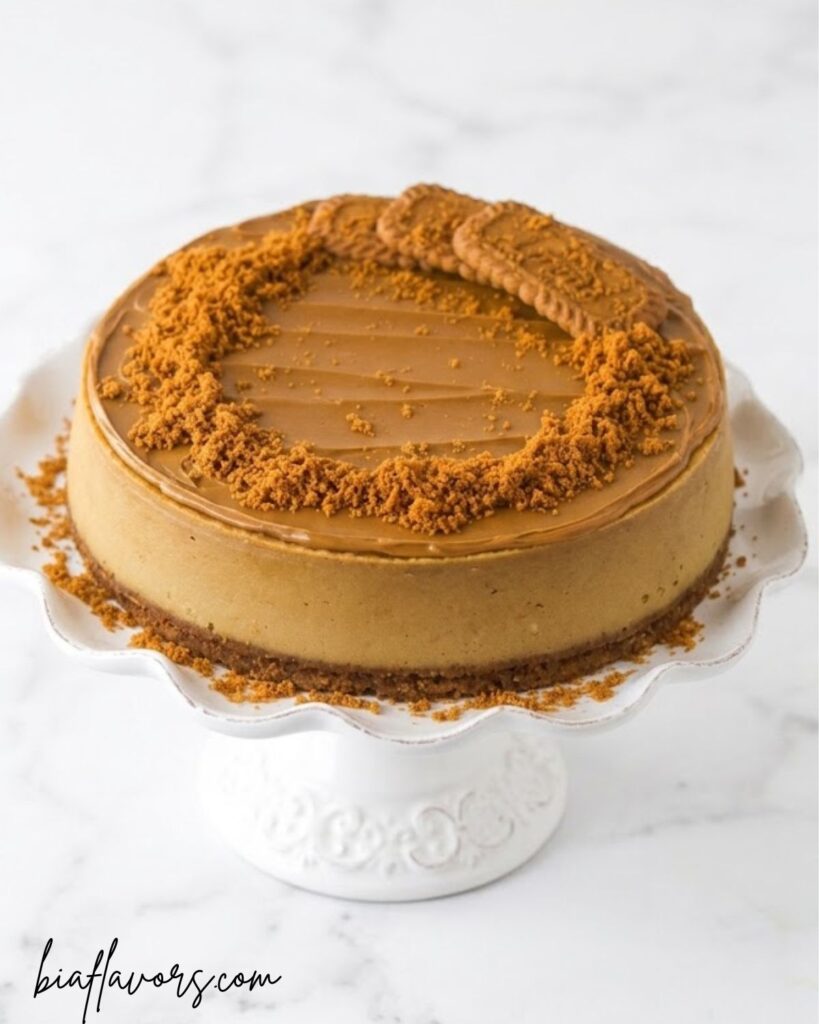
Once the cheesecake is firm and chilled, remove it from the pan and place it on a serving plate. Warm the Biscoff spread slightly until pourable, then spread it evenly over the top.
Finish by sprinkling Biscoff cookie crumbs around the edges and adding whole cookies if you like for decoration. Keep refrigerated until ready to serve.
Expert Tips For the Perfect Biscoff Cheesecake
Use Room Temperature Ingredients
Make sure your cream cheese, eggs, and sour cream are at room temperature before mixing. This helps everything blend smoothly and prevents lumps in your cheesecake batter.
Mix on Low Speed
Always mix the batter on low speed. Honestly, adding too much air can cause cracks while baking, so keeping it slow gives you a smoother, creamier texture.
Don’t Skip the Water Bath
A water bath may seem like an extra step, but it really helps the cheesecake bake evenly. It also prevents cracks and keeps the texture soft and creamy.
Avoid Overbaking
The cheesecake is done when the center is still slightly jiggly. It will continue to set as it cools. If it looks fully firm in the oven, it’s probably overbaked.
Cool It Slowly
Letting the cheesecake cool gradually in the oven is very important. Trust me, this step helps avoid cracks and gives you that perfect smooth top.
Chill Properly
Give the cheesecake enough time to chill—at least 5–6 hours or overnight. This helps it set properly and makes slicing much easier.
Clean Slices Tip
For neat slices, use a sharp knife and wipe it clean after each cut. This small trick makes your cheesecake look more professional and bakery-style.
Creative Ways to Customize This Cheesecake
Add a Chocolate Twist
You can drizzle melted chocolate on top or mix some chocolate into the filling. Honestly, chocolate and Biscoff together taste amazing and make the dessert even more indulgent.
Try a No-Bake Version
If you want something quicker, you can turn this into a no-bake cheesecake by skipping eggs and using whipped cream for structure. It’s lighter but still full of flavor.
Make Mini Cheesecakes
Instead of one large cheesecake, you can make mini versions in cupcake liners. They’re perfect for parties and easier to serve.
Add a Crunch Layer
You can add a thin layer of crushed nuts or extra cookie crumbs between the crust and filling for added texture. It gives a nice little crunch in every bite.
Adjust Sweetness
If you prefer a less sweet dessert, slightly reduce the sugar in the filling. The Biscoff spread is already quite sweet, so this helps balance the flavor.
Decorate Your Way
Top it with whipped cream swirls, whole Biscoff cookies, or even a drizzle of caramel. This makes it look more bakery-style and perfect for special occasions.
Storage Tips
Keep It Refrigerated
Since this is a cheesecake, always store it in the fridge. Keep it covered well with plastic wrap or in an airtight container so it stays fresh and doesn’t absorb other smells.
Best Within a Few Days
For the best taste and texture, try to enjoy it within 4–5 days. Honestly, it tastes even better the next day once everything is fully set.
Slice Before Storing
If you’ve already cut the cheesecake, you can store slices separately or place parchment paper between them to prevent sticking. This also makes it easier to grab a piece anytime.
Freezing Option
You can freeze the cheesecake if you want to store it longer. Wrap it tightly in plastic wrap and then in foil, and freeze for up to 1–2 months.
Thaw Properly
When ready to eat, let it thaw in the fridge overnight instead of at room temperature. This helps keep the texture smooth and creamy.
Avoid Leaving It Out
Try not to leave the cheesecake at room temperature for too long, especially in warm weather. It can soften too much and lose its structure.
More Cheesecake Recipes You’ll Love
- No Bake Oreo Cheesecake
- Best Pistachio Cheesecake
- Espresso Cheesecake
- Peanut Butter Cheesecake
- Lemon Blueberry Cheesecake
- No Bake Chocolate Cheesecake
- Funfetti Cheesecake
FAQs About These Biscoff Cheesecake
Why did my cheesecake crack?
Cracks usually happen overmixing, overbaking, or sudden temperature changes. That’s why mixing on low speed, using a water bath, and letting it cool slowly really helps prevent cracks and keeps the top smooth.
Can I make this cheesecake without a water bath?
Yes, you can, but the texture may not be as smooth and you might get cracks. Honestly, the water bath gives more even baking and a creamier result, so it’s worth the extra step.
How do I know when the cheesecake is done?
The edges should look set, but the center should still have a slight jiggle when you gently shake the pan. It will continue to firm up as it cools, so don’t wait until it looks completely solid.
Can I use low-fat cream cheese?
It’s not recommended because low-fat cream cheese has more moisture and less structure. That’s why full-fat cream cheese gives the best rich and creamy texture.
Can I make this ahead of time?
Yes, this cheesecake is perfect for making ahead. In fact, it tastes even better the next day after chilling overnight, as the flavors settle and the texture becomes firmer.
How do I get clean slices?
Use a sharp knife and wipe it clean after each cut. You can also dip the knife in warm water for smoother slices. Trust me, this makes a big difference in presentation.
Final Thoughts
This Biscoff cheesecake is one of those desserts that truly feels special from the first bite to the last. The creamy, rich filling combined with the caramelized flavor of Biscoff creates a dessert that’s both comforting and indulgent at the same time. Honestly, it’s the kind of recipe that looks impressive but is completely worth the effort.
What I love most about this cheesecake is how reliable and crowd-pleasing it is. Whether you’re making it for a celebration or just to treat yourself, it always turns out beautifully when you follow the steps carefully. Trust me, once you try it, it’s going to become one of your go-to desserts for every occasion.
Biscoff Cheesecake
Ingredients
Crust
- 1 ¾ cups 235g Biscoff cookie crumbs
- ¼ cup 56g packed light brown sugar
- ¼ cup 56g unsalted butter, melted
Filling
- 24 oz 678g cream cheese, room temperature
- 1 ½ cups 360g Biscoff cookie spread
- 1 ¼ cups 280g light brown sugar
- 3 tbsp 24g all-purpose flour
- ½ cup 115g sour cream
- 1 tsp vanilla extract
- 4 large eggs room temperature
Topping
- ½ cup 120g Biscoff cookie spread
- Biscoff cookie crumbs for garnish
Instructions
- Preheat oven to 325°F (163°C). Prepare a 9-inch springform pan with parchment paper and grease the sides.
- Mix crust ingredients and press firmly into the pan. Bake for 7–9 minutes, then let it cool.
- Wrap the pan with foil to prepare for a water bath.
- Reduce oven temperature to 300°F (148°C).
- Beat cream cheese and Biscoff spread on low speed until smooth.
- Add brown sugar and flour, then mix well.
- Add sour cream and vanilla extract, mixing until combined.
- Add eggs one at a time, mixing slowly after each addition.
- Pour batter into crust and place in a water bath.
- Bake for 1 hour 25 minutes until center is slightly jiggly.
- Turn off oven and let cheesecake cool inside for 30 minutes, then slightly open the door for another 30 minutes.
- Remove and refrigerate for 5–6 hours or overnight until fully set.
- Warm Biscoff spread and pour over the cheesecake, then decorate with crumbs.
Notes
- Use full-fat cream cheese for best texture
- Don’t overmix to avoid cracks
- Bake with a water bath for even cooking
- Chill completely before slicing for clean cuts