The first time I tried pistachio cheesecake, I honestly didn’t expect much from it. I had always gone for classic cheesecake or chocolate desserts, so this green-colored slice sitting in the bakery display didn’t really grab my attention at first.
But one bite changed everything. It was creamy, rich, and had this smooth pistachio flavor that felt different in the best way not too sweet, not too heavy, just perfectly balanced.
After that, I couldn’t stop thinking about it. I ended up trying to recreate it at home, and after a few attempts, I finally got that same silky texture and nutty flavor that made me fall in love with it in the first place.
Now this pistachio cheesecake has become one of those desserts I keep coming back to whenever I want something a little special but still homemade.
Why We Love This Pistachio Cheesecake
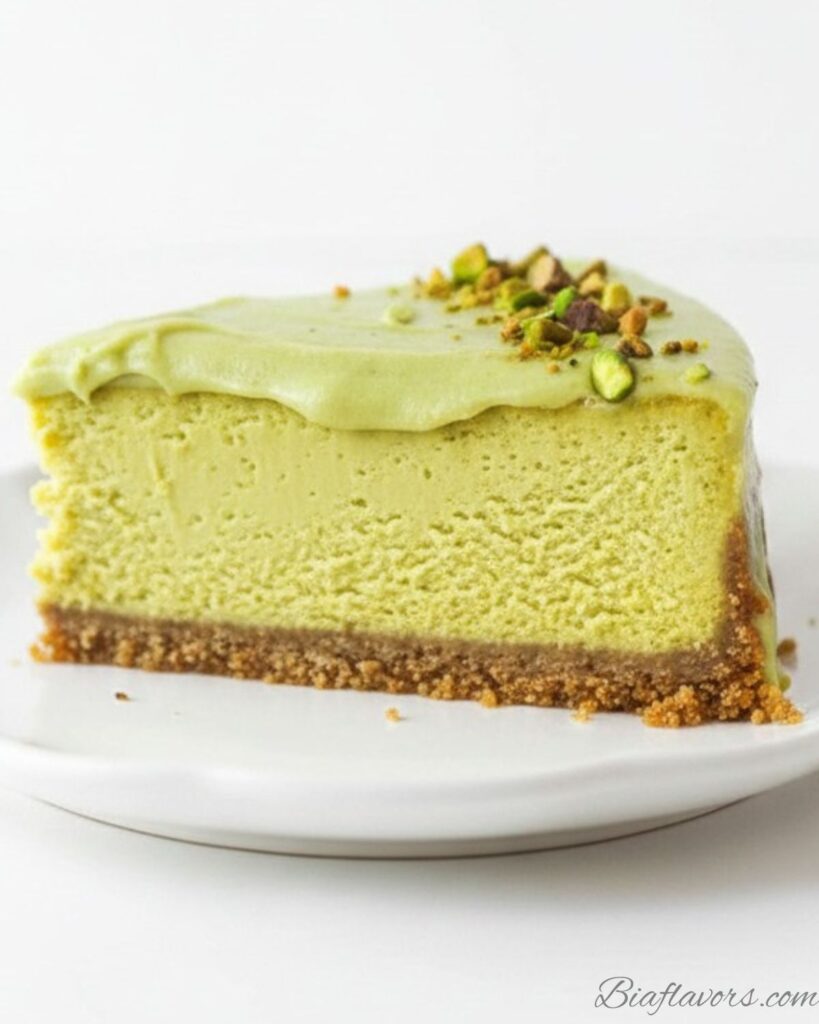
This pistachio cheesecake is the kind of dessert that feels a little fancy but still very comforting. The texture is what makes it so special smooth, creamy, and rich without being overly heavy, so every bite just melts in your mouth.
The pistachio flavor adds something different from the usual cheesecakes. It’s nutty, slightly earthy, and naturally rich, which balances perfectly with the sweetness of the creamy filling. It feels like a bakery-style dessert, but you can easily make it at home without any complicated steps.
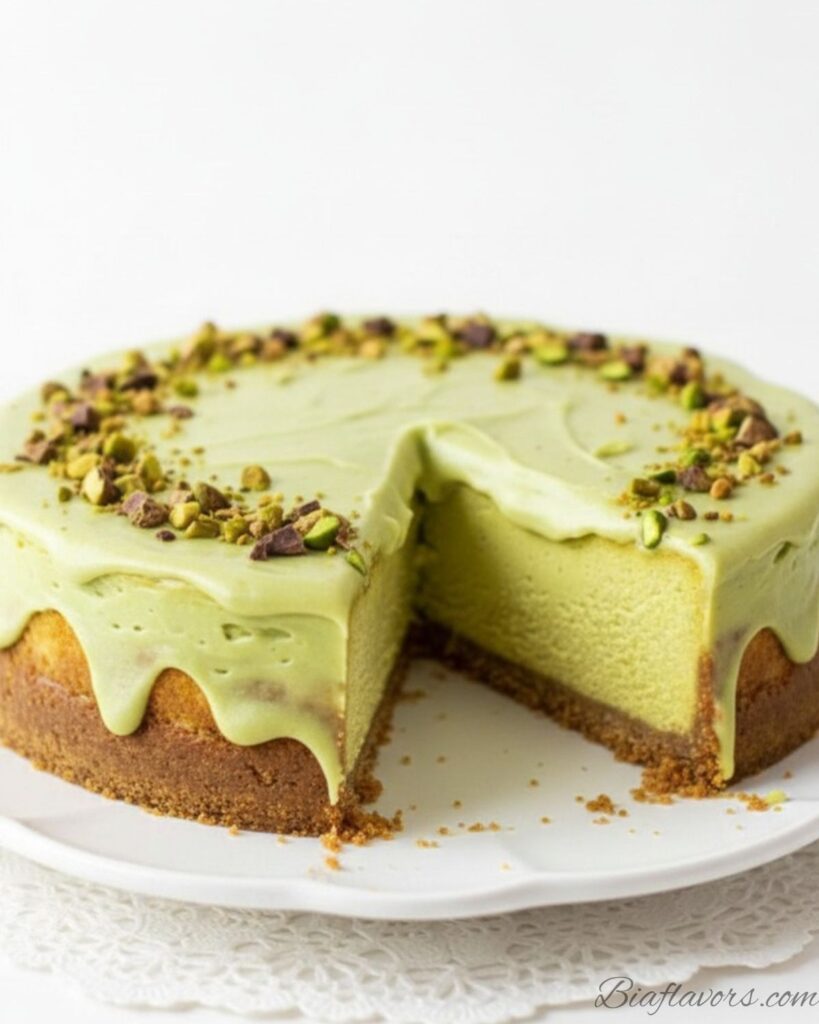
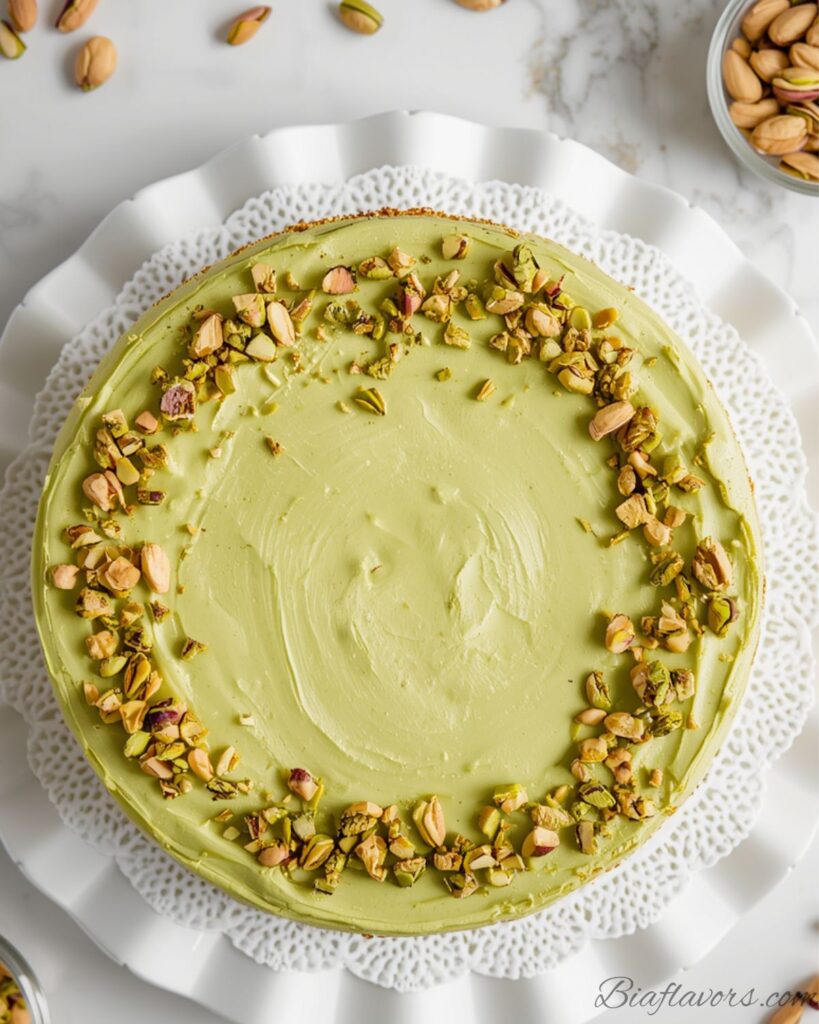
What makes it even better is how impressive it looks when served. That soft green color and smooth top make it perfect for celebrations, family gatherings, or anytime you want a dessert that feels a bit more special than usual.
What Makes This Pistachio Cheesecake Special
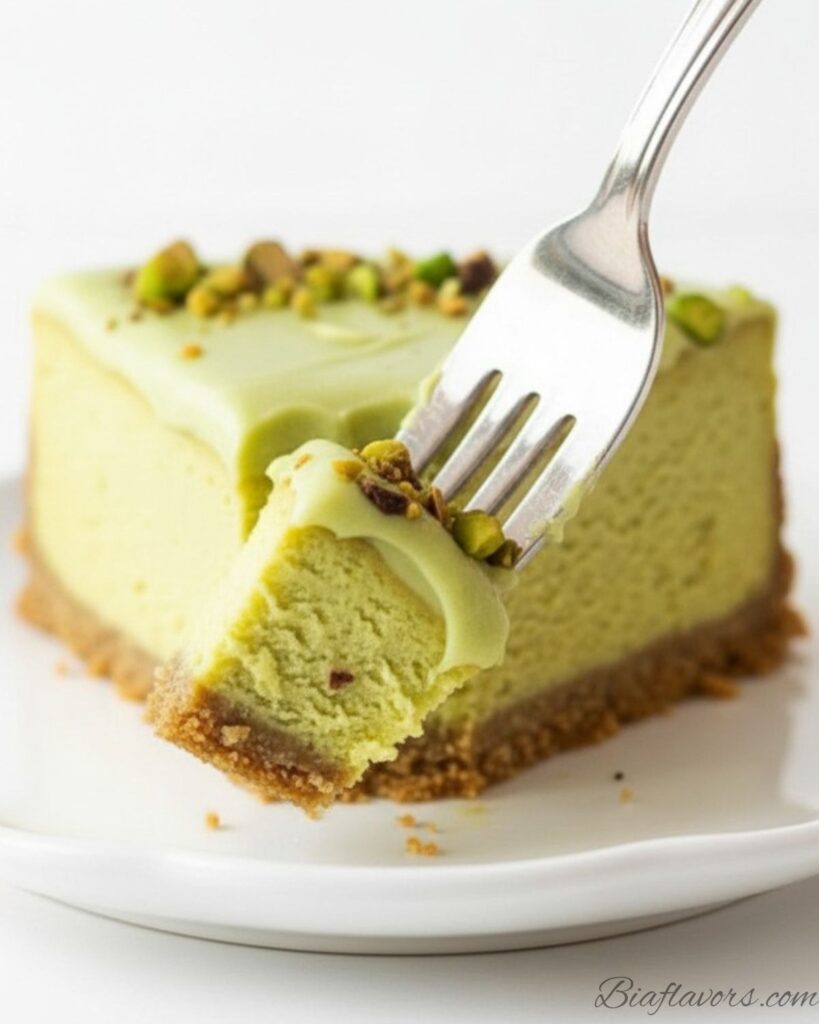
What really makes this pistachio cheesecake stand out is its unique flavor and texture combination. The filling is incredibly smooth and creamy, but the pistachio adds a rich, nutty depth that you don’t usually get in classic cheesecakes. It’s not overpowering — just enough to give every bite a distinct, luxurious taste.
Another special thing is how balanced it feels. It’s sweet, but not too sweet. Rich, but still light enough to enjoy more than one slice. That balance is what makes it feel like something straight from a bakery rather than a simple homemade dessert.
And visually, it’s just as impressive as it tastes. The soft pistachio green color gives it a unique, elegant look that instantly stands out on any dessert table, making it perfect for special occasions or when you want to impress guests.
Ingredients You’ll Need For Pistachio Cheesecake
Pistachio Paste
- 3 cups (336g) shelled pistachios — gives rich nutty flavor, healthy fats, and natural creaminess
- 3–4 tbsp water — helps blend pistachios into a smooth, silky paste
Crust
- 2 cups (268g) graham cracker crumbs — adds crunchy base and classic cheesecake texture
- 3 tbsp (39g) sugar — enhances sweetness and balances crust flavor
- 1/2 cup (112g) unsalted butter (melted) — binds crust together and adds richness
Cheesecake Filling
- 24 oz (678g) cream cheese (room temperature) — creates creamy, rich, and smooth cheesecake texture
- 1 1/2 cups (336g) pistachio paste — provides strong pistachio flavor and natural nutty richness
- 1 1/4 cups (259g) sugar — sweetens and balances tangy cream cheese
- 3 tbsp (24g) all-purpose flour — stabilizes cheesecake and prevents cracks
- 1 cup (230g) sour cream — adds softness, moisture, and slight tang
- 2 1/2 tsp vanilla extract — enhances overall flavor depth
- 3/4 tsp almond extract — boosts nutty aroma and pistachio taste
- 4 large eggs (room temperature) — gives structure and helps cheesecake set perfectly
Pistachio Ganache
- 1 cup (169g) white chocolate chips — creates smooth, sweet topping layer
- 3–4 tbsp pistachio paste — adds pistachio flavor and color to ganache
- 1/4 cup (60ml) heavy whipping cream — makes ganache silky, glossy, and rich
- Chopped pistachios (optional) — adds crunch, texture, and decorative finish
How to Make Pistachio Cheesecake (Step-by-Step)
Step 1: Make the pistachio paste
Start by boiling water in a pot and add the pistachios for about 4–5 minutes. This helps loosen the skins. Drain them and rub with a towel to remove as much skin as possible for a smoother, greener paste. Then blend the pistachios in a food processor, adding small amounts of water as needed. Keep blending patiently until it turns into a smooth, creamy paste. Set aside the required amount for filling and ganache.
Step 2: Prepare the crust
Preheat your oven to 325°F (163°C). Mix graham cracker crumbs, sugar, and melted butter until it looks like wet sand. Press the mixture firmly into a lined 9-inch springform pan. Bake for 8–10 minutes, then let it cool. Wrap the outside of the pan with foil to prepare for a water bath.
Step 3: Make the cheesecake filling
Lower the oven temperature to 300°F (148°C). In a large bowl, beat cream cheese and pistachio paste until smooth and creamy. Add sugar and flour, mixing on low speed. Then add sour cream, vanilla extract, and almond extract and mix again until combined. Add eggs one at a time, mixing gently after each addition. Do not overmix to avoid cracks.
Step 4: Bake the cheesecake
Pour the filling over the cooled crust. Place the springform pan inside a larger pan and add warm water to create a water bath (halfway up the sides). Bake for about 1 hour 25–35 minutes until the center is set but still slightly jiggly.
Step 5: Cool it properly
Turn off the oven and leave the cheesecake inside for 30 minutes. Then slightly open the oven door and let it cool for another 30 minutes. This slow cooling helps prevent cracks. After that, remove and refrigerate for 5–6 hours or overnight until fully set.
Step 6: Make the ganache topping
In a bowl, combine white chocolate chips, heavy cream, and pistachio paste. Heat in short bursts in the microwave, stirring each time until smooth and creamy.
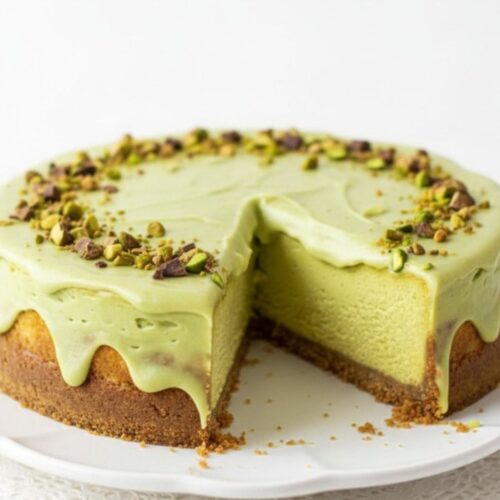
Step 7: Finish and serve
Pour the ganache over the chilled cheesecake and spread evenly. Add chopped pistachios on top for decoration if desired. Slice and serve once the topping sets.
Expert Tips for Perfect Pistachio Cheesecake
Use room temperature ingredients
Make sure cream cheese and eggs are at room temperature before mixing. This helps everything blend smoothly and prevents lumps in the batter.
Take time to make smooth pistachio paste
Don’t rush the pistachio blending process. The smoother the paste, the creamier and more elegant your cheesecake texture will be. If it feels grainy, keep blending patiently.
Mix on low speed only
When preparing the filling, always mix on low speed. Too much air in the batter can cause cracks while baking and change the dense, creamy texture.
Don’t skip the water bath
The water bath is what keeps the cheesecake soft and prevents it from drying or cracking. It may feel like an extra step, but it makes a huge difference in the final result.
Avoid overbaking
The center should still have a slight jiggle when you turn off the oven. It will continue to set as it cools, giving you that perfect creamy texture.
Cool it slowly
Letting the cheesecake cool gradually in the oven prevents sudden temperature changes, which is one of the main reasons cheesecakes crack.
Chill overnight for best flavor
Even though it sets in a few hours, the flavor becomes richer and texture smoother if you leave it overnight in the fridge.
Ingredient Substitutions for Pistachio Cheesecake
Pistachio Paste Alternatives
If you don’t have time to make pistachio paste, you can use store-bought pistachio paste or pistachio butter. In a pinch, almond butter can work, but it will change the flavor slightly and won’t have that signature pistachio taste.
Graham Cracker Crust Substitutes
Instead of graham crackers, you can use digestive biscuits, vanilla wafers, or even crushed shortbread cookies. Each option gives a slightly different flavor but still works well for a cheesecake base.
Cream Cheese Alternatives
Full-fat cream cheese gives the best texture, but if needed, you can use Neufchâtel cheese for a lighter version. Keep in mind the cheesecake may be slightly softer.
Sour Cream Substitutes
Greek yogurt is the best replacement for sour cream. It gives a similar tangy flavor and keeps the filling creamy and smooth.
Butter Substitute for Crust
You can replace unsalted butter with melted coconut oil if you want a dairy-free option. It will slightly change the flavor but still helps bind the crust well.
White Chocolate Substitute (Ganache)
If you don’t have white chocolate chips, you can use milk chocolate, but the ganache will be darker and less sweet. For a dairy-free option, use vegan white chocolate.
Eggs Substitute (for egg-free version)
You can use egg replacer or a mixture of yogurt and cornstarch, but the texture will be less firm compared to the original baked version.
How to Store Pistachio Cheesecake
In the refrigerator
The best way to store pistachio cheesecake is in the fridge. Cover it tightly with plastic wrap or place it in an airtight container. It will stay fresh for up to 4–5 days. Always keep it chilled because cream cheese-based desserts can soften and lose structure at room temperature.
In the freezer
If you want to store it for a longer time, you can freeze it. First, let the cheesecake set completely, then wrap it tightly in plastic wrap and aluminum foil. You can also cut it into slices for easier storage. It will last up to 2 months in the freezer. When ready to eat, thaw it in the refrigerator overnight.
Serving after storage
After refrigeration or freezing, let the cheesecake sit in the fridge for a while before serving so the texture becomes creamy again. Avoid microwaving, as it can ruin the structure and make it watery.
Pro tip
Always store the cheesecake without toppings if possible, especially the ganache. Add the topping fresh before serving for the best texture and presentation.
More Cheesecake Recipes
- Espresso Cheesecake
- Peanut Butter Cheesecake
- Lemon Blueberry Cheesecake
- Mini Chocolate Cheesecakes
- Funfetti Cheesecake
- No Bake Chocolate Cheesecake
- Biscoff Cheesecake
- No Bake Oreo Cheesecake
FAQs About These Pistachio Cheesecake
Why did my pistachio cheesecake crack?
Cracks usually happen due to overmixing, overbaking, or sudden temperature changes. Using a water bath and cooling the cheesecake slowly in the oven helps prevent cracks.
Can I make pistachio cheesecake without a water bath?
Yes, but it increases the risk of cracks and a drier texture. The water bath keeps the cheesecake moist and helps it bake evenly, so it’s highly recommended.
Can I use store-bought pistachio paste?
Yes, store-bought pistachio paste works well and saves time. Just make sure it’s good quality and not overly sweetened for the best flavor balance.
How do I know when cheesecake is fully baked?
The edges should look set, but the center should still have a slight jiggle. It will continue to firm up as it cools, so don’t overbake it.
Can I make this cheesecake ahead of time?
Yes, it’s actually better when made ahead. Refrigerating overnight improves the texture and enhances the pistachio flavor.
Why is my cheesecake grainy or lumpy?
This usually happens if the cream cheese wasn’t at room temperature or wasn’t mixed properly. Always soften cream cheese and mix on low speed for a smooth texture.
Final Thoughts
This pistachio cheesecake is one of those desserts that feels special every single time you make it. It’s creamy, rich, and has that unique nutty pistachio flavor that stands out from regular cheesecakes. What I like most is how it looks impressive but still feels completely doable at home with the right steps.
It does take a bit of time, especially with the pistachio paste and chilling, but the end result is absolutely worth it. Once you slice into that smooth, creamy texture with the pistachio topping, it’s hard not to go back for another piece.
Pistachio Cheesecake
Ingredients
Pistachio Paste
- 3 cups 336g shelled pistachios
- 3 –4 tbsp water
Crust
- 2 cups 268g graham cracker crumbs
- 3 tbsp 39g sugar
- 1/2 cup 112g unsalted butter (melted)
Filling
- 24 oz 678g cream cheese (room temperature)
- 1 1/2 cups 336g pistachio paste
- 1 1/4 cups 259g sugar
- 3 tbsp 24g all-purpose flour
- 1 cup 230g sour cream
- 2 1/2 tsp vanilla extract
- 3/4 tsp almond extract
- 4 large eggs room temperature
Pistachio Ganache
- 1 cup 169g white chocolate chips
- 3 –4 tbsp pistachio paste
- 1/4 cup 60ml heavy whipping cream
- Chopped pistachios optional for topping
Instructions
- Make pistachio paste by boiling, peeling, and blending pistachios until smooth.
- Prepare crust and bake at 325°F (163°C) for 8–10 minutes.
- Beat cream cheese and pistachio paste until smooth.
- Add sugar, flour, sour cream, vanilla, almond extract, then eggs one by one.
- Pour into crust and bake in water bath at 300°F (148°C) for 1 hr 25–35 min.
- Cool slowly in oven, then refrigerate 5–6 hours or overnight.
- Make ganache and spread over chilled cheesecake.
- Top with pistachios, slice, and serve.