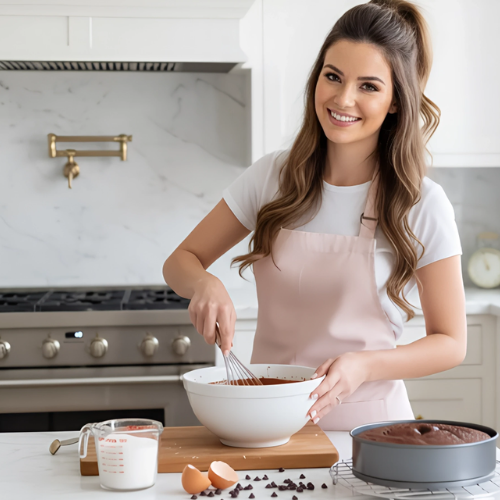
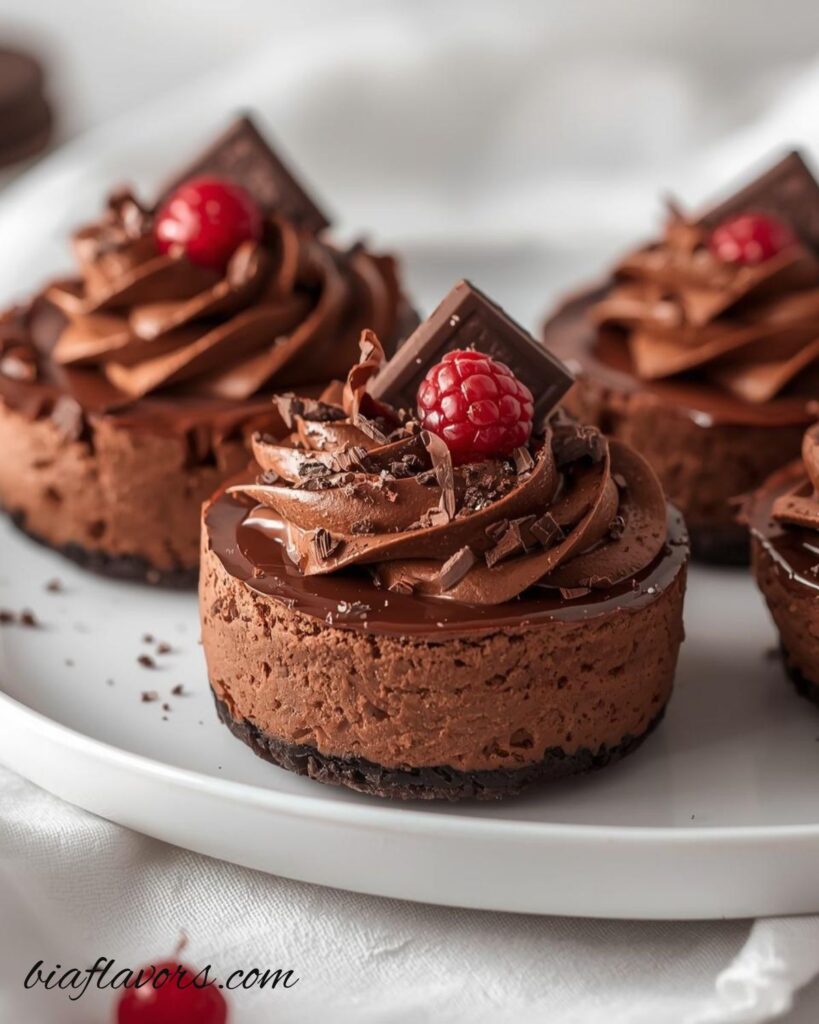
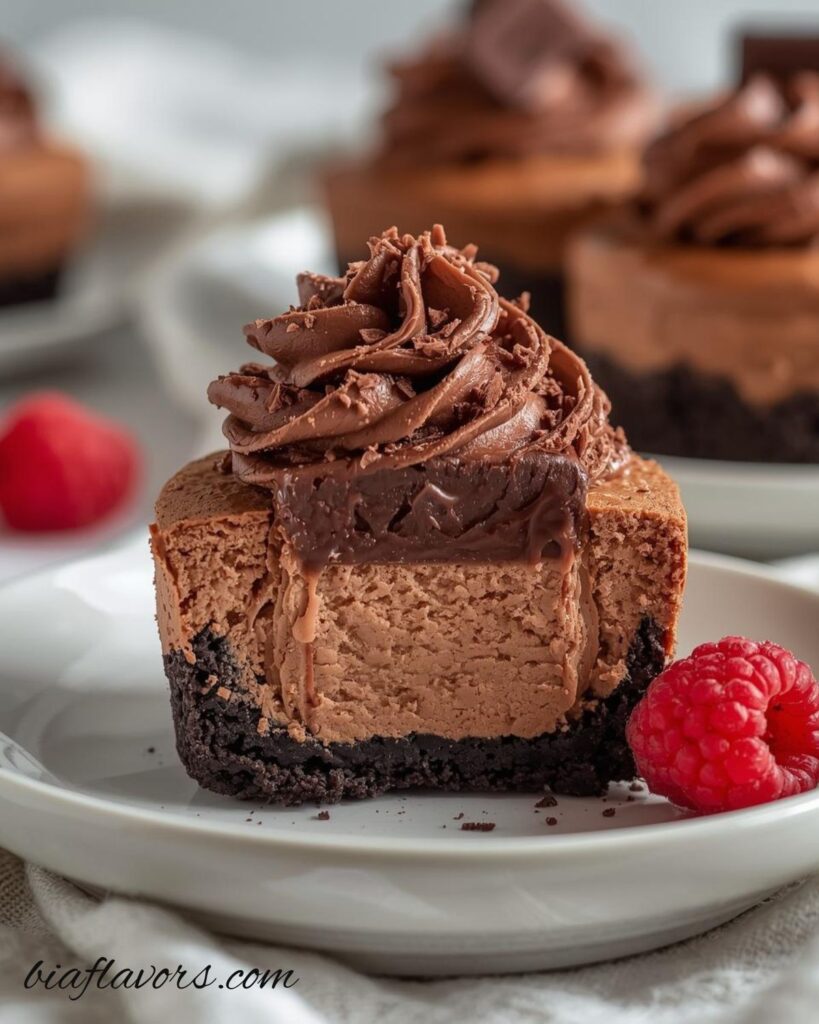
If you’re someone who loves chocolate and cheesecake, these Mini Chocolate Cheesecakes are going to feel like a little dream in dessert form. They’re rich, creamy, and perfectly portioned into individual servings so you get all the indulgence without needing to slice a full cake.
What makes them even better is how simple they are to make. With a crunchy chocolate cookie base and a smooth, velvety chocolate cheesecake filling on top, every bite feels balanced and satisfying. They also look really cute on a dessert table, which makes them perfect for parties, gatherings, or even just a small treat at home.
The best part? No complicated steps, no stress just a straightforward recipe that delivers bakery-style results right from your own kitchen.
Why You’ll Love This Recipe
These mini chocolate cheesecakes are one of those desserts that feel a little fancy, but are actually very easy to make at home. The texture is what really wins you over a smooth, creamy cheesecake filling sitting on top of a crunchy chocolate base in every bite.
You’ll also love how perfectly portioned they are. Since they’re made as individual servings, there’s no slicing or mess involved. Just grab one and enjoy. It makes them especially great for parties, dessert tables, or when you want something sweet without overindulging.
Another reason they stand out is the chocolate flavor. It’s rich but not overwhelming, and pairs beautifully with the creamy cheesecake layer. They look impressive, taste even better, and always feel like a little bakery-style treat made right at home.
Ingredients You’ll Need For Mini Chocolate Cheesecakes
Crust
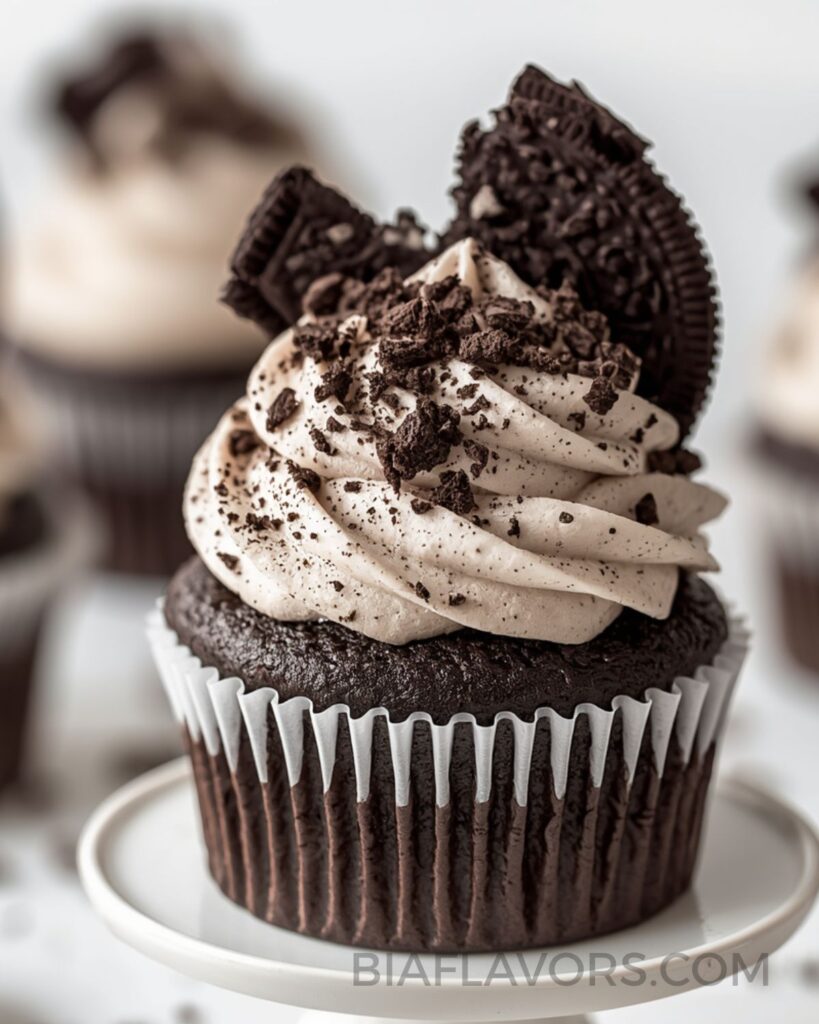
- 1 cup (134g) Oreo cookie crumbs – creates a rich, chocolatey, crunchy base
- 2 tbsp unsalted butter, melted – binds the crumbs together and adds richness
Cheesecake Filling
- 12 oz (339g) cream cheese, room temperature – gives the cheesecake its smooth, creamy texture
- 1/2 cup (104g) sugar – sweetens and balances the chocolate flavor
- 2 tbsp (14g) unsweetened cocoa powder – adds deep chocolate taste
- 1/4 cup (58g) sour cream, room temperature – adds creaminess and a slight tang
- 1/2 tsp vanilla extract – enhances overall flavor
- 2 large eggs, room temperature – help set the cheesecake filling
- 4 oz semi-sweet or bittersweet chocolate, melted – gives rich chocolate flavor and smooth texture
Chocolate Ganache
- 3 oz (85g) semi-sweet chocolate chips – creates a silky chocolate topping
- 1/4 cup (60ml) heavy whipping cream – melts chocolate into a smooth ganache
Whipped Cream Topping
- 3/4 cup (180ml) heavy whipping cream, cold – base for fluffy whipped cream
- 3 tbsp (22g) powdered sugar – sweetens and stabilizes the cream
- 3 tbsp (14g) cocoa powder – adds chocolate flavor to the topping
- 1/2 tsp vanilla extract – adds aroma and depth
- Mini chocolate bars (optional) – for decoration and extra indulgence
How to Make Mini Chocolate Cheesecakes
1. Prepare the crust
Start by preheating your oven to 325°F (162°C) and line a cupcake pan with liners. In a bowl, mix the Oreo cookie crumbs and melted butter until the mixture feels like wet sand. Spoon it evenly into each cupcake liner and press it down firmly using the back of a spoon. This helps create a solid base that holds the cheesecake filling. Bake the crusts for 5 minutes, then remove and let them cool while you prepare the filling.
2. Lower oven temperature
After baking the crust, reduce the oven temperature to 300°F (148°C). This lower temperature helps the cheesecakes bake gently and prevents cracking.
3. Make the chocolate cheesecake filling
In a large mixing bowl, beat together the cream cheese, sugar, and cocoa powder on low speed until smooth. Make sure not to overmix — keeping the speed low helps avoid too much air, which can cause cracks later. Scrape down the sides of the bowl so everything blends evenly.
4. Add sour cream and vanilla
Next, add the sour cream and vanilla extract and mix again on low speed until fully combined. This step adds a smooth, creamy texture and balances the chocolate flavor.
5. Add eggs carefully
Add the eggs one at a time, mixing slowly after each addition. This helps the batter stay silky and prevents it from becoming too airy or overworked.
6. Add melted chocolate
Pour in the melted chocolate and gently stir until the batter becomes rich, smooth, and fully chocolatey. At this stage, the filling should look thick and glossy.
7. Fill and bake
Spoon the cheesecake filling into each prepared crust, filling them almost to the top. Bake for 15 minutes, then turn off the oven and leave the door closed for another 10 minutes. After that, crack the oven door slightly and let them cool inside for 15–20 minutes before transferring to the fridge.
8. Chill completely
Once slightly cooled, move the cheesecakes to the refrigerator and let them chill until fully set. This step is important for clean texture and easy removal from the liners.
9. Make the chocolate ganache
Add chocolate chips to a bowl. Heat the heavy cream until it just begins to boil, then pour it over the chocolate. Let it sit for a minute, then whisk until smooth and glossy.
10. Add ganache topping
Spoon a small amount of chocolate ganache over each mini cheesecake and spread gently. Let it set slightly before adding whipped cream.
11. Make the whipped cream
In a mixing bowl, whip together heavy cream, powdered sugar, cocoa powder, and vanilla extract on high speed until stiff peaks form. The texture should be light, fluffy, and hold its shape.
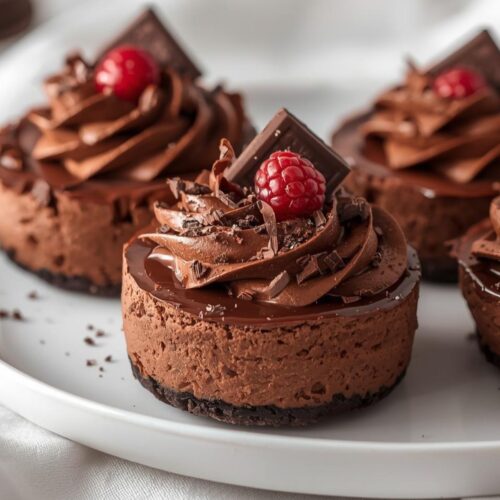
12. Decorate and serve
Pipe or spoon the whipped cream onto each cheesecake and top with a mini chocolate bar if desired. Chill until ready to serve. These mini cheesecakes taste best cold and creamy straight from the fridge.
Expert Tips for Perfect Mini Chocolate Cheesecakes
- Always use room temperature cream cheese – This is the key to a smooth, lump-free filling. Cold cream cheese won’t blend properly and can leave a grainy texture.
- Mix on low speed only – It’s tempting to whip fast, but too much air in the batter can cause the cheesecakes to rise too quickly and then crack while cooling.
- Don’t overbake – The centers should still look slightly soft when you turn off the oven. They will continue to set as they cool, so overbaking can make them dry.
- Use a gentle cooling method – Letting them sit in the oven after baking and then cooling slowly helps prevent sudden temperature changes, which is a common cause of cracks.
- Chill fully before decorating – The ganache and whipped cream hold much better on fully set cheesecakes, so don’t rush the chilling step.
- Use good-quality chocolate – Since chocolate is the main flavor here, using better chocolate makes a big difference in richness and taste.
- Clean liners for neat presentation – For the prettiest look, peel off cupcake liners only after chilling completely.
- Pipe toppings just before serving (if possible) – This keeps the whipped cream looking fresh, fluffy, and stable.
These small details make a big difference and help you get that smooth, bakery-style finish every single time.
Variations
- White chocolate version – Swap the semi-sweet chocolate in the filling with white chocolate for a sweeter, creamier flavor with a lighter look.
- Mint chocolate cheesecakes – Add a few drops of peppermint extract to the filling for a refreshing chocolate-mint twist, perfect for holidays.
- Nutty crunch base – Mix finely chopped almonds or hazelnuts into the Oreo crust for a little extra texture and flavor.
- Double chocolate overload – Stir in chocolate chips into the batter before baking for extra melted chocolate bites in every mini cheesecake.
- Salted caramel topping – Drizzle salted caramel over the ganache instead of whipped cream for a rich sweet-salty combination.
- Berry twist – Add a small spoon of raspberry or strawberry sauce on top for a fruity contrast to the rich chocolate.
- Cookie base swap – Replace Oreo crumbs with chocolate graham crackers or digestive biscuits for a slightly different crust flavor.
These small changes let you turn the same recipe into completely new dessert variations depending on the occasion or mood.
Storage Instructions
Once your mini chocolate cheesecakes are fully set and decorated, store them in an airtight container in the refrigerator. They stay fresh for about 3–4 days, and the texture actually gets even better after chilling for a few hours.
If you’re stacking them, place a small piece of parchment paper between layers to protect the toppings and keep them looking neat.
For longer storage, you can also freeze them (without whipped cream topping). Wrap each cheesecake individually and store in a freezer-safe container for up to 1 month. When ready to eat, thaw them overnight in the fridge.
For the best taste and texture, always serve them cold straight from the fridge that’s when the filling is at its creamiest and most delicious.
Common Mistakes to Avoid
- Using cold cream cheese – This is one of the biggest mistakes. Cold cream cheese doesn’t mix smoothly and can leave lumps in your filling, affecting the final texture.
- Overmixing the batter – Mixing too fast or too long adds too much air, which can cause cracks while baking and a less creamy texture.
- Skipping the low baking temperature – Baking too hot can make the cheesecakes rise quickly and then fall, leading to cracks and uneven texture.
- Overbaking the cheesecakes – They should still look slightly soft in the center when you turn the oven off. They firm up as they cool, so baking too long makes them dry.
- Not cooling gradually – Sudden temperature changes (hot oven straight to cold fridge) can cause cracks. Always cool them slowly first.
- Not chilling enough time – Cutting or decorating before they’re fully chilled can make them fall apart or feel too soft.
- Warm ganache or cream on warm cheesecakes – Toppings won’t set properly if the cheesecakes are not completely cold.
Avoiding these small mistakes will help you get smooth, creamy, bakery-style mini cheesecakes every time.
Try More Cheesecake Recipes
- Espresso Cheesecake
- Biscoff Cheesecake
- Funfetti Cheesecake
- No Bake Oreo Cheesecake
- Pistachio Cheesecake
- Peanut Butter Cheesecake
- Lemon Blueberry Cheesecake
- Mini Cheesecakes
- Mini Chocolate Cheesecakes
FAQs About These Mini Chocolate Cheesecake
1. Can I make these mini cheesecakes ahead of time?
Yes, absolutely. In fact, they taste even better the next day after chilling. You can make them 1–2 days in advance and store them in the fridge until serving.
2. Why did my mini cheesecakes crack on top?
Cracks usually happen if the batter is overmixed, baked at too high a temperature, or cooled too quickly. Mixing on low speed and cooling gradually helps prevent this.
3. Can I skip the ganache or whipped cream?
Yes, you can. The cheesecakes are still rich and delicious on their own, but the toppings add extra flavor and a bakery-style finish.
4. Can I use milk chocolate instead of dark chocolate?
Yes, but the result will be sweeter and slightly less intense in chocolate flavor. Semi-sweet or bittersweet chocolate gives a more balanced taste.
5. Do I need a water bath for this recipe?
No, a water bath isn’t required for mini cheesecakes. The low baking temperature and gentle cooling method are enough to keep them creamy.
6. How do I know when they are done baking?
They should look set around the edges but still slightly soft in the center. They will continue to firm up as they cool.
7. Can I freeze mini chocolate cheesecakes?
Yes, you can freeze them (without toppings) for up to 1 month. Thaw overnight in the fridge before serving.
Final Thoughts
These Mini Chocolate Cheesecakes are the perfect little dessert when you want something rich, creamy, and chocolatey without making a full cake. Every bite gives you that smooth cheesecake texture with a crunchy chocolate base and a deep chocolate flavor that feels truly indulgent.
They’re easy to make ahead, great for sharing, and always look impressive on any dessert table. Once you try them, they’re the kind of treat you’ll find yourself making again and again for special occasions or just a sweet craving at home.
Mini Chocolate Cheesecakes
Ingredients
Crust
- 1 cup 134g Oreo cookie crumbs
- 2 tbsp unsalted butter melted
Cheesecake Filling
- 12 oz 339g cream cheese, room temperature
- 1/2 cup 104g sugar
- 2 tbsp 14g unsweetened cocoa powder
- 1/4 cup 58g sour cream, room temperature
- 1/2 tsp vanilla extract
- 2 large eggs room temperature
- 4 oz semi-sweet or bittersweet chocolate melted
Chocolate Ganache
- 3 oz 85g semi-sweet chocolate chips
- 1/4 cup 60ml heavy whipping cream
Whipped Cream Topping
- 3/4 cup 180ml heavy whipping cream, cold
- 3 tbsp 22g powdered sugar
- 3 tbsp 14g unsweetened cocoa powder
- 1/2 tsp vanilla extract
- Mini chocolate bars optional, for topping
Instructions
- Preheat oven to 325°F (162°C) and line cupcake pan.
- Mix Oreo crumbs + melted butter, press into liners, and bake 5 minutes.
- Lower oven to 300°F (148°C).
- Beat cream cheese, sugar, and cocoa until smooth.
- Add sour cream and vanilla, mix gently.
- Add eggs one at a time, then mix in melted chocolate.
- Fill cups and bake 15 minutes. Turn off oven and let sit 10 minutes.
- Cool gradually, then chill in fridge.
- Make ganache and spoon over cheesecakes.
- Whip cream ingredients until stiff peaks form.
- Pipe whipped cream and decorate with chocolate bars.
Notes
- Make sure your cream cheese is fully softened before mixing to avoid lumps and get a silky smooth filling.
- Mix the batter on low speed only so you don’t add too much air, which can cause cracks while baking.
- Don’t skip the slow cooling process in the oven—it helps the cheesecakes set gently and stay creamy.
- Always chill completely before decorating so the ganache and whipped cream sit nicely on top.
- For the best texture and flavor, serve them cold straight from the fridge.