The first time I tried making a red velvet cake roll, I honestly thought I had ruined it before it even left the pan. I remember pulling the cake out of the oven, feeling weirdly confident because it looked soft and perfect. Then came the rolling part. One small crack turned into three giant ones, the filling leaked everywhere, and my “beautiful bakery-style dessert” looked more like a collapsed towel.
What surprised me later was that cake rolls are actually not hard they’re just unforgiving if you rush them.
After making this recipe multiple times (including one stressful attempt before a family dinner), I finally figured out the small details that actually matter. Things like rolling the cake while hot, not overmixing the batter, and even re-rolling it during cooling completely changed the result.
If you’ve ever wanted to make a soft, creamy, bakery-style red velvet cake roll at home without the usual disasters, this guide will save you a lot of frustration.
And yes this version stays soft, rolls beautifully, and tastes even better the next day.

Why You’ll Love This Red Velvet Cake Roll
I’ve baked plenty of desserts that looked impressive but tasted average. This isn’t one of them. The I love layered cakes, but sometimes they feel like too much work. Frosting layers evenly, smoothing the sides, decorating the top it can quickly turn into a stressful project.
That’s why I started appreciating cake rolls more. This dessert gives you that fancy bakery-style look without requiring expert decorating skills. Once sliced, the spiral filling instantly makes it look elegant.
The texture is also completely different from regular red velvet cake. Instead of dense layers with thick frosting, this version is light, soft, and creamy. The sponge stays fluffy while the cream cheese whipped filling adds richness without becoming overly sweet.
The best part is that it tastes even better after chilling for a few hours. The flavors settle together beautifully, and the cake becomes softer the next day.
Ingredients You’ll Need For Red Velvet Cake Roll
For the Red Velvet Cake
- 1 cup minus 1 tablespoon all-purpose flour
- 3 tablespoons natural unsweetened cocoa powder
- 1 teaspoon baking powder
- 1/2 teaspoon salt
- 4 large eggs, separated
- 3/4 cup granulated sugar
- 5 tablespoons buttermilk
- 1 teaspoon white vinegar
- 1/4 cup vegetable oil
- 1 teaspoon vanilla extract
- 2 teaspoons red food coloring
For the Cream Cheese Whipped Filling
- 3/4 cup cold heavy whipping cream
- 1/4 cup powdered sugar
- 3/4 teaspoon vanilla extract
- 4 oz cream cheese, softened
The Biggest Mistake People Make With Cake Rolls
I used to think cake rolls cracked because the sponge was too dry. While overbaking definitely causes problems, I later realized the real issue was cooling the cake incorrectly.
The first few times, I waited for the cake to cool completely before rolling it because I thought touching it while hot would destroy it. That was exactly the problem.
Cake rolls need to be shaped while warm so the sponge “learns” the rolled shape before setting. Once I started rolling the cake immediately after baking, the cracks became much smaller or disappeared completely. It honestly surprised me how much difference that one step made.
How to Make Red Velvet Cake Roll (Step-by-Step)
Step 1: Prepare the Pan and Oven
Preheat oven to 350°F (175°C). Line a 17×12-inch jelly roll pan with parchment paper, leaving slight overhang on the sides for easy removal. Proper preparation ensures the sponge releases easily and rolls without breaking.
Step 2: Mix Dry Ingredients
In a bowl, whisk together flour, cocoa powder, baking powder, and salt. This step helps distribute cocoa evenly and prevents lumps in the batter, which keeps the sponge smooth and consistent.
Step 3: Prepare the Wet Batter
In a separate bowl, whisk egg yolks and sugar until smooth. Add buttermilk, oil, vanilla, vinegar, and red food coloring. Mix until the batter becomes glossy and evenly colored. Gently fold in the dry ingredients until just combined avoid overmixing to keep the sponge light.
Step 4: Whip Egg Whites
In a clean bowl, beat egg whites until stiff peaks form. This step is essential because it adds air and structure to the sponge, making it flexible enough to roll without cracking. Fold the whipped egg whites gently into the batter in batches to maintain airiness.
Step 5: Bake the Cake
Spread the batter evenly into the prepared pan. Tap lightly to remove air bubbles. Bake for 10–12 minutes, or until the cake springs back when lightly touched. Do not overbake, as a dry sponge will crack when rolled.
Step 6: Roll While Warm
Once baked, immediately lift the cake using parchment paper. Roll it gently from the shorter side while still warm. This step is crucial it sets the shape and prevents cracking later. Let it cool in the rolled position.
Step 7: Make the Cream Filling
Whip cold heavy cream, powdered sugar, and vanilla until slightly thickened. Add softened cream cheese and continue whipping until smooth, thick, and pipeable. The filling should be light yet stable enough to hold shape inside the roll.
Step 8: Assemble the Cake Roll
Carefully unroll the cooled sponge. Spread an even layer of cream filling, leaving a small border around edges. Roll the cake back slowly and gently without pressing too hard. Wrap in plastic wrap and chill for at least 1 hour.
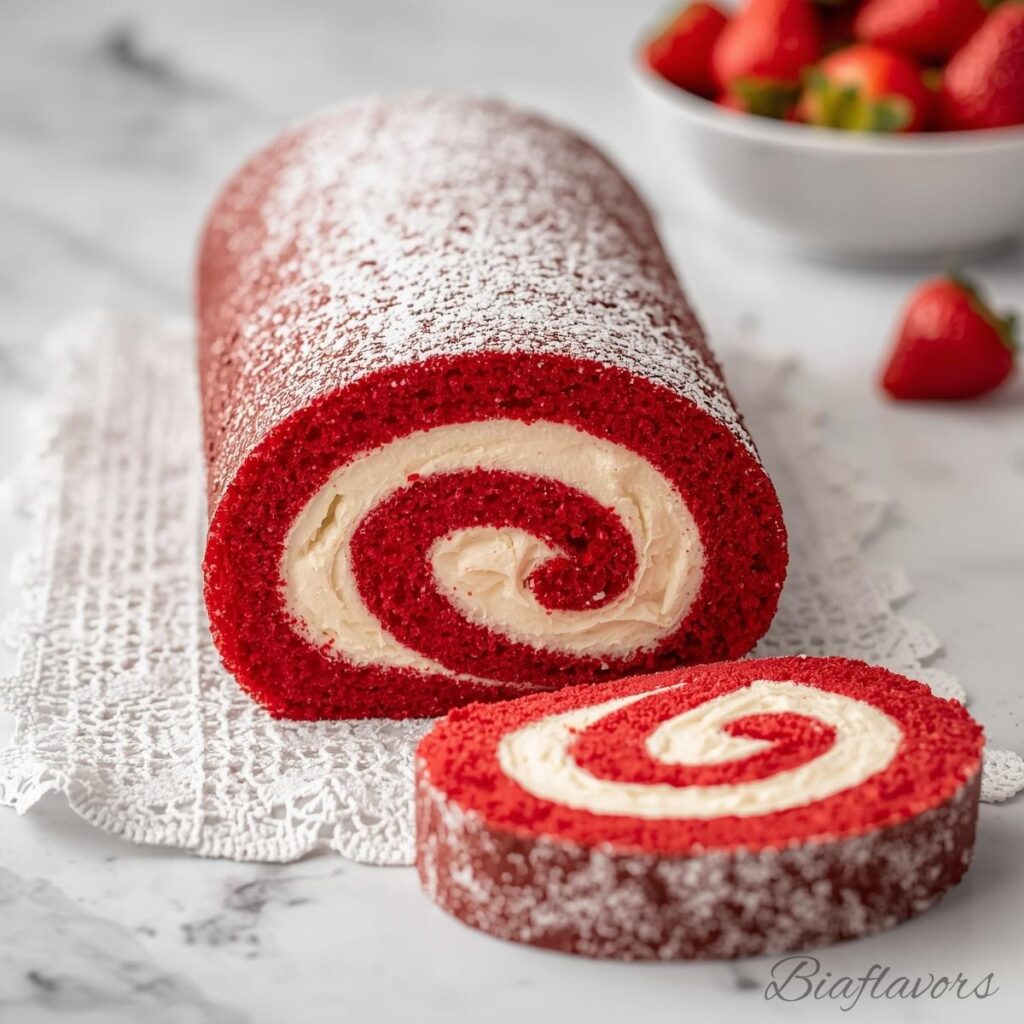
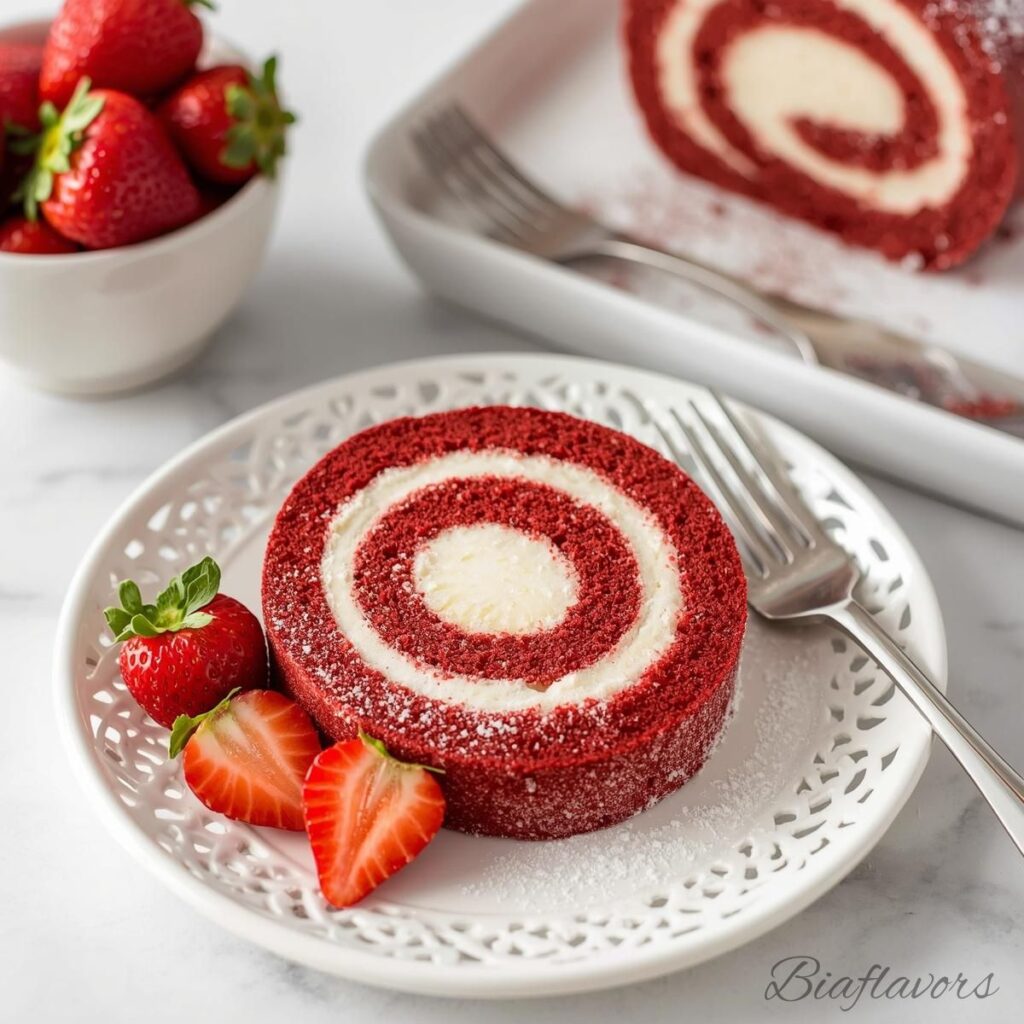
Slice and Serve the Red Velvet Cake Roll
Before serving, dust the top lightly with powdered sugar for a simple bakery-style finish. Use a sharp serrated knife for slicing and wipe the blade clean between cuts if you want neat spiral slices. The final texture should feel soft & creamy.
And the flavor has that perfect balance of cocoa, vanilla, and cream cheese richness without becoming overly sweet. The first time I sliced a clean spiral after struggling through earlier attempts, it honestly felt incredibly satisfying.
Common Mistakes to Avoid When Making Red Velvet Cake Roll
When I first started making cake rolls, I thought the recipe itself was the problem. But after a few tries, I realized most failures come from small mistakes that seem harmless in the moment. The funny part is, every mistake I made felt small until I saw the cake crack or the filling leak everywhere.
Once I understood these issues, my results improved a lot. If you’re trying this recipe for the first time, avoiding these mistakes will save you from the same frustration I went through.
Not Rolling the Cake While It’s Still Warm
This is the biggest mistake almost everyone makes, including me. The first time I waited for the cake to cool completely because I was scared it would break. But instead of helping, that actually made things worse. The sponge loses flexibility when it cools flat, and once that happens, cracks are almost guaranteed.
Rolling the cake while it’s warm allows it to “remember” its shape. Think of it like training the sponge to stay curved. Once it sets in that shape, it becomes much easier to handle later. This one step alone can completely change your result.
Overbaking the Sponge (Even by a Few Minutes)
Cake rolls are very sensitive when it comes to baking time. Even a couple of extra minutes in the oven can dry out the sponge enough that it becomes stiff instead of flexible. And stiff sponge = cracks when rolling.
I learned this the hard way when I got distracted and left the cake in “just a little longer.” It looked fine, but the moment I rolled it, I heard tiny cracks forming. Now I always check at the minimum baking time and trust the texture instead of guessing. The cake should feel soft and springy, not dry or firm.
Using Cold Cream Cheese in the Filling
This is one mistake that seems small but makes a big difference. If the cream cheese is cold, it doesn’t blend properly with the whipped cream. You end up with tiny lumps in the filling that never fully disappear, no matter how much you whip.
I used to rush this step and regret it later when the filling didn’t look smooth. Now I always let the cream cheese sit at room temperature for at least 30–40 minutes before using it. The texture becomes creamy, smooth, and much easier to mix. It also spreads better inside the cake without tearing the sponge.
Overfilling the Cake Roll
When I first made this recipe successfully, I got a little too confident and added “extra filling for better taste.” That was a mistake.
Too much filling doesn’t improve flavor it just makes rolling messy. The filling starts squeezing out from the sides, and the cake loses its neat spiral shape. The right amount should feel generous but controlled.
Think of it like a thin, even layer instead of a thick frosting layer. The cake itself should still be the star, not just the filling.
Not Spreading Batter Evenly Before Baking
This is something many beginners don’t think about. If the batter is uneven in the pan, one side becomes thicker than the other. That means uneven baking and uneven baking leads to cracks when rolling.
I used to just “roughly spread” the batter and hope for the best. But later I realized taking an extra minute to level it properly makes the sponge bake evenly and roll smoothly. Now I always gently tap the pan on the counter before baking to remove air bubbles and even out the surface. It’s a small step, but it helps a lot.
Skipping the Cooling Process Between Rolls
Some people roll the cake once and leave it until completely cool. That can work, but I noticed I got better results when I re-rolled it during cooling.
If you skip this flexibility step, the cake sometimes “sets” too firmly in one position, which increases cracking risk when unrolling later. Even doing one or two gentle re-rolls during cooling helps the sponge stay soft and adjustable. It’s a bit extra effort, but it pays off in the final texture.
Expert Tips for Perfect Cake Roll
- Use gel food coloring for a richer red color
- Use room temperature eggs for better volume
- Always whip egg whites to stiff peaks for a light sponge
- Fold batter gently to avoid losing air
- Do not overfill or the roll may crack
- Chill before slicing for clean, bakery-style spirals
How to Store Red Velvet Cake Roll (So It Stays Soft and Fresh)
I learned this the hard way: a perfectly rolled red velvet cake can go from “bakery-level soft” to “slightly dry disappointment” in just a couple of days if you don’t store it properly.
The first time I made this cake successfully, I left it uncovered in the fridge thinking it would be fine. Next day, the edges were dry, the sponge felt stiff, and the filling had started losing its smooth texture. That’s when I realized storage matters just as much as baking.
Once I started storing it the right way, the cake stayed soft for days and actually tasted better over time.
Refrigerating the Cake Roll (Best Everyday Method)
The most reliable way to store red velvet cake roll is in the refrigerator. After assembling and chilling the cake, keep it wrapped tightly in plastic wrap. This is important because the sponge absorbs fridge air very quickly, which can dry it out. I usually keep it wrapped in two layers:
- First layer: plastic wrap (tight, no air gaps)
- Second layer: an airtight container or cake box
This double protection helps maintain moisture and keeps the cream cheese filling fresh. The cake stays good in the fridge for about 3 to 4 days, and honestly, I feel the flavor improves slightly after the first day because everything settles together.
Freezing Red Velvet Cake Roll (For Longer Storage)
If you want to make this dessert ahead of time for an event or celebration, freezing works surprisingly well. Here’s how I usually do it:
First, wrap the whole cake roll tightly in plastic wrap. Then add a layer of aluminum foil to protect it from freezer burn. You can also slice it into portions before freezing if you want to serve smaller pieces later.
The cake can be frozen for up to 2 months without losing much quality. When you’re ready to eat it, move it to the fridge and let it thaw slowly overnight. This slow thawing helps keep the texture soft instead of watery.
More Red Velvet Recipes
FAQs About Red Velvet Cake Roll
Why did my red velvet cake roll crack?
This is the most common issue, and honestly, it happened to me many times at the start. The main reason is usually rolling the cake too late after baking or overbaking it by even a few minutes. Once the sponge cools flat, it loses flexibility and becomes harder to roll without breaking.
Another hidden reason can be overmixing the batter, which makes the sponge dense instead of airy. A light, soft sponge is what allows the cake to bend instead of crack.
Can I make red velvet cake roll ahead of time?
Yes, and in fact, it often tastes better the next day. I usually make it a night before serving. After chilling overnight in the fridge, the sponge becomes softer and the cream cheese filling sets perfectly. The flavors also blend together more nicely after resting. Just make sure it’s tightly wrapped so it doesn’t dry out in the fridge.
How long does red velvet cake roll stay fresh?
If stored properly in the refrigerator, it stays fresh for about 3 to 4 days. After that, the sponge may start drying out and the filling can lose its creamy texture. I’ve noticed that the best taste is actually within the first 48 hours. If you want to keep it longer, freezing is a better option.
Can I freeze red velvet cake roll?
Yes, you can freeze it quite easily. Wrap it tightly in plastic wrap, then add a layer of foil for extra protection. It can stay in the freezer for up to 2 months. When you want to eat it, thaw it slowly in the refrigerator overnight instead of leaving it at room temperature. This keeps the texture smooth and prevents the filling from becoming watery.
Do I need a jelly roll pan for this recipe?
Yes, a jelly roll pan is highly recommended. A standard baking tray is usually too deep or too small, which affects how evenly the sponge bakes. The thin, even layer is what makes rolling possible without cracks. The ideal size is around 17×12 inches, which gives the perfect thickness for a flexible sponge.
Can I make this without red food coloring?
Yes, you can skip it, but the result won’t look like traditional red velvet cake. Without food coloring, the cake will look more like a light chocolate sponge. The flavor will still be good because cocoa powder, buttermilk, and vanilla still create that classic red velvet taste profile. If appearance matters to you, gel food coloring works best for a rich red color.
Why is my cake roll soggy after refrigeration?
This usually happens if the cake was stored while still warm or not wrapped properly. When warm cake is wrapped, condensation forms inside and makes the sponge soggy. Always make sure the cake is fully cooled before wrapping it for the fridge. Also, use tight plastic wrap to avoid moisture exposure from the fridge air.
Can I use whipped cream instead of cream cheese filling?
Yes, you can, but the taste will be different. Whipped cream alone makes the cake lighter and less tangy. Cream cheese adds structure and a slight richness that balances the sweetness of red velvet sponge. From my experience, the cream cheese version holds better inside the roll and doesn’t collapse as easily after slicing.
Final Thoughts on Red Velvet Cake Roll
Making this red velvet cake roll felt complicated at first, especially when my early attempts kept cracking or turning messy. But after a few tries, I realized it’s not really about difficulty it’s about timing, patience, and handling the sponge gently.
Once you learn to roll it while it’s warm, avoid overbaking, and chill it properly, everything starts coming together naturally. The result is a soft, creamy dessert that looks impressive but feels very doable at home.
What I like most is that it gets easier every time you make it. The process becomes familiar, and the fear of messing up slowly disappears. So even if your first try isn’t perfect, don’t worry. With a little practice, this cake roll can easily become one of your favorite homemade desserts.

Red Velvet Cake Roll Recipe
Ingredients
Red Velvet Sponge
- 1 cup minus 1 tbsp all-purpose flour
- 3 tbsp unsweetened cocoa powder
- 1 tsp baking powder
- 1/2 tsp salt
- 4 large eggs separated
- 3/4 cup granulated sugar
- 5 tbsp buttermilk
- 1/4 cup vegetable oil
- 1 tsp vanilla extract
- 1 tsp white vinegar
- 2 tsp red food coloring
Cream Cheese Filling
- 4 oz cream cheese softened
- 3/4 cup heavy whipping cream cold
- 1/4 cup powdered sugar
- 3/4 tsp vanilla extract
Instructions
- Preheat oven to 350°F (175°C). Line a jelly roll pan with parchment paper.
- Whisk flour, cocoa powder, baking powder, and salt together.
- Beat egg yolks with sugar, then add buttermilk, oil, vanilla, vinegar, and food coloring.
- Gently mix dry ingredients into wet mixture.
- Whip egg whites until stiff peaks form and fold into batter.
- Spread batter evenly in pan and bake for 10–12 minutes.
- Roll cake while warm using parchment paper and let cool.
- Whip cream, powdered sugar, vanilla, and cream cheese until smooth and thick.
- Unroll cake, spread filling evenly, and re-roll gently.
- Chill for at least 1 hour before slicing.
Notes
- Roll the cake while warm to prevent cracks.
- Don’t overbake—keep the sponge soft and flexible.
- Use room temperature ingredients (except cream).
- Chill before slicing for best texture and clean swirls.
- Gel food coloring gives a richer red color.
- Flavor improves after resting overnight.