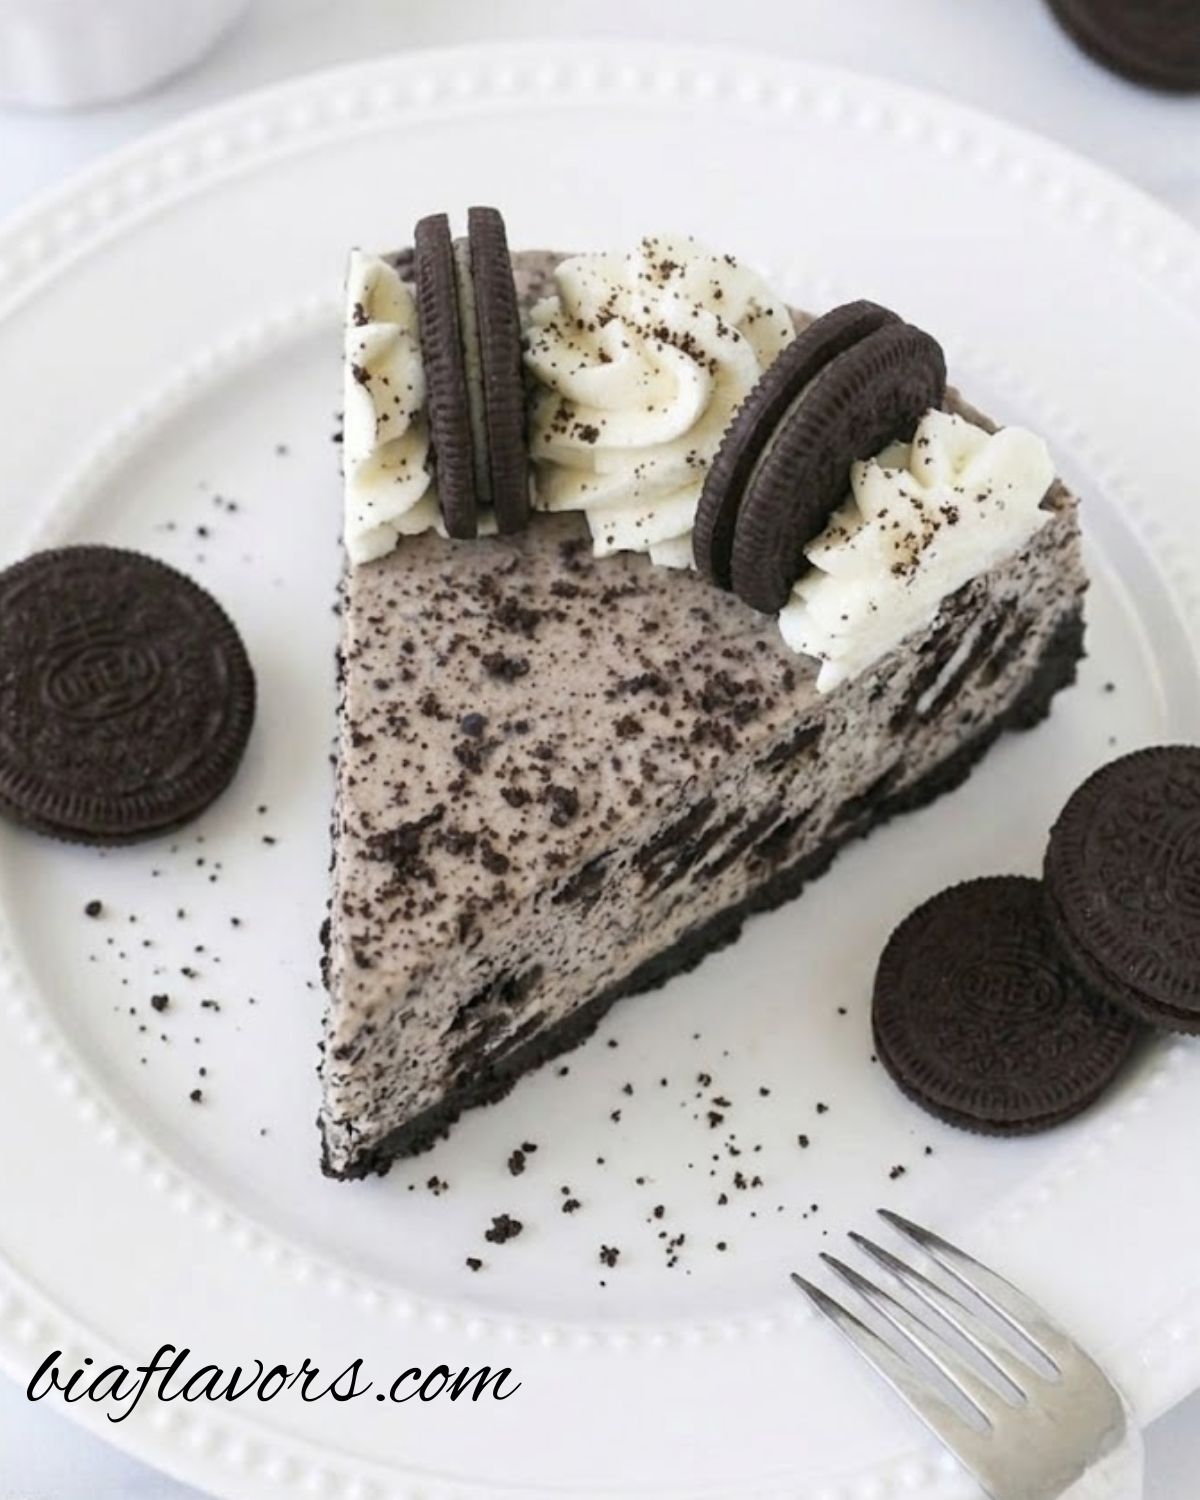
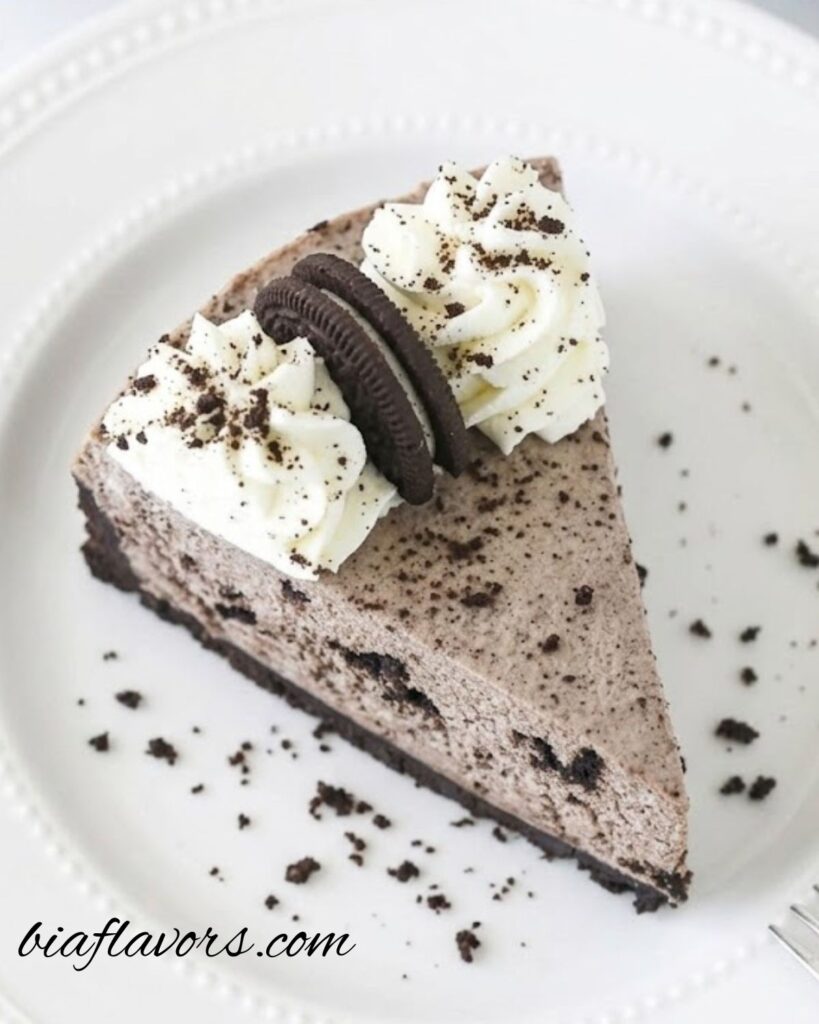
Craving something sweet but don’t want to turn on the oven? This No Bake Oreo Cheesecake is the perfect quick fix. It’s creamy, rich, and packed with Oreo flavor, yet super easy to make at home. Honestly, even beginners can make it without any stress. Trust me, it comes out so delicious that it will likely become your favorite no-bake dessert for every special moment.

Why We Love This Recipe
This No Bake Oreo Cheesecake is loved because it is simple, quick, and always turns out delicious. Honestly, you don’t need any baking skills or fancy equipment to make it. It’s creamy, smooth, and has that perfect Oreo crunch in every bite. That’s why I used this recipe whenever I want something easy but impressive for guests or family. Trust me, it feels like a bakery-style dessert made at home without any stress.
What I really love about this cheesecake is how versatile it is. You can easily adjust the sweetness or add extra chocolate chips if you like it richer. It’s also a fun dessert to make with kids they can crush the Oreos or help layer the cheesecake. Likely, once you try it, you’ll find yourself making it for birthdays, parties, or even just a cozy treat at home.
Honestly, recipes like this make dessert time exciting but still simple, and that’s why it’s become a staple in my kitchen.
Ingredients You’ll Need For No Bake Oreo Cheesecake
- Oreo crumbs (3 cups / 403g) – gives a rich chocolate base and strong Oreo flavor
- Butter (5 tbsp / 70g, melted) – helps bind crumbs together and creates a firm crust
For the filling
- Cream cheese (24 oz / 678g, room temperature) – creates creamy, smooth cheesecake texture
- Sugar (1/2 cup / 104g) – balances tanginess and adds sweetness
- Vanilla extract (2 tsp) – enhances flavor and gives a warm aroma
- Heavy whipping cream (1 1/4 cups / 300ml, cold) – makes filling light, fluffy, and airy
- Powdered sugar (3/4 cup / 86g) – helps stabilize whipped cream and adds smooth sweetness
- Oreo crumbs (1 1/2 cups / 162g) – adds strong Oreo taste inside the filling
- Chopped Oreos (7–10, optional) – gives extra crunch and texture bites
For whipped cream topping
- Heavy whipping cream (3/4 cup / 180ml, cold) – used for soft decorative topping
- Powdered sugar (6 tbsp / 44g) – sweetens and stabilizes whipped cream
- Vanilla extract (1/2 tsp) – adds light flavor
- Oreo crumbs (optional) – for final decoration and extra crunch
- Oreos (cut in half) – used for garnish and presentation
How to Make No Bake Oreo Cheesecake
For the crust
Start by preparing your pan so everything comes out nicely later. Line a 9-inch springform pan with parchment paper and lightly grease the sides.
Now crush your Oreos into fine crumbs and mix them with melted butter until everything is evenly combined. Honestly, this step is simple but very important for a good base.
Press this mixture firmly into the bottom of the pan and slightly up the sides. Take your time here, because a well-pressed crust holds everything together beautifully. Once done, place the pan in the fridge while you move on to the filling.
For the filling
In a large bowl, beat cream cheese, sugar, and vanilla extract together until the mixture becomes smooth and creamy. Don’t rush this step, smooth texture is the key here.
In another bowl, whip the cold heavy cream with powdered sugar until stiff peaks form.
Now gently fold the whipped cream into the cream cheese mixture in two parts. Be soft and careful so the mixture stays light and fluffy.
After that, add Oreo crumbs and chopped Oreos. Fold them in gently so every bite gets that delicious Oreo texture. That’s why I used both crumbs and chunks it makes a big difference.
Pour this mixture over your chilled crust and spread it evenly.
Chilling time
Now comes the most important part, patience. Place your cheesecake in the fridge for at least 5–6 hours, but overnight is even better. Trust me, this is what gives it the perfect firm and creamy texture.
For the topping
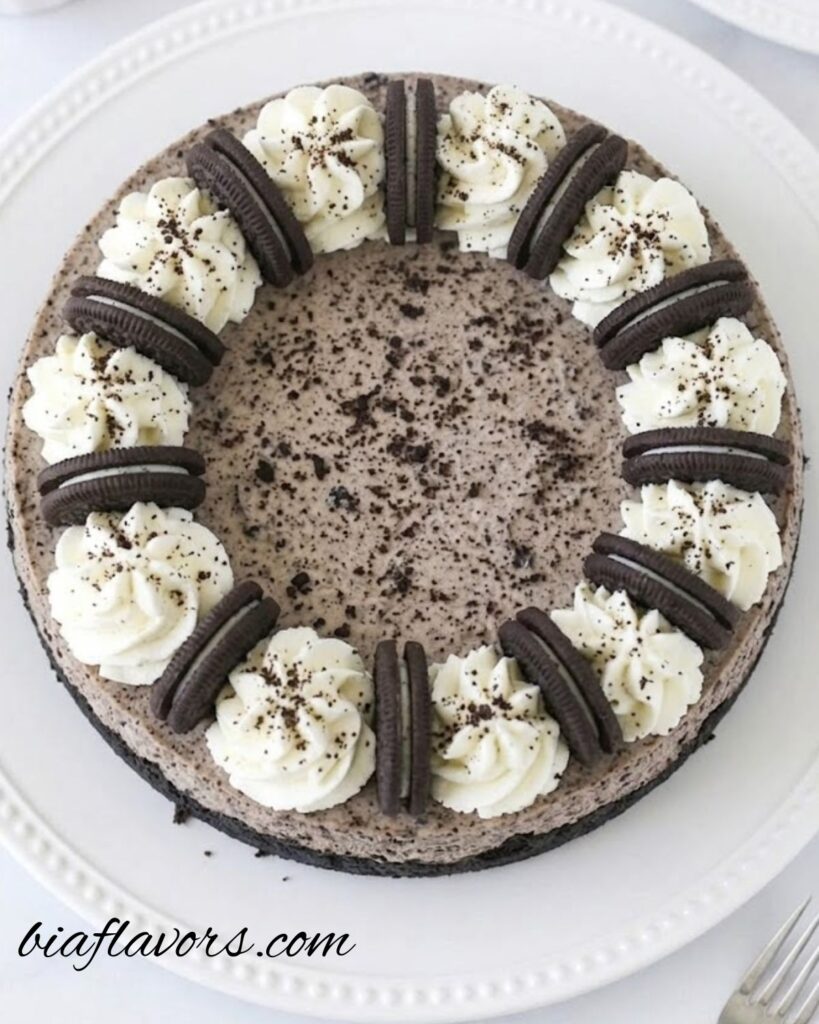
Once it’s set, whip the cream, powdered sugar, and vanilla extract until stiff peaks form. Carefully remove the cheesecake from the pan and place it on your serving plate. Now pipe whipped cream around the edges and decorate with Oreo halves and a little crumb sprinkle. Honestly, this final step makes it look like a bakery-style dessert at home. Keep it chilled until you’re ready to serve.
Expert Tips For The Perfect No Bake Oreo Cheesecake
Trust me, small details make a big difference in this No Bake Oreo Cheesecake, so don’t skip these tips if you want that perfect bakery-style result.
- Make sure your cream cheese is at room temperature before mixing. Trust me, this helps you get a smooth, lump-free texture without extra effort.
- Always use cold heavy cream when whipping. That’s likely the key reason your filling turns out light and fluffy.
- Don’t overmix after adding whipped cream. Gently fold it in so the texture stays airy instead of heavy.
- Press the crust firmly into the pan. That’s why I always take a few extra seconds here it prevents crumbling later.
- Give it enough chilling time. Honestly, 5–6 hours is minimum, but overnight chilling gives the best firm slice.
- Use a hot knife (wipe and dip in warm water) for clean slices. It makes the presentation look professional.
- Add Oreo chunks at the end instead of mixing too hard, so you get that crunchy bite in every slice.
If you follow these small steps, trust me, your cheesecake will likely turn out perfect every single time.
Ingredient Variations (Customize Your Cheesecake Your Way)
One of the best things about this recipe is how flexible it is. Honestly, you can easily adjust it based on what you like or what you already have at home.
- You can replace regular Oreos with chocolate Oreos or even golden Oreos for a different flavor twist.
- If you want a stronger chocolate taste, add a little melted dark chocolate into the filling.
- For a lighter version, you can reduce the Oreo chunks and keep mostly crumbs for a smoother texture.
- If you don’t have heavy cream, whipped topping can also work, though the texture will be slightly different. That’s why I usually prefer fresh cream for the best result.
- You can add a layer of chocolate ganache on top if you want it extra rich and bakery-style.
- For a fun twist, try adding a few strawberries or caramel drizzle on serving. It gives a nice balance to the sweetness.
Storage Tips
This cheesecake stores really well, which makes it perfect for preparing ahead of time.
- Keep it in the refrigerator in an airtight container or covered tightly with plastic wrap.
- It stays fresh for about 4–5 days, but honestly, it tastes best within the first 2–3 days.
- Don’t leave it outside for too long because it can soften quickly.
- If you want clean slices later, chill it again for a few minutes before serving.
FAQs About These No Bake Oreo Cheesecake
Q: Can I make this No Bake Oreo Cheesecake without heavy cream?
Yes, you can make it without heavy cream by using whipped topping (like Cool Whip). Honestly, it still works well, but the texture becomes a little less rich and less creamy compared to fresh whipped cream. That’s why I usually prefer heavy cream for the best bakery-style result.
Q: Why is my cheesecake not setting properly?
This usually happens when it hasn’t chilled long enough or the cream wasn’t whipped to stiff peaks. Trust me, chilling time is very important here. You should refrigerate it for at least 5–6 hours, but overnight is the safest option for a firm, clean slice.
Q: Can I freeze No Bake Oreo Cheesecake?
Yes, you can freeze it for up to 1 month. Wrap it properly in plastic wrap and then foil to avoid freezer burn. When you want to serve it, thaw it slowly in the fridge for a few hours. Likely, the texture will still stay creamy if handled properly.
Q: How do I get clean and perfect slices?
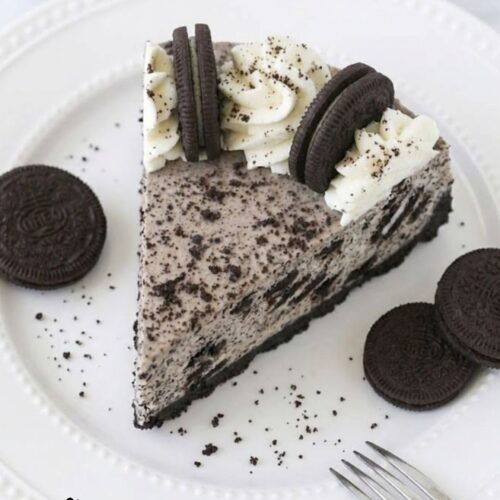
Honestly, this is a small trick but very useful. Use a sharp knife and dip it in warm water before each slice. Wipe it clean every time. That’s why I always follow this step when I want neat, bakery-style presentation.
Q: Can I reduce the sweetness in this recipe?
Yes, you can slightly reduce sugar, but keep in mind Oreos already add sweetness. So don’t reduce too much or the balance might feel off. Trust me, a little sweetness works best with this dessert.
Q: Can I prepare this cheesecake a day before serving?
Absolutely yes. In fact, I highly recommend it. Overnight chilling makes the texture firmer and flavors more developed. That’s why I usually prepare it a day before any event.
Final Thoughts
This No Bake Oreo Cheesecake is one of those desserts that never disappoints. It’s simple, creamy, and gives that perfect bakery-style taste without any oven or complicated steps. Trust me, even if you’re a beginner, you can easily make it and still get amazing results.
What I really love about this recipe is how reliable it is. Likely, once you try it, it will become your go-to dessert for special occasions, family gatherings, or even just a quick sweet craving at home. That’s why I always keep it in my list of easy recipes.
At the end of the day, desserts like this are not just about taste, they’re about comfort and happiness too. And honestly, this cheesecake gives both in every bite.
No Bake Oreo Cheesecake
Ingredients
For the crust
- Oreo crumbs 3 cups / 403g
- Butter melted (5 tbsp / 70g)
For the filling
- Cream cheese 24 oz / 678g, room temp
- Sugar 1/2 cup / 104g
- Vanilla extract 2 tsp
- Heavy whipping cream 1 1/4 cups / 300ml, cold
- Powdered sugar 3/4 cup / 86g
- Oreo crumbs 1 1/2 cups / 162g
- Chopped Oreos 7–10, optional
For whipped cream topping
- Heavy whipping cream 3/4 cup / 180ml, cold
- Powdered sugar 6 tbsp / 44g
- Vanilla extract 1/2 tsp
- Oreos / Oreo crumbs for garnish
Instructions
- Mix Oreo crumbs with melted butter. Press into a 9-inch springform pan. Chill.
- Beat cream cheese, sugar, and vanilla until smooth. Whip cream with powdered sugar until stiff peaks form. Fold into cream cheese mixture. Add Oreo crumbs and chopped Oreos. Pour over crust.
- Refrigerate for 5–6 hours or overnight until set.
- Whip cream with sugar and vanilla. Pipe on cheesecake and decorate with Oreos and crumbs.
Notes
- Make sure the cream cheese is at room temperature for a smooth, lump-free filling.
- Always use cold heavy cream when whipping to get the right fluffy texture.
- Don’t rush the chilling time — overnight chilling gives the best firm and creamy result.
- Fold the whipped cream gently to keep the filling light and airy.
- Press the crust firmly so it holds its shape when slicing.
- For clean slices, use a warm knife and wipe it after every cut.
- You can adjust Oreo quantity based on how strong you want the flavor to be.