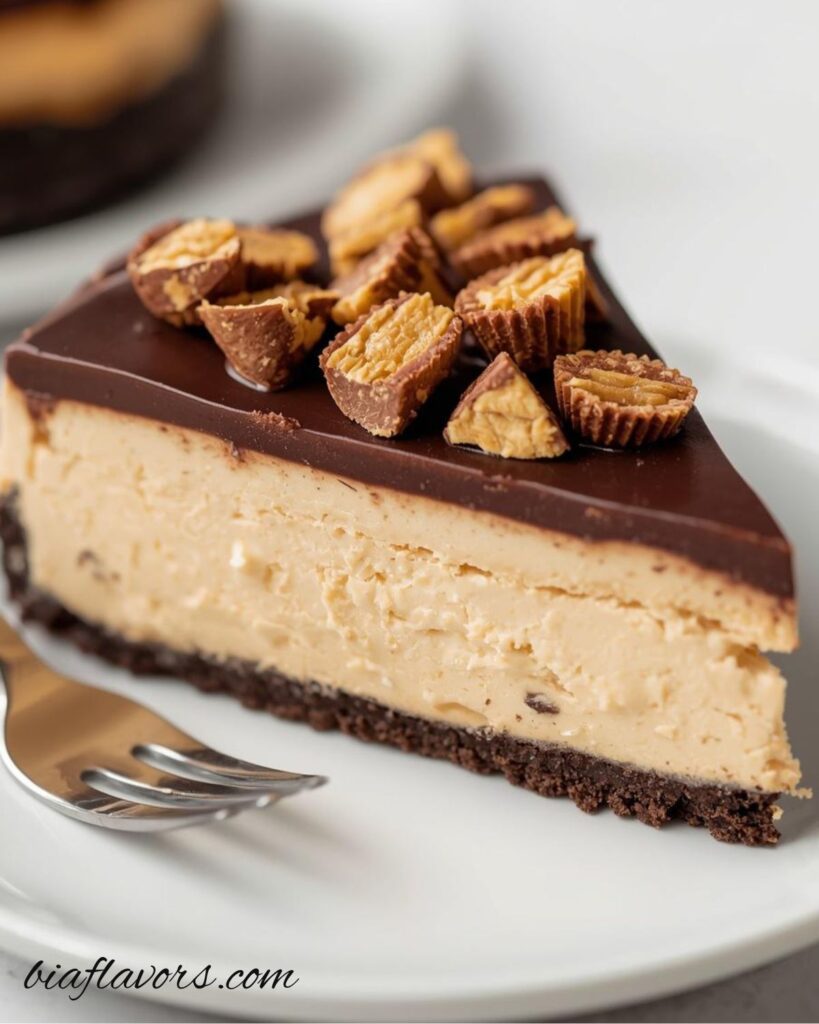
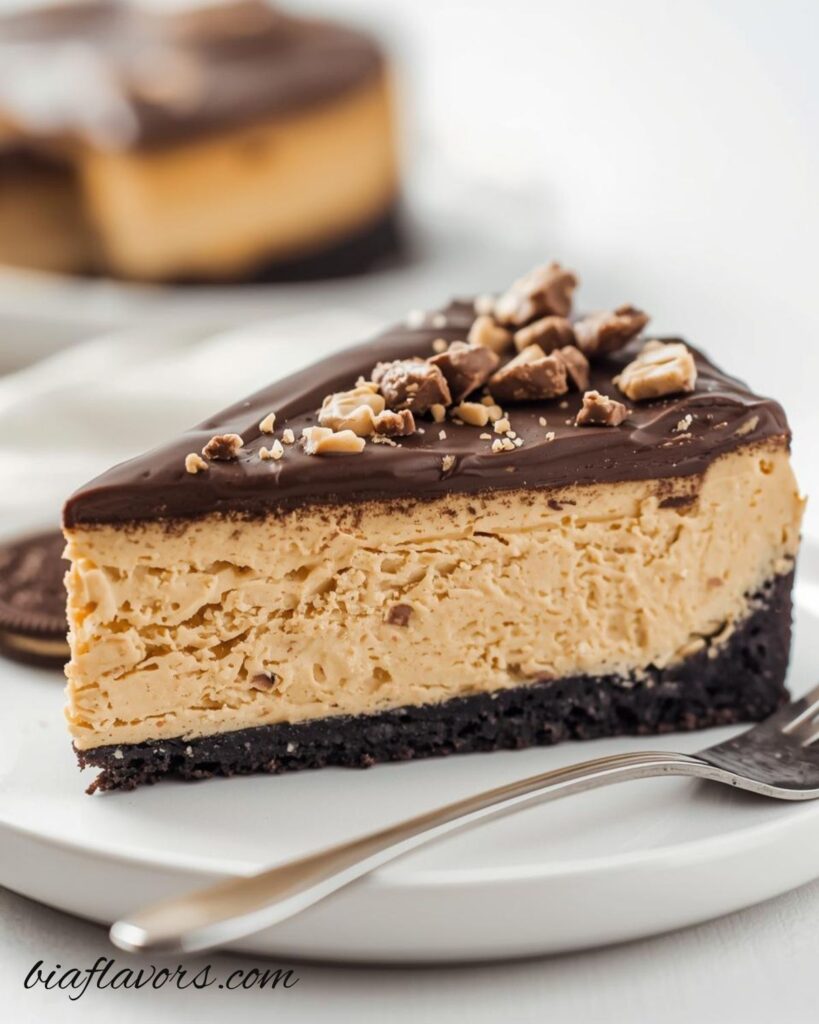
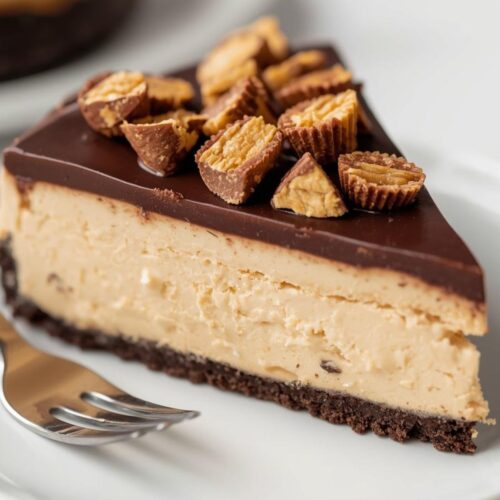
If you love the combination of chocolate and peanut butter, this no bake Reese’s peanut butter cheesecake is honestly going to feel like a dream dessert. It’s rich, creamy, and packed with that classic Reese’s flavor in every bite, but the best part is you don’t even need to turn on your oven.
I usually make this when I want something impressive but still easy, and trust me, it never fails to get attention at the table. That smooth cheesecake filling with chunks of Reese’s on a chocolatey base is the kind of dessert that feels indulgent but is actually simple to put together. That’s why this recipe has become one of my favorites for gatherings and special treats at home.
Why We Love This Recipe
This no bake Reese’s peanut butter cheesecake is one of those desserts that just makes everyone happy the moment they try it. It’s rich, creamy, and has that perfect balance of chocolate and peanut butter that never goes out of style.
- No oven needed
That’s why I love it so much. You just mix, layer, and chill—perfect for hot days or when you want something quick. - Creamy and smooth texture
The cheesecake filling is soft, rich, and melts in your mouth, which makes every bite feel indulgent. - Packed with Reese’s flavor
The chunks of Reese’s add little bites of chocolate and peanut butter throughout, making it honestly hard to stop at one slice. - Perfect for any occasion
Whether it’s a family gathering, party, or just a weekend treat, this dessert always feels special without much effort. - Beginner-friendly recipe
Even if you’ve never made cheesecake before, this one is likely going to turn out great because it’s so simple and forgiving.
Ingredients You’ll Need For No Bake Reese’s Peanut Butter Cheesecake
Crust
- Oreo cookie crumbs – gives a rich chocolate base and adds crunch and structure to the cheesecake
- Butter (melted) – binds the crumbs together and helps form a firm, sliceable crust
Cheesecake Filling
- Cream cheese (room temperature) – creates the smooth, creamy cheesecake texture
- Sugar – sweetens the filling and balances the tanginess of cream cheese
- Creamy peanut butter (not natural) – adds rich, nutty flavor and makes the filling extra smooth
- Vanilla extract – enhances overall flavor and adds warmth
- Sour cream – gives a slight tang and makes the filling lighter and creamier
- Mini Reese’s (chopped) – adds chocolate and peanut butter chunks in every bite
- Heavy whipping cream (cold) – whips into volume and makes the cheesecake light and airy
- Powdered sugar – sweetens the whipped cream and helps stabilize the texture
Chocolate Ganache Topping
- Semi-sweet chocolate chips – creates a rich, smooth chocolate topping
- Heavy whipping cream – melts the chocolate into a silky ganache
- Mini Reese’s (chopped) – adds extra texture and Reese’s flavor on top
How to Make No Bake Reese’s Peanut Butter Cheesecake
Prepare the crust
Line a 9-inch springform pan with parchment paper and lightly grease the sides. In a bowl, mix Oreo crumbs with melted butter until the texture looks like wet sand. Press it firmly into the bottom and slightly up the sides of the pan. Honestly, pressing it well here makes a big difference for clean slices later. Chill in the fridge while you prepare the filling.
Make the cheesecake filling base
In a large mixing bowl, beat cream cheese and sugar until completely smooth and creamy. Take your time here because any lumps will affect the final texture.
Add flavor ingredients
Mix in the peanut butter and vanilla extract until fully combined. Then add sour cream and mix again until smooth. This step is where the filling starts to get that rich, balanced flavor that makes this cheesecake so good.
Add Reese’s pieces
Gently stir in the chopped mini Reese’s. This adds little bites of chocolate and peanut butter throughout the cheesecake, which honestly makes every slice more exciting.
Whip the cream
In a separate bowl, whip cold heavy cream with powdered sugar until stiff peaks form. This is what gives the cheesecake its light and fluffy texture, so don’t rush this step.
Combine everything
Gently fold the whipped cream into the cheesecake mixture in two parts. Be soft with your mixing because overmixing can deflate the texture.
Assemble and chill
Spread the filling evenly over the chilled crust. Smooth the top and refrigerate for at least 5–6 hours or overnight until fully set. Trust me, patience here gives the best texture.
Make the ganache
Heat heavy cream until just starting to boil, then pour over chocolate chips. Let it sit for a few minutes, then whisk until smooth and glossy.
Finish the cheesecake
Pour ganache over the set cheesecake and spread evenly. Top with chopped Reese’s for extra flavor and texture. Chill again until the topping sets, then slice and serve.
Expert Tips for the Perfect No Bake Reese’s Peanut Butter Cheesecake
- Use room temperature cream cheese
Honestly, this is the most important step. It blends smoothly and prevents any lumps in your filling. - Don’t use natural peanut butter
That’s why I specifically used creamy peanut butter here. Natural peanut butter can separate and change the texture of the cheesecake. - Whip the cream until stiff peaks
This gives the cheesecake its light, fluffy texture. If it’s under-whipped, the filling may turn soft and not set properly. - Fold gently, don’t mix hard
When combining whipped cream with the cheesecake base, be gentle. Overmixing can deflate the air and make it heavy. - Chill long enough
Honestly, this step makes or breaks the recipe. Let it chill overnight if possible so it sets perfectly and slices cleanly. - Clean knife for neat slices
Dip your knife in warm water and wipe it before each cut. This gives those bakery-style clean slices. - Let ganache cool slightly before pouring
If it’s too hot, it can melt the cheesecake layer. A slightly thick but pourable ganache works best.
Ingredient Variations
- Swap Oreo crust with chocolate graham crackers
If you want a slightly less sweet base, chocolate graham crackers work really well and still give a nice chocolate flavor. - Use crunchy peanut butter
Honestly, if you like a bit of texture, crunchy peanut butter adds small peanut bits that make the filling more interesting. - Add extra Reese’s layers
That’s why I sometimes mix half into the filling and save half for the top. It makes every bite more loaded and indulgent. - Try white chocolate drizzle
Instead of only ganache, you can add a light white chocolate drizzle for a sweeter contrast. - Add a pinch of salt
A small pinch in the filling balances the sweetness and enhances the peanut butter flavor really well. - Make it chocolate peanut butter overload
Mix mini chocolate chips into the filling along with Reese’s for an even richer dessert experience.
Storage Tips
- Refrigeration is a must
Keep the cheesecake stored in the fridge at all times. Honestly, this dessert stays best when it’s properly chilled and firm. - Use an airtight container or cover well
Cover the cheesecake tightly with plastic wrap or store in an airtight container so it doesn’t absorb fridge odors or dry out. - Best freshness time
It stays fresh for about 3–4 days, and the texture is at its best within the first 48 hours. - Freeze for longer storage
You can freeze it for up to 1–2 months. Slice it first, wrap each piece individually, and store in a freezer-safe container. - Thawing tips
Let frozen slices thaw in the fridge overnight for the best creamy texture. Don’t thaw at room temperature for too long or it may soften too much. - Keep toppings in mind
If possible, add extra ganache or Reese’s after thawing for the freshest look and taste.
Try More Cheesecake Desserts
- Funfetti Cheesecake
- No Bake Chocolate Cheesecake
- Biscoff Cheesecake
- Oreo Cheesecake
- Mini Cheesecakes
FAQs About These No Bake Reese’s Peanut Butter Cheesecake
Why is my no bake cheesecake not setting?
Honestly, this usually happens if the whipped cream wasn’t whipped to stiff peaks or if the cheesecake didn’t chill long enough. It really needs at least 5–6 hours, but overnight is best.
Can I use natural peanut butter?
I don’t recommend it. Natural peanut butter can separate and make the filling runny. That’s why creamy processed peanut butter works much better here.
Can I make this ahead of time?
Yes, and honestly it’s even better when made a day before. The flavors settle and the texture becomes firmer and creamier.
Can I skip sour cream?
You can, but it does add a slight tang and helps balance the sweetness. Without it, the filling may taste a bit heavier.
Why did my ganache turn grainy?
This can happen if the chocolate is overheated or not mixed properly. Let the cream sit on the chocolate for a few minutes before whisking gently.
Can I use whipped topping instead of heavy cream?
Yes, but real whipped cream gives a better texture and richer taste. That’s why I personally prefer whipping fresh cream.
Final Thoughts
Honestly, this no bake Reese’s peanut butter cheesecake is one of those desserts that always feels a little special, even though it’s actually quite simple to make. The creamy peanut butter filling, chocolate Oreo crust, and rich ganache on top come together in a way that just works every single time.
That’s why I keep coming back to this recipe whenever I need a crowd-pleasing dessert. It looks impressive, tastes indulgent, and doesn’t require turning on the oven. Trust me, once you make it, it’s likely going to become one of those recipes you save for birthdays, gatherings, or even just a weekend treat for yourself.
The best part is how flexible it is you can easily adjust the toppings or add more Reese’s depending on how rich you want it. Honestly, it’s hard to go wrong with this one.
No Bake Reese’s Peanut Butter Cheesecake
Ingredients
Crust
- 3 cups 403g Oreo crumbs
- 6 tbsp butter melted
Cheesecake Filling
- 24 oz cream cheese room temperature
- 1/2 cup 104g sugar
- 1 1/4 cups 350g creamy peanut butter
- 1 tsp vanilla extract
- 1/4 cup 58g sour cream
- 20 mini Reese’s chopped
- 1 1/4 cups 300ml heavy whipping cream, cold
- 3/4 cup 86g powdered sugar
Chocolate Ganache
- 4 oz semi-sweet chocolate chips
- 5 tbsp heavy whipping cream
- 15 mini Reese’s chopped
Instructions
- Mix Oreo crumbs and melted butter, press into a 9-inch springform pan. Chill.
- Beat cream cheese and sugar until smooth.
- Add peanut butter, vanilla, and sour cream, mix well.
- Stir in chopped Reese’s.
- Whip heavy cream with powdered sugar until stiff peaks form.
- Fold whipped cream into cheesecake mixture gently.
- Spread filling over crust and chill 5–6 hours or overnight.
- Heat cream, pour over chocolate chips, whisk into ganache.
- Pour ganache over cheesecake and top with Reese’s.
- Chill again, slice, and serve.
Notes
- Honestly, this cheesecake sets best when chilled overnight, so don’t rush the chilling time if you want clean, firm slices.
- Make sure your cream cheese is at room temperature or it won’t mix smoothly and may leave small lumps in the filling.
- That’s why I recommend using creamy peanut butter instead of natural—it keeps the texture stable and rich.
- If your whipped cream feels too soft, keep whipping until stiff peaks form; this is what helps the cheesecake hold its shape.
- Trust me, folding the whipped cream gently is key. Overmixing can make the filling lose its light, airy texture.
- For extra flavor, you can add more chopped Reese’s between layers or on top right before serving.
- Slice with a warm knife for clean, bakery-style cuts every time.