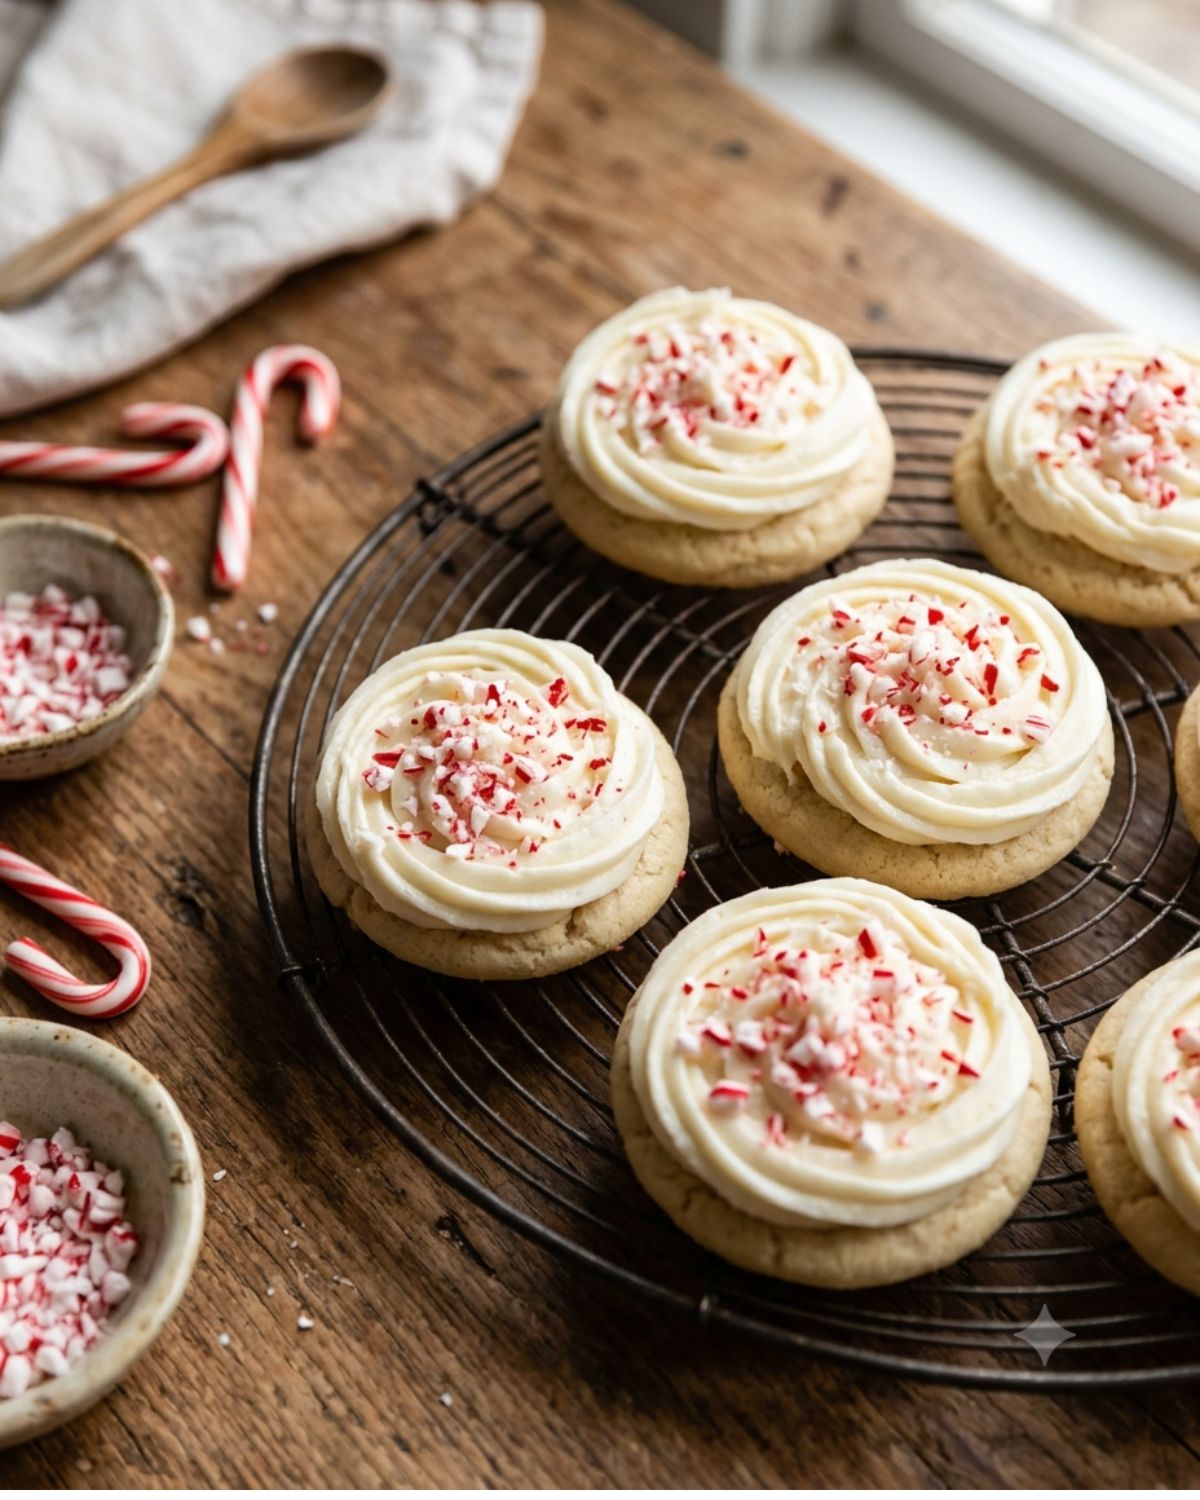
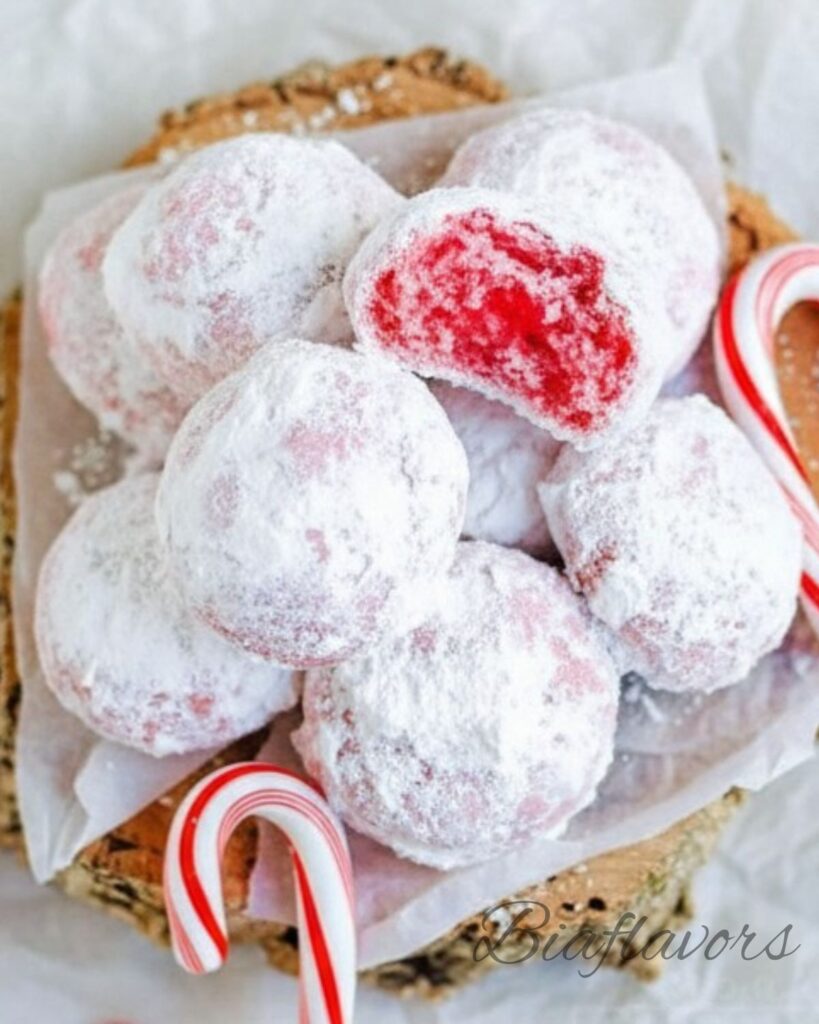
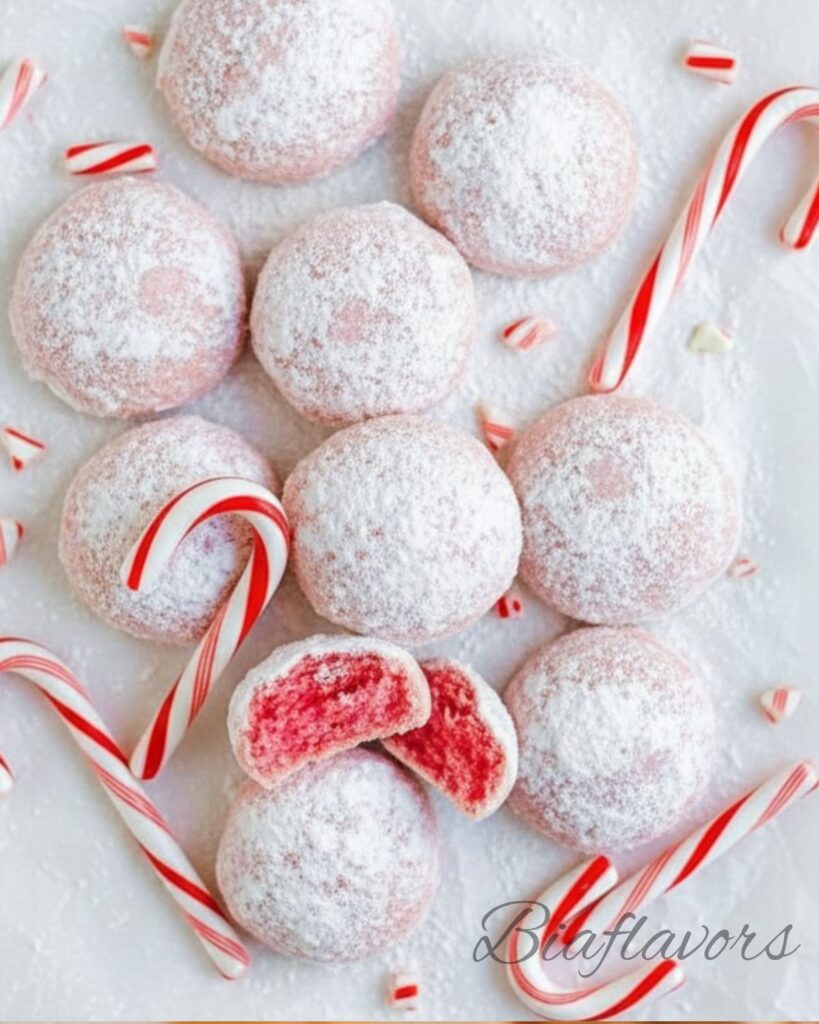
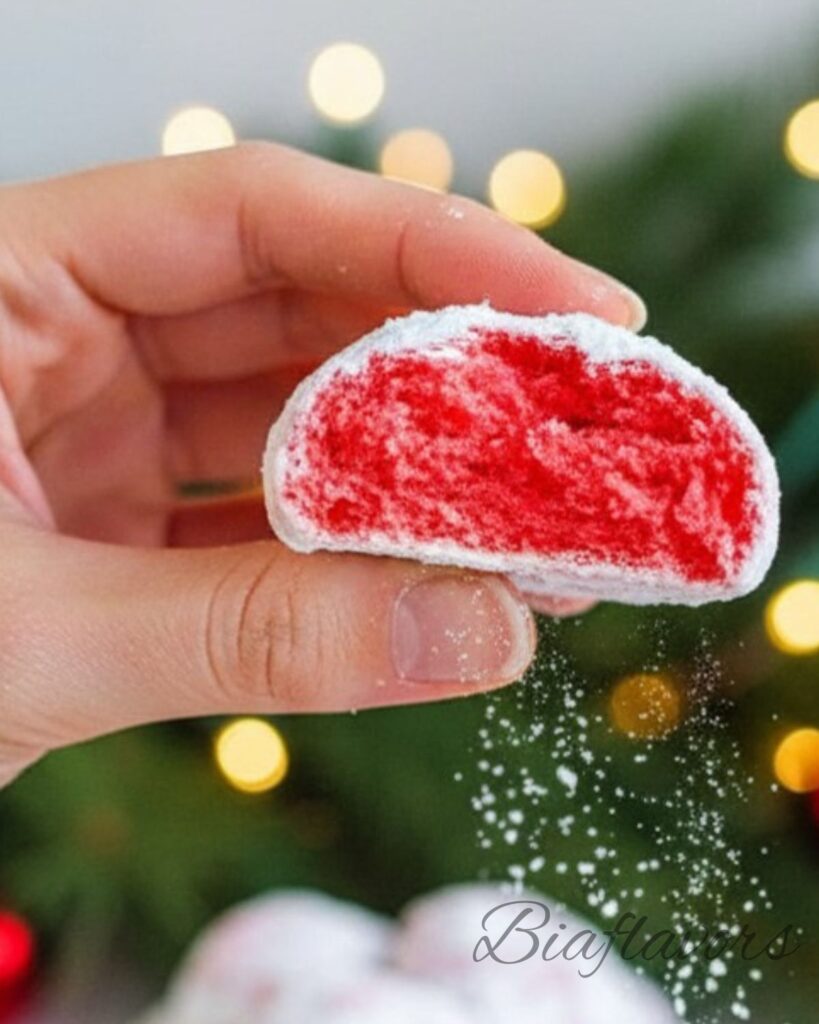
These peppermint snowball cookies are soft, buttery, and melt-in-your-mouth little treats coated in a snowy layer of powdered sugar with a refreshing hint of peppermint. Every bite feels light, sweet, and perfectly festive, making them a holiday favorite that disappears fast from the cookie tray.
When I first started making snowball cookies, I loved how simple they were but wanted to give them a seasonal twist. Adding peppermint changed everything it turned a classic buttery cookie into something cool, refreshing, and perfect for Christmas baking.
They’re the kind of cookies that make your kitchen smell like the holidays and bring that cozy, homemade feeling with every batch. Simple ingredients, easy steps, and a beautiful snowy finish make them truly special.
Why You’ll Love These Peppermint Snowball Cookies
These peppermint snowball cookies are soft, buttery, and melt-in-your-mouth with a light, snowy coating of powdered sugar and a refreshing hint of peppermint. Every bite feels delicate, sweet, and perfectly festive, making them a holiday classic you’ll want to bake again and again.
They’re also incredibly simple to make with basic ingredients and no complicated steps. The texture is rich and crumbly in the best way, while the peppermint adds a cool, holiday twist that makes them stand out on any cookie tray.
Perfect for Christmas baking, gifting, or cozy winter evenings, these cookies bring a warm homemade feel with a refreshing festive flavor.
Ingredients for Peppermint Snowball Cookies
- 1 cup unsalted butter, softened
- 2/3 cup powdered sugar, sifted
- 2 1/4 cups all-purpose flour (spooned & leveled)
- 1/2 tsp salt
- 1 tsp peppermint extract
- Red or pink food coloring (as needed)
- 3/4 cup Andes peppermint baking chips
- Additional powdered sugar for coating
How to Make Peppermint Snowball Cookies
Cream the butter and sugar
In a large mixing bowl, add the softened butter and sifted powdered sugar. Beat them together for about 2–3 minutes until the mixture becomes very light, fluffy, and pale in color. This step is important because it adds air into the dough, which gives the cookies their soft, melt-in-your-mouth texture.
Mix in flavor and dry ingredients
Add the peppermint extract and salt to the butter mixture and mix until combined so the flavor is evenly distributed. Then slowly add the flour and mix on low speed just until a soft dough forms. Be careful not to overmix, as this can make the cookies dense instead of delicate.
Add color and peppermint chips
Add a few drops of red or pink food coloring and gently mix until the dough reaches a soft festive shade. Then fold in the Andes peppermint baking chips, making sure they are evenly spread throughout the dough so every cookie has little bursts of peppermint flavor.
Chill the dough for best shape
Cover the dough and place it in the refrigerator for at least 30 minutes. Chilling helps the butter firm up, which prevents spreading in the oven and makes the dough easier to roll into neat cookie balls.
Shape into snowball cookies
Preheat your oven to 375°F (190°C) and line a baking sheet with parchment paper. Scoop about 1 tablespoon of dough and roll it gently between your hands into smooth, even balls. Place them on the baking sheet with a little space between each one so they bake evenly.
Bake until just set
Bake for 7 to 8 minutes, keeping a close eye on them. The cookies should stay very pale with only a slight golden color on the bottom. This keeps them soft and tender inside.
Coat in powdered sugar
Let the cookies cool on the baking sheet for about 5 minutes, just until they are safe to handle but still slightly warm. Roll them gently in powdered sugar, then place them on a tray. Once completely cooled, roll them again in powdered sugar for a thick, snowy coating that gives them their signature look.
Final setting and storage
Allow the cookies to cool completely before storing. Place them in an airtight container so they stay soft, buttery, and fresh. The peppermint flavor becomes even more noticeable after a few hours, making them perfect for make-ahead holiday baking.
Expert Tips for Perfect Peppermint Snowball Cookies
Use properly softened butter
Make sure the butter is soft enough to press with your finger but not melted. This helps create a light, fluffy dough that bakes into tender cookies.
Don’t overmix the dough
Once you add the flour, mix only until it comes together. Overmixing can make the cookies dense instead of soft and crumbly.
Chill for better shape
Always chill the dough for at least 30 minutes. This step helps the cookies hold their round shape and prevents spreading in the oven.
Keep cookies pale while baking
These cookies should not brown much. Remove them when the bottoms are just slightly golden to keep them soft and delicate.
Double coat in powdered sugar
For that classic snowy look, coat them twice—once while slightly warm and again after they fully cool. This gives a thick, beautiful sugar coating.
Handle gently while warm
They are very delicate right out of the oven. Let them rest for a few minutes before moving or coating to avoid breaking.
Personal tip
For extra peppermint flavor, let the cookies sit overnight the mint taste becomes smoother and more refreshing the next day.
Common Mistakes to Avoid
Using cold or melted butter
If the butter is too cold, it won’t cream properly and the dough will be dense. If it’s melted, the cookies will spread too much. Always use softened butter for the right texture.
Skipping the creaming step
Not beating butter and sugar long enough can result in heavy cookies. Creaming properly adds air, which makes them soft and melt-in-your-mouth.
Overmixing after adding flour
Once flour is added, overmixing can develop gluten and make the cookies tough instead of delicate and crumbly.
Not chilling the dough
Skipping chilling can cause the cookies to spread and lose their round snowball shape. Chilling helps them hold structure during baking.
Overbaking
These cookies should stay pale. If they brown too much, they’ll become dry instead of soft and buttery.
Coating too late or too early
If you wait too long, powdered sugar won’t stick well. If they’re too hot, they may absorb too much sugar. Lightly warm cookies work best for the first coat.
Not double coating
One coating of powdered sugar isn’t enough for the classic snowy look. A second coating after cooling gives that perfect festive finish.
Storage Tips
At room temperature
Store peppermint snowball cookies in an airtight container at room temperature for up to 4 days. Keep them in a cool, dry place so they stay soft and the powdered sugar coating remains fresh.
Layering for freshness
If stacking cookies, place parchment paper between layers. This prevents them from sticking together and keeps the snowy coating intact.
In the refrigerator
You can refrigerate them for up to 1 week in an airtight container. Let them sit at room temperature for about 10–15 minutes before serving so they soften again.
Freezing option
These cookies freeze very well for up to 2 months. Freeze them in a single layer first, then transfer to a freezer-safe container or bag. Thaw at room temperature before serving.
Best texture tip
For the best melt-in-your-mouth texture, always serve them at room temperature. The butter-based dough softens slightly and gives that delicate crumbly bite.
Make-ahead tip
You can also prepare the dough in advance and refrigerate it for up to 2–3 days before baking, making holiday baking much easier.
Serving Suggestions
Classic holiday platter
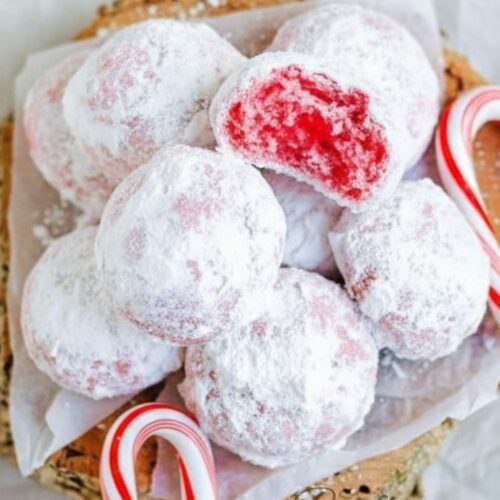
Serve peppermint snowball cookies on a festive dessert tray with other holiday treats like fudge, sugar cookies, and brownies. Their snowy coating makes them stand out beautifully.
With hot drinks
Pair them with hot chocolate, coffee, or peppermint tea. The warm drink slightly softens the cookie, creating a melt-in-your-mouth bite with cozy flavor.
Gift boxes
Pack them in small tins or decorative boxes for homemade gifts. Their pretty powdered sugar coating makes them look elegant and festive for sharing.
Dessert table highlight
Place them on Christmas or winter dessert tables as a light, sweet option. Their soft texture balances richer desserts like cakes and pies.
After-meal treat
Serve them after dinner as a light sweet bite. Their delicate peppermint flavor feels refreshing and not overly heavy.
Cozy snack moment
Enjoy them with a warm drink while relaxing at home. They’re simple, comforting, and perfect for winter evenings.
More Cookie Recipes You’ll Love
- Brookies Cookies
- Lemon Crinkle Cookies
- Chocolate Chip Cheesecake Cookies
- Double Chocolate Sandwich Cookies
- Chocolate Chip Biscoff Cookies
- Chocolate Mint Cookies
- Pecan Pie Cookies
- Caramel Stuffed Cookies
- Red Velvet Cookie Sandwiches
- Chocolate chip banana cookies
FAQs About Peppermint Snowball Cookies
Why are my snowball cookies spreading too much?
This usually happens when the butter is too soft or not chilled properly. Make sure your dough is chilled for at least 30 minutes before baking so the cookies hold their round shape.
Why are my cookies dry or crumbly?
Overbaking or adding too much flour can make them dry. Always measure flour correctly and remove the cookies as soon as the bottoms are lightly golden.
Can I skip peppermint extract?
Yes, but it will change the flavor. Peppermint extract gives the signature refreshing holiday taste, but you can replace it with vanilla if you prefer a milder flavor.
Why isn’t the powdered sugar sticking?
If the cookies are too hot or too cold, the sugar may not stick well. Coat them when they are slightly warm, then coat again after they fully cool for the best snowy finish.
Can I make the dough ahead of time?
Yes, you can refrigerate the dough for up to 2–3 days. This actually helps the flavors develop and makes baking easier during busy holiday prep.
How do I keep cookies soft for longer?
Store them in an airtight container at room temperature and avoid overbaking. Adding the second sugar coating also helps lock in moisture.
Final Thoughts
These peppermint snowball cookies are soft, buttery, and melt-in-your-mouth with a cool peppermint twist and snowy powdered sugar coating. They’re simple to make but look and taste like a festive holiday classic. Perfect for Christmas baking, gifting, or cozy winter treats, they bring a light, refreshing sweetness that everyone loves.
Peppermint Snowball Cookies
Ingredients
- 1 cup unsalted butter softened
- 2/3 cup powdered sugar sifted
- 2 1/4 cups all-purpose flour spooned & leveled
- 1/2 tsp salt
- 1 tsp peppermint extract
- Red or pink food coloring as needed
- 3/4 cup Andes peppermint baking chips
- Additional powdered sugar for coating
Instructions
- Beat butter and powdered sugar until light and fluffy.
- Mix in peppermint extract and salt.
- Add flour and mix just until a soft dough forms.
- Add food coloring and peppermint chips.
- Chill dough for 30 minutes.
- Preheat oven to 375°F (190°C) and line baking sheet.
- Roll dough into 1-inch balls and place on tray.
- Bake for 7–8 minutes until just lightly golden underneath.
- Cool slightly, then coat in powdered sugar twice.