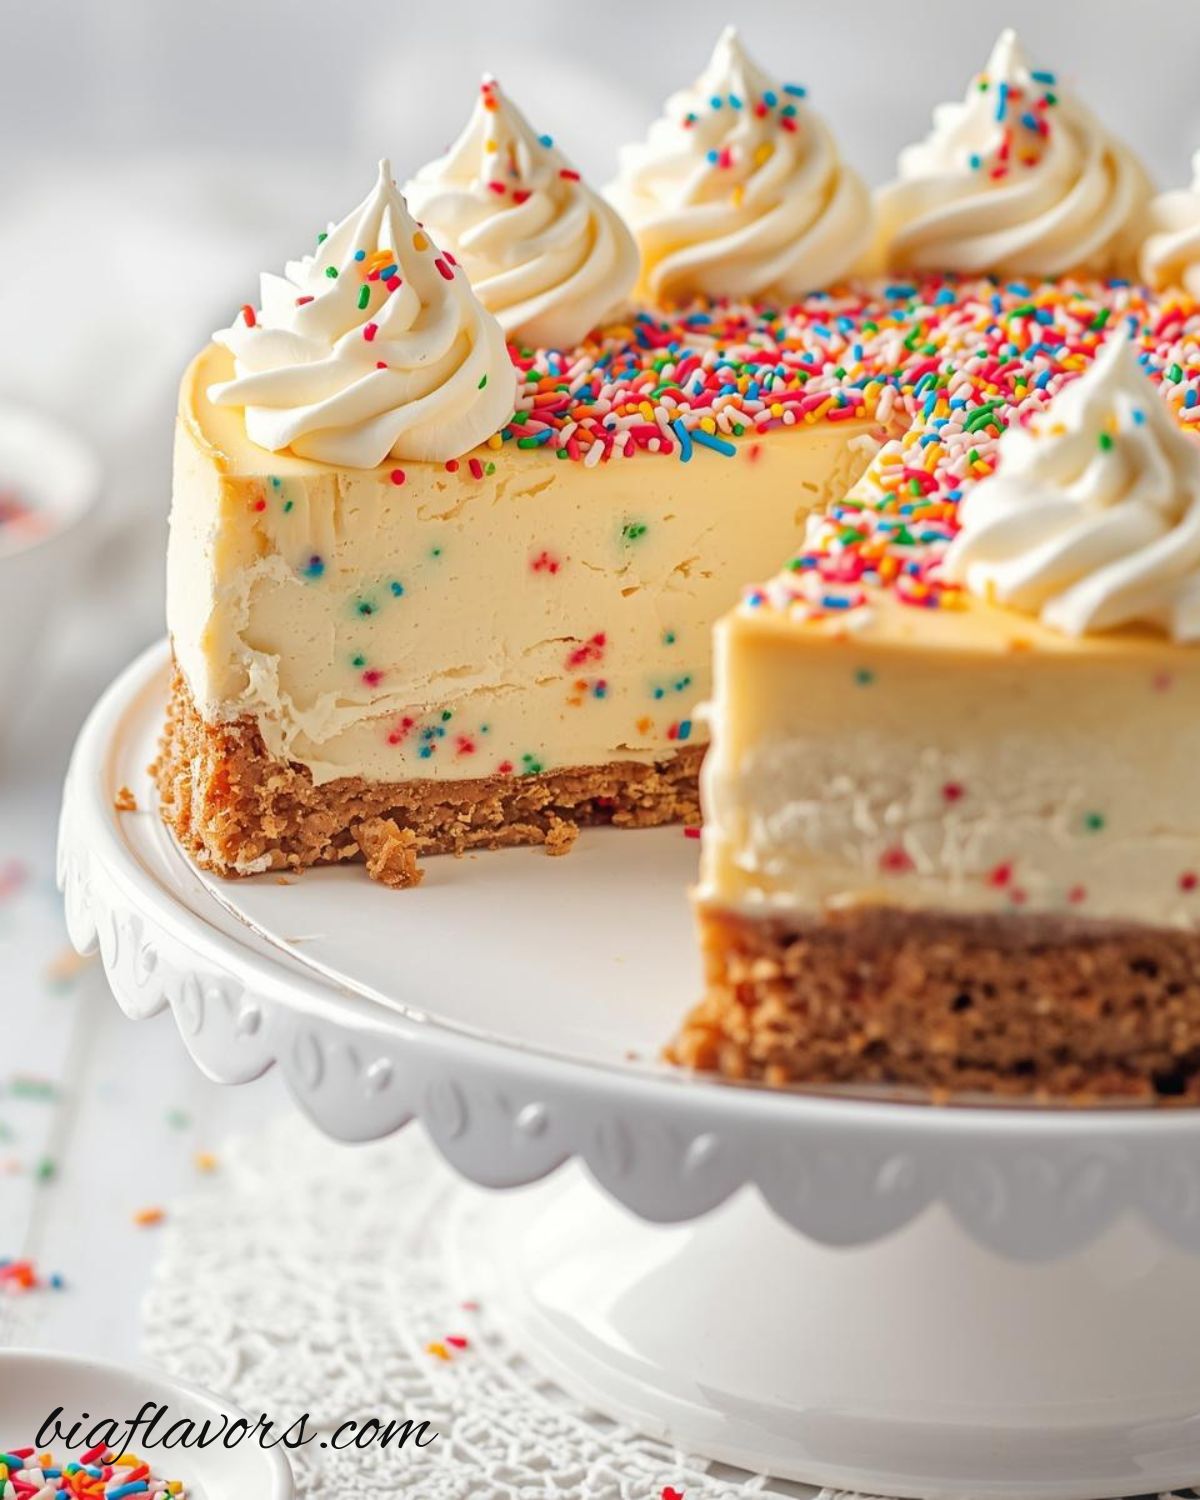
Author name: Areeba

Sliced chocolate chip banana bread on a white ceramic board showing moist golden interior with melted chocolate chips on a white marble counter
Bread

Chocolate Chip Banana Bread- Moist, Soft & Loaded with Chocolate Chips

I still remember the first time I made banana bread. I had a couple of overripe bananas sitting on the counter that I didn’t really want to waste, so I thought, “Let’s just try something simple and see how it turns out.” When it came out of the oven, I was honestly surprised. The whole kitchen smelled like warm bananas and vanilla, and the loaf was so soft it almost felt like cake. But on its own, it was a little too plain for my taste. That’s when I added chocolate chips and everything changed. They melted into little pockets inside the warm bread, and suddenly it wasn’t just banana bread anymore. It turned into one of those simple recipes you find yourself making again and again every time bananas get too ripe to ignore. Why We Love Chocolate Chip Banana Bread There’s something really comforting about banana bread. It’s simple, no-fuss, and made with basic ingredients you probably already have at home, yet it always feels like a treat straight out of a bakery. Chocolate chips just make it even better. They melt into soft pockets of chocolate inside the warm banana bread, giving you that perfect mix of sweet banana flavor and rich chocolate in every bite. It’s also one of those recipes that fits into any part of the day breakfast, afternoon tea, or even a late-night snack when you’re craving something warm and homemade. And honestly, it’s one of the easiest ways to turn overripe bananas into something actually exciting instead of wasting them. What Makes This Chocolate Chip Banana Bread Special? What I love most about this banana bread is how something so simple can taste this good with almost no effort. It turns a few overripe bananas into something warm, soft, and genuinely comforting. The texture is what really makes it stand out soft and moist in the center with just the right amount of structure so every slice holds together perfectly. It doesn’t feel heavy or dry at all. And then there are the chocolate chips. They melt into little pockets inside the bread, so every bite has that mix of sweet banana and rich chocolate. It’s simple, but it just works so well. Honestly, it’s the kind of recipe that feels homemade in the best way nothing fancy, just something you end up making again because it always turns out good. Ingredients You’ll Need Chocolate Chip Banana Bread For the Banana Bread Batter How to Make Chocolate Chip Banana Bread (Step-by-Step) Step 1: Prepare your oven and pan Start by preheating your oven to 350°F (175°C). Grease a 9×5 inch loaf pan with butter or oil and set it aside. This simple step helps the bread come out clean later without sticking. Step 2: Mash the bananas and mix wet ingredients In a large bowl, mash the overripe bananas until mostly smooth. A few small chunks are totally fine they actually add texture later. Now add melted butter, granulated sugar, and brown sugar. Whisk everything together until it looks well combined and slightly glossy. Next, mix in the Greek yogurt, eggs, and vanilla extract. Stir until the batter becomes smooth and creamy. This is the base that keeps your banana bread soft and moist. Step 3: Combine dry ingredients In a separate bowl, whisk together flour, baking soda, and salt. Mixing them separately helps distribute everything evenly so the bread rises properly. Step 4: Bring it all together (don’t overmix!) Slowly add the dry ingredients into the wet mixture. Fold gently using a spatula or spoon until just combined. This is the most important part don’t overmix. Overmixing makes banana bread dense instead of soft and fluffy. Step 5: Add chocolate chips Now fold in the chocolate chips. Stir just a few times so they are evenly spread throughout the batter without overworking it. Step 6: Bake the banana bread Pour the batter into your prepared loaf pan and smooth the top lightly. Bake for about 50 minutes, or until a toothpick or knife inserted in the center comes out clean (a few melted chocolate streaks are okay). Step 7: Cool before slicing Let the banana bread cool in the pan for about 15 minutes. Then carefully remove it and place it on a wire rack. Try not to slice it immediately it’s very soft when warm and holds together better after cooling slightly. Expert Tips for Perfect Chocolate Chip Banana Bread After making banana bread a few times, I realized it’s not a complicated recipe at all but small details make a big difference in texture and flavor. These are the things that actually improved my results over time. Use very ripe bananas The darker and softer your bananas are, the better your banana bread will taste. I’m talking about bananas with lots of brown spots. They mash easily and give a deeper, naturally sweet flavor that you can’t get from firmer bananas. Don’t overmix the batter This is probably the most common mistake. Once you add the flour, mix only until everything is combined. Overmixing develops gluten, which makes the bread dense instead of soft and tender. Room temperature ingredients matter Eggs and Greek yogurt blend much better when they’re not cold. I noticed the batter becomes smoother and more even when everything is at room temperature. Balance moisture with yogurt Greek yogurt is doing a lot of work here. It keeps the bread moist without making it greasy. If your banana bread ever turns out dry, this ingredient is usually the reason it stays soft. Coat chocolate chips lightly in flour This is a small trick, but it helps a lot. Tossing chocolate chips in a little flour before adding them to the batter prevents them from sinking to the bottom while baking. Check doneness early Every oven is slightly different. Start checking around the 45-minute mark. The bread is ready when a toothpick comes out clean or with a few moist crumbs. Let it cool before slicing

Two oatmeal cookies being pulled apart showing gooey melted chocolate stretching between them
Cookies

Oatmeal Chocolate Chip Cookies (Thick, Fudgy & Made from Scratch)

My neighbor once knocked on my door holding an empty plate she had finished every oatmeal chocolate chip cookie I sent her and came back for the recipe. I laughed because these cookies are not ordinary. The secret is blended oat flour in the dough, which makes them thick, soft, and slightly fudgy. You even reshape them right after baking and that’s what makes them special. I’ve been making them for years now, and they never last more than a day or two in my house. The mix of rolled oats, oat flour, and extra chocolate chips gives every bite crisp edges, a soft center, and melted chocolate pockets that taste bakery-made. Why You’ll Love These Oatmeal Chocolate Chip Cookies Ingredients for Oatmeal Chocolate Chip Cookies How to Make Oatmeal Chocolate Chip Cookies (Step by Step) Step 1: Preheat the Oven Preheat your oven to 325°F. Line two half-sheet baking pans with parchment paper or silicone mats. Lower temperature , less spreading and a softer center. I burned two batches at 350°F before I learned this lesson. Step 2: Cream the Butter Beat ¾ cup softened butter in a large bowl or stand mixer for about 1 minute, until smooth and creamy. Scrape the sides and bottom of the bowl before adding anything else. If you skip scraping, you’ll end up with streaks of unbeaten butter in the dough. Step 3: Add Brown Sugar Add 1½ cups packed dark brown sugar to the butter. Beat together, then scrape the bowl again and beat for another 2–3 minutes until the mixture is fluffy and lighter in color. This step builds the texture don’t rush it. Step 4: Add Eggs and Vanilla Add 1 whole egg, 1 egg yolk, and 2 teaspoons vanilla extract. Beat until fully incorporated. Scrape down the sides again. The batter will look glossy and smooth. Step 5: Mix Dry Ingredients Add 1 cup all-purpose flour (spooned and leveled!) but don’t mix it in yet. On top of the flour, add ½ teaspoon baking soda, ¾ teaspoon baking powder, and ¾ teaspoon kosher salt. Stir the leaveners into the flour with a spoon, then use the mixer to fold everything in but stop while the dough still looks streaky white from the flour. Overmixing = tough cookies. Step 6: Add Rolled Oats Add 1 cup of whole rolled oats. Fold in gently. Set aside. Step 7: Add Blended Oats (Oat Flour) Blend 1¼ cups of rolled oats in a blender or food processor for 30–60 seconds until it looks like coarse flour. It doesn’t need to be perfectly smooth a little texture is fine. Add this oat flour to the dough and mix just until the streaks are gone. Scrape the bowl one more time. Step 8: Add Chocolate Chips Add 2½ cups chocolate chips and stir gently by hand until just distributed. Don’t overmix. Step 9: Portion the Dough Use a 1¾-inch cookie scoop (or your hands) to portion dough balls slightly under 2 inches wide about the size of a golf ball. Place them 2 inches apart on the prepared pans. I fit 9 cookies per half-sheet pan. Step 10: Bake the Cookies Bake at 325°F for 9–10 minutes. The edges should look firm and just starting to go golden. The center may still look shiny a shine about the size of a dime is fine. If the whole top is still shiny, bake 2–3 more minutes. Step 11: Reshape While Warm Remove the pan from the oven. Working immediately (within 30 seconds), use two spoons to gently push each cookie inward from the edges, nudging it up slightly in the middle. This reshaping step is what creates that thick, fudgy center. If you wait, the edges crisp and you can’t reshape them. I know it sounds fussy, but it takes about 3 seconds per cookie. Step 12: Finish and Enhance Let cookies cool on the pan for 5–10 minutes before moving them. While still warm but no longer hot, press a few extra chocolate chips into the top of each cookie. Optional: dust lightly with Maldon sea salt flakes for a salty-sweet finish. Step 13: Cool Completely Transfer to a wire rack and cool completely. They’re fragile when warm but hold together beautifully once cooled. Expert Tips for Perfect Oatmeal Chocolate Chip Cookies Tip 1: Spoon your flour, always. After making these oatmeal chocolate chip cookies with scooped flour three times and wondering why they kept coming out dense, I finally weighed the difference. Scooping packed nearly 30% more flour into the cup. Spooning gives you the right amount every time add it to the cup with a spoon and level off with a straight edge. Tip 2: Don’t skip the egg yolk. I tried this recipe once with two whole eggs to save the hassle of separating. The cookies were fine, but they had a slightly cakey lift that I didn’t love. The extra yolk without the white is what keeps these cookies dense and fudgy in the center instead of puffy. It’s worth the extra step. Tip 3: Blend your oats fresh. You can use store-bought oat flour, but blending rolled oats yourself gives a coarser texture that holds up better in the cookie. I tried store-bought oat flour once and the cookies were slightly gummy in the center. 30 seconds in the blender and you have exactly what you need. Tip 4: Reshape immediately. This is non-negotiable. The moment those cookies come out of the oven, grab two spoons and push the edges gently inward. You have about 30 seconds before the edges set. I missed my window once because I stopped to answer a text. The cookies were still good, but they were flat and lacy instead of thick and fudgy. Set a timer. Stay at the oven. Tip 5: Bake low and slow. 325°F feels too low. I know. The first time I followed this recipe, I bumped it to 350°F thinking it would just be faster. The cookies

Large pile of golden Peanut Butter Blossoms with chocolate kiss centers on round white ceramic plate on white marble clean white background
Cookies

Best Peanut Butter Blossoms (Soft, Chewy & Easy to Make)

My neighbor knocked on my door the afternoon I first made these peanut butter blossoms. She had smelled them baking from across the yard not even joking. I handed her one straight off the cooling rack, still slightly warm with the chocolate kiss glossy on top. She stood in my doorway, ate it, and then quietly said, “Can I have another one?” That was the moment I knew this recipe was a keeper. Peanut butter blossoms have this way of stopping people mid-conversation. The combination of a soft, chewy peanut butter cookie rolled in sugar and pressed with a Hershey’s Kiss is just impossible to walk past without grabbing one. These are the cookies that disappear first at every holiday cookie exchange, every bake sale, and every family gathering. And once you know how simple they are to make from scratch, you will never reach for the store-bought version again. Why You’ll Love These Peanut Butter Blossoms One bowl. A hand mixer. Less than two hours from start to finish, including the chill time. These homemade peanut butter blossoms use simple pantry ingredients nothing fancy, nothing you need to hunt down at a specialty store. The butter and peanut butter get creamed together until they are pale and fluffy, and that step alone is what gives these cookies their signature soft, thick texture. The sugar coating adds a gentle crunch on the outside while the inside stays tender and chewy for days. The chocolate kiss on top melts just enough when you press it in, then sets into a smooth chocolate center as the cookies cool. Whether you are baking these for Christmas, a school event, a weekend treat, or just because you have a jar of peanut butter sitting on the counter, this recipe delivers consistent, bakery-quality results every single time you make it. Ingredients for Easy Peanut Butter Blossom Cookies How to Make Peanut Butter Blossoms (Step by Step) Follow these steps exactly and your cookies will come out thick, soft, and perfectly chewy. I have included the lessons I learned the hard way so you do not have to repeat my mistakes. Step 1: Mix the Dry Ingredients Whisk together the flour, baking soda, baking powder, and salt in a medium bowl. Set this aside. Doing this dry mix separately ensures everything distributes evenly into the dough skipping this step and adding dry ingredients directly can create pockets of baking soda in your cookies. Step 2: Cream the Butter and Sugars In a large bowl, beat the butter, peanut butter, granulated sugar, and brown sugar together on medium speed until the mixture is light in color and visibly fluffy this takes a full 3 to 4 minutes. Do not rush this step. I once stopped after 90 seconds and the cookies spread way too thin. The color change is your cue: it should go from golden-tan to a pale, almost cream color. Step 3: Add the Eggs and Vanilla Add the egg, egg yolk, and vanilla extract to the butter mixture and mix on medium until fully combined, about 1 minute. Scrape down the sides of the bowl so everything incorporates evenly. Step 4: Combine Wet and Dry Ingredients Add the dry ingredients to the wet ingredients and mix on low just until the dough comes together. Do not over-mix once the flour is in over-mixing develops the gluten and makes the cookies tough instead of tender. Step 5: Chill the Dough Wrap the dough tightly in plastic wrap and refrigerate for at least 1 hour. If you can refrigerate it overnight, do it. Overnight chilling gives you thicker, chewier cookies with deeper flavor. I tested both, and the overnight dough made noticeably better cookies. Step 6: Prepare for Baking When ready to bake, preheat your oven to 350°F (175°C). Line baking sheets with parchment paper or a silicone baking mat. Let the chilled dough sit at room temperature for 5 to 10 minutes so it is pliable enough to roll. Step 7: Roll the Dough Balls Scoop exactly 1 tablespoon of dough per cookie and roll into smooth balls between your palms. Do not go larger. I made that mistake once and the cookies spread into puddles. Roll each ball in the granulated sugar until fully coated. Step 8: Bake the Cookies Place the sugar-coated balls 2 inches apart on the prepared baking sheets. Bake for 7 to 9 minutes, until the edges are just set and the tops look slightly underdone. They will firm up as they cool. While they bake, have your unwrapped chocolate kisses ready on the counter. Step 9: Add the Chocolate Kisses Remove the cookies from the oven and immediately within 5 seconds press one chocolate kiss firmly into the center of each cookie. The cookie will crack slightly around the edges and that is completely normal and exactly what you want. The chocolate will soften but will firm back up once fully cooled at room temperature. Step 10: Cool and Store Let the cookies cool on the baking sheet for 5 minutes, then transfer to a wire rack. If you need to speed up the chocolate setting, place the baking sheet in the refrigerator for 10 minutes. Store cooled cookies in an airtight container at room temperature for up to 5 to 7 days. Expert Tips for Perfect Peanut Butter Blossoms Every Time Tip 1: Cream the Butter and Peanut Butter Properly I cannot stress this enough. I rushed this step on my second batch and the cookies came out greasy and dense. The creaming process incorporates air into the fat, which is what gives the cookies their structure and lift. Set a timer for 4 minutes and let the mixer run. You will see the mixture go from a dark tan color to something noticeably lighter and fluffier. Tip 2: Use Properly Softened Butter Use room temperature butter not cold, not melted. Cold butter will not cream with the peanut butter properly, and melted butter will make your

Chocolate Crinkle Cookies with deep cracks and snowy powdered sugar coating stacked on a white plate
Cookies

Chocolate Crinkle Cookies (Fudgy Centers, Perfect Cracks Every Time)

My younger sister has one rule for special occasions: there must be Chocolate Crinkle Cookies on the table. Not cupcakes, not brownies specifically these. The year I forgot to make them, she reminded me about it for three months straight. So the next year, I made two batches and hid one in the back of the fridge. Nobody suspected a thing until I pulled out the second tray two hours later. These Chocolate Crinkle Cookies have a fudgy brownie-like center, crisp edges, and that signature snowy crinkle top that makes them look bakery-style. They’re made with pantry staples, require no chilling, and are ready in just 20 minutes. Why You’ll Love These Chocolate Crinkle Cookies One bowl for dry ingredients, one for wet no stand mixer required. The dough comes together in about 10 minutes and goes straight onto the baking sheet. No chilling, no complicated steps, just soft and fudgy cookies ready fast. This recipe makes 24–28 cookies, perfect for a cookie box or party platter. The cocoa powder gives these cookies a deep chocolate flavor without needing melted chocolate, while the powdered sugar coating creates that signature crisp, crinkled shell around the soft brownie-like center. Once you make these Chocolate Crinkle Cookies, they’ll quickly become your go-to dessert whenever you need something easy and impressive. Ingredients for Chocolate Crinkle Cookies How to Make Chocolate Crinkle Cookies (Step by Step) Step 1: Prep Your Baking Sheets Preheat your oven to 350°F (180°C). Line your baking sheets with parchment paper or silicone mats and set them aside. I always use parchment the cookies release cleanly and the bottoms don’t overbrown. Greasing the pan directly makes the edges spread too fast and you lose those beautiful cracks. Step 2: Mix the Dry Ingredients In a large bowl, whisk together the flour, granulated sugar, brown sugar, baking powder, and salt. Whisking instead of stirring makes sure the baking powder is evenly distributed uneven distribution means some cookies rise and crack beautifully while others stay flat. Set this bowl aside. Step 3: Mix the Cocoa Mixture In a separate medium bowl, stir together the melted (and slightly cooled) butter with the cocoa powder. The mixture will be extremely thick almost like a stiff paste. That’s exactly right. Add the eggs and vanilla extract and stir until combined. The first time I made this, I thought I’d done something wrong because it looked so dense and dark. Keep going. Step 4: Combine and Beat Pour the cocoa-egg mixture into the bowl of dry ingredients. Beat together on medium-high speed using a hand mixer or stand mixer fitted with the paddle attachment. The dough will look dry and crumbly at first this is normal. Keep beating for about 1–2 minutes and it will come together into a thick, glossy, fudgy dough. Do not add water or milk it does not need it. Step 5: Roll in Powdered Sugar Measure one tablespoon of dough per cookie. Roll it into a smooth ball between your palms, then roll it generously in the powdered sugar until it’s fully coated. And I mean generously don’t be shy. The first time I made these I lightly dusted the balls and almost no crinkle appeared. The powdered sugar needs to be thick enough to crack as the cookie spreads. Step 6: Bake Place the dough balls about 3 inches apart on your prepared baking sheets. Bake for 12–13 minutes. The cookies will spread, puff up, and form those signature cracks. The centers will still look soft and slightly underdone when you pull them out that’s intentional. They firm up as they cool. Overbaking by even 2 minutes will turn that fudgy center into a dry, hard cookie. Step 7: Cool and Serve Let the cookies cool on the baking sheet for 5 minutes before moving them to a wire rack. They’re too fragile straight out of the oven and will fall apart if you try to move them immediately. Once fully cool, the outside is lightly crisp, the inside is fudgy, and the powdered sugar has set into that beautiful snowy finish. Expert Tips for Perfect Chocolate Crinkle Cookies Ingredient Substitutions Instead of unsalted butter, use white butter or salted butter if using salted, reduce the added salt to 1/4 tsp. The texture will be identical.Instead of brown sugar, use all granulated sugar (1 1/2 cups total). The cookies will be slightly less moist and the caramel undertone will be missing, but they’ll still crinkle and taste great.Instead of natural cocoa powder, Dutch-process is not recommended (see tips above), but if it’s your only option, replace the baking powder with 1/4 tsp baking soda to compensate for the alkalinity difference.For egg-free: replace each egg with 3 tbsp aquafaba (liquid from a can of chickpeas). The texture will be slightly less fudgy but the cookies will still crack and hold their shape.For gluten-free: substitute a 1:1 gluten-free flour blend. Make sure your baking powder is also gluten-free certified. How to Store Chocolate Crinkle Cookies Store fully cooled Chocolate Crinkle Cookies in an airtight container at room temperature. They stay soft and fresh for up to 1 week which is longer than most cookies because the brown sugar and extra cocoa keep them moist. Don’t refrigerate them; cold air dries them out and makes the powdered sugar coating go sticky.To freeze: place baked, fully cooled cookies in a single layer in a freezer-safe bag or container. They freeze well for up to 3 months. Thaw at room temperature for 30 minutes before serving no reheating needed.You can also freeze the unbaked dough balls (before rolling in powdered sugar). Store them in a zip-lock bag for up to 2 months. When ready to bake, roll in powdered sugar straight from frozen and add 2 extra minutes to the bake time. Try These Chocolate Crinkle Cookies This Weekend I make these for every cookie box I put together festive days, holidays, teacher gifts, bake sales. They look impressive, travel well, and stay soft for

_Macro close-up side view of frosted fudge brownie showing ultra dark dense fudgy base and thick smooth chocolate frosting layer with clean cut edges (1)
Bars & Brownies

Nutella Fudge Brownies (Rich, Dense & Totally Addictive)

Picture this: it’s a random Tuesday evening, your family has already eaten dinner, and somehow everyone ends up in the kitchen asking “what’s that smell?” That’s exactly what happened the first time I made these Nutella Fudge Brownies. I had a jar of Nutella sitting in the pantry, a stick of butter, and genuinely nothing better to do. One hour later, my brother ate four pieces and asked me to make them again the next day. These aren’t your basic box-mix brownies. These are three layers of serious chocolate: a cocoa brownie base, a thick Nutella fudge layer in the middle, and a shiny chocolate topping that snaps when you break it. If you’ve been looking for Nutella Fudge Brownies that actually taste like a proper dessert the kind you’d pay good money for at a bakery this is that recipe. Why You’ll Love These Nutella Fudge Brownies No fancy equipment needed one bowl for the brownie, one bowl for the fudge. The whole thing takes under an hour (plus 20 minutes chill time in the fridge). They serve 12–16 people, which makes them great for dawats, school events, or any time you need to impress a crowd without spending all day in the kitchen.The fudge layer is made with sweetened condensed milk and Nutella, so it’s incredibly creamy and stays soft even after refrigerating. The brownie base is dense and fudgy not cakey, not dry. And that chocolate topping sets firm so every slice cuts clean. Ingredients for Nutella Fudge Brownies For the Brownie Base For the Nutella Fudge Layer For the Chocolate Topping How to Make Nutella Fudge Brownies (Step by Step) Step 1: Preheat & Prep Your Pan Preheat your oven to 350°F (176°C). Grease a 9×9 inch baking pan or line it with parchment paper or aluminum foil. I always use parchment it lets you lift the whole brownie slab out in one piece and cuts so much more cleanly. The first time I didn’t use it, half the brownie stuck to the pan. Learn from my mistake. Step 2: Mix the Wet Ingredients In a medium bowl, combine the melted butter, sugar, and vanilla extract. Stir until well mixed. Add the eggs and mix again until everything is fully combined and slightly glossy. Don’t rush this step the sugar needs to dissolve a bit into the butter. Step 3: Add the Dry Ingredients In a separate bowl, whisk together the flour, cocoa powder, baking powder, and salt. Slowly add the dry ingredients into the wet mixture and stir until just combined. Do not overmix stop as soon as you stop seeing dry flour. Overmixing develops gluten and makes your brownies tough instead of fudgy. Step 4: Bake the Brownie Base Pour the batter into your prepared pan and spread it evenly to the edges. Bake for 18–20 minutes. The brownie is ready when a toothpick comes out with a few moist crumbs not wet batter, but not clean either. If it comes out completely clean, they’re already overbaked. Let the brownies cool completely before adding the fudge layer. Step 5: Make the Nutella Fudge Layer Combine the sweetened condensed milk, butter, chocolate chips, and Nutella in a heatproof glass or metal bowl. Set the bowl over a pot of gently simmering water (double boiler method). Stir constantly until everything melts together into a smooth, thick, glossy fudge. This takes about 5–7 minutes don’t rush it by raising the heat or the chocolate will seize.Once the fudge is smooth, pour it over the cooled brownies and spread evenly. Place the pan in the refrigerator to set for about 20–30 minutes. Step 6: Add the Chocolate Topping Once the fudge layer is set, add the chocolate chips and shortening to a microwave-safe bowl. Microwave in 15-second increments, stirring between each, until fully melted and smooth. Spread the melted chocolate evenly over the fudge layer. It sets quickly within a few minutes at room temperature. Once firm, cut into bars and serve. Expert Tips for Perfect Nutella Fudge Brownies Ingredient Substitutions How to Store Nutella Fudge Brownies Store these brownies in an airtight container in the refrigerator. They stay fresh and fudgy for 4–5 days, though they’re honestly best within the first 2–3 days when the layers are still distinct and the chocolate topping is at its snappiest.To bring them back to that fresh-baked taste, take a piece out of the fridge 10–15 minutes before eating and let it come to room temperature. The fudge layer softens up beautifully and the whole brownie tastes richer when it’s not fridge-cold. You can also microwave for 8–10 seconds the Nutella fudge gets slightly gooey, which is honestly even better.For longer storage, wrap individual pieces in plastic wrap and freeze for up to 2 months. Thaw overnight in the fridge. More Brownie Recipes FAQs About Nutella Fudge Brownies Q: Can I use store-brand hazelnut spread instead of Nutella?Yes, any chocolate-hazelnut spread will work in this recipe. The flavor will be slightly different depending on the brand, but the fudge layer will still set and taste great. Just make sure it’s a smooth spread, not a crunchy or grainy one.Q: Why did my fudge layer not set properly?The fudge needs to be cold to set firm make sure you’re refrigerating the pan for at least 20–30 minutes before adding the topping. If it’s still soft after an hour in the fridge, the brownie might not have been cool enough when you added the fudge, or the fudge wasn’t heated long enough to fully melt the chocolate chips.Q: Can I make these Nutella Fudge Brownies ahead of time?Absolutely. These are actually better the next day once all three layers have fully set and the flavors have had time to develop. Make them the night before your event, refrigerate overnight, and slice in the morning. They transport well and look gorgeous on a dessert table.Q: My brownie came out cakey instead of fudgy what went wrong?Three possible reasons: you overbaked them (pull them

Top-down flat lay of classic chocolate chip cookies on white parchment paper with scattered chocolate chips on white marble
Cookies

Best Chocolate Chip Banana Cookies (Soft, Chewy & Easy Homemade Recipe)

I wasn’t even planning to bake that day. I just had one overripe banana sitting on my counter and a craving for something sweet with my evening tea. Banana bread felt like too much effort, so I started wondering what else I could do with it. That’s how these chocolate chip banana cookies happened almost by accident. The first batch surprised me in the best way. They came out soft in the center, slightly chewy on the edges, and packed with little pockets of melted chocolate in every bite. The banana kept them naturally moist, while the chocolate made them feel like a proper dessert instead of just another “healthy snack” recipe. Since then, these cookies have become my quick fix whenever I want something homemade, warm, and comforting without spending much time in the kitchen. Why We Love These Chocolate Chip Banana Cookies These cookies are the perfect mix of soft, chewy, and chocolatey in every bite. The banana keeps them naturally moist and gives a gentle sweetness, so they don’t feel overly sugary like regular cookies. Instead, they have that homemade comfort taste that makes you want to grab just one more. What makes them even better is how quick and easy they are to make. No fancy ingredients, no long chilling time, and no complicated steps just simple mixing and baking. They’re the kind of recipe you can make when you suddenly want something sweet without much effort. What Makes These Banana Chocolate Cookies Special What really makes these chocolate chip banana cookies stand out is their texture and simplicity. They stay soft and slightly chewy even after cooling, thanks to the ripe banana, which also adds natural sweetness without needing too much sugar. Unlike regular cookies, these don’t turn dry or crumbly. Instead, they stay moist in the center with little melted chocolate pockets in every bite. It feels like a mix between a cookie and a banana dessert, which makes them a little different from anything store-bought. Another special thing is how beginner-friendly they are. Even if you’re not confident in baking, this recipe is hard to mess up and still gives you delicious results every time. Ingredients You’ll Need For Chocolate Chip Banana Cookies Dry Ingredients Wet Ingredients Add-ins How to Make Chocolate Chip Banana Cookies Step 1: Mix the dry ingredients In a medium bowl, whisk together all-purpose flour, baking soda, cornstarch, and salt. Set this aside for later. This helps everything mix evenly when added to the wet ingredients. Step 2: Cream butter, bananas, and sugars In a large mixing bowl, add softened butter, ripe bananas, brown sugar, and granulated sugar. Beat everything together until the mixture becomes light, creamy, and slightly fluffy. Then mix in vanilla extract until fully combined. Step 3: Combine wet and dry mixtures Slowly add the dry ingredients into the wet mixture. Stir just until everything is combined. Avoid overmixing, as it can make the cookies dense instead of soft. Step 4: Add chocolate chips Fold in the semi-sweet chocolate chips gently so they are evenly spread throughout the dough. Step 5: Chill the dough Cover the dough and refrigerate it for 30 minutes. This helps the cookies hold their shape and improves texture. Step 6: Preheat and prepare trays Preheat your oven to 375°F (190°C). Line baking sheets with parchment paper or lightly grease them. Step 7: Shape and bake Scoop cookie dough onto the baking sheets using a cookie scoop, spacing them apart. Bake for 9–10 minutes, or until the tops just start turning light golden brown. Step 8: Cool and enjoy Let the cookies cool completely on the baking sheet before moving them. This helps them set properly and keeps them soft and chewy inside. Expert Tips for Perfect Chocolate Chip Banana Cookies Use very ripe bananas The darker and softer the bananas, the better. Overripe bananas add natural sweetness and keep the cookies soft and moist without making them dry. Don’t overmix the dough Once you add the dry ingredients, mix only until everything is combined. Overmixing can make the cookies dense instead of soft and chewy. Chill the dough properly Refrigerating the dough for at least 30 minutes is important. It helps control spreading in the oven and gives you thicker, bakery-style cookies. Watch the baking time closely These cookies bake fast, so keep an eye on them after 8–9 minutes. Take them out when the edges are lightly golden — they will continue to set as they cool. Space cookies evenly Always leave enough space between each dough scoop because they spread slightly while baking. Let them cool on the tray Don’t move them immediately after baking. Letting them cool on the tray helps them firm up while staying soft in the center. Ingredient Substitutions for Chocolate Chip Banana Cookies All-Purpose Flour Alternatives You can replace all-purpose flour with whole wheat flour for a slightly healthier version. The cookies will be a bit denser but still soft and tasty. A gluten-free flour blend can also work if you want a gluten-free option. Butter Substitutes Instead of unsalted butter, you can use coconut oil or margarine. Coconut oil adds a light coconut flavor and keeps the cookies soft, while margarine gives a similar texture to butter. Sugar Alternatives Brown sugar is important for chewiness, but you can replace granulated sugar with coconut sugar or cane sugar. If you want a less sweet version, reduce the sugar slightly, but it may affect texture. Banana Variations Ripe bananas are best, but if you don’t have very ripe ones, you can mash slightly firm bananas and add a bit more sugar for sweetness. Chocolate Chip Options Semi-sweet chocolate chips can be swapped with dark chocolate, milk chocolate, or even white chocolate chips depending on your taste preference. Egg-Free Option (if needed) This recipe doesn’t use eggs, but if you want extra binding in a variation, you can add a flax egg (1 tbsp flaxseed + 3 tbsp water) for a vegan-friendly twist. How to

Whole pistachio cheesecake on white scalloped plate with one slice removed showing green pistachio filling golden crust and crushed pistachios on top
Cheesecakes

Best Pistachio Cheesecake (Creamy, Rich & Bakery-Style Dessert Recipe)

The first time I tried pistachio cheesecake, I honestly didn’t expect much from it. I had always gone for classic cheesecake or chocolate desserts, so this green-colored slice sitting in the bakery display didn’t really grab my attention at first. But one bite changed everything. It was creamy, rich, and had this smooth pistachio flavor that felt different in the best way not too sweet, not too heavy, just perfectly balanced. After that, I couldn’t stop thinking about it. I ended up trying to recreate it at home, and after a few attempts, I finally got that same silky texture and nutty flavor that made me fall in love with it in the first place. Now this pistachio cheesecake has become one of those desserts I keep coming back to whenever I want something a little special but still homemade. Why We Love This Pistachio Cheesecake This pistachio cheesecake is the kind of dessert that feels a little fancy but still very comforting. The texture is what makes it so special smooth, creamy, and rich without being overly heavy, so every bite just melts in your mouth. The pistachio flavor adds something different from the usual cheesecakes. It’s nutty, slightly earthy, and naturally rich, which balances perfectly with the sweetness of the creamy filling. It feels like a bakery-style dessert, but you can easily make it at home without any complicated steps. What makes it even better is how impressive it looks when served. That soft green color and smooth top make it perfect for celebrations, family gatherings, or anytime you want a dessert that feels a bit more special than usual. What Makes This Pistachio Cheesecake Special What really makes this pistachio cheesecake stand out is its unique flavor and texture combination. The filling is incredibly smooth and creamy, but the pistachio adds a rich, nutty depth that you don’t usually get in classic cheesecakes. It’s not overpowering — just enough to give every bite a distinct, luxurious taste. Another special thing is how balanced it feels. It’s sweet, but not too sweet. Rich, but still light enough to enjoy more than one slice. That balance is what makes it feel like something straight from a bakery rather than a simple homemade dessert. And visually, it’s just as impressive as it tastes. The soft pistachio green color gives it a unique, elegant look that instantly stands out on any dessert table, making it perfect for special occasions or when you want to impress guests. Ingredients You’ll Need For Pistachio Cheesecake Pistachio Paste Crust Cheesecake Filling Pistachio Ganache How to Make Pistachio Cheesecake (Step-by-Step) Step 1: Make the pistachio paste Start by boiling water in a pot and add the pistachios for about 4–5 minutes. This helps loosen the skins. Drain them and rub with a towel to remove as much skin as possible for a smoother, greener paste. Then blend the pistachios in a food processor, adding small amounts of water as needed. Keep blending patiently until it turns into a smooth, creamy paste. Set aside the required amount for filling and ganache. Step 2: Prepare the crust Preheat your oven to 325°F (163°C). Mix graham cracker crumbs, sugar, and melted butter until it looks like wet sand. Press the mixture firmly into a lined 9-inch springform pan. Bake for 8–10 minutes, then let it cool. Wrap the outside of the pan with foil to prepare for a water bath. Step 3: Make the cheesecake filling Lower the oven temperature to 300°F (148°C). In a large bowl, beat cream cheese and pistachio paste until smooth and creamy. Add sugar and flour, mixing on low speed. Then add sour cream, vanilla extract, and almond extract and mix again until combined. Add eggs one at a time, mixing gently after each addition. Do not overmix to avoid cracks. Step 4: Bake the cheesecake Pour the filling over the cooled crust. Place the springform pan inside a larger pan and add warm water to create a water bath (halfway up the sides). Bake for about 1 hour 25–35 minutes until the center is set but still slightly jiggly. Step 5: Cool it properly Turn off the oven and leave the cheesecake inside for 30 minutes. Then slightly open the oven door and let it cool for another 30 minutes. This slow cooling helps prevent cracks. After that, remove and refrigerate for 5–6 hours or overnight until fully set. Step 6: Make the ganache topping In a bowl, combine white chocolate chips, heavy cream, and pistachio paste. Heat in short bursts in the microwave, stirring each time until smooth and creamy. Step 7: Finish and serve Pour the ganache over the chilled cheesecake and spread evenly. Add chopped pistachios on top for decoration if desired. Slice and serve once the topping sets. Expert Tips for Perfect Pistachio Cheesecake Use room temperature ingredients Make sure cream cheese and eggs are at room temperature before mixing. This helps everything blend smoothly and prevents lumps in the batter. Take time to make smooth pistachio paste Don’t rush the pistachio blending process. The smoother the paste, the creamier and more elegant your cheesecake texture will be. If it feels grainy, keep blending patiently. Mix on low speed only When preparing the filling, always mix on low speed. Too much air in the batter can cause cracks while baking and change the dense, creamy texture. Don’t skip the water bath The water bath is what keeps the cheesecake soft and prevents it from drying or cracking. It may feel like an extra step, but it makes a huge difference in the final result. Avoid overbaking The center should still have a slight jiggle when you turn off the oven. It will continue to set as it cools, giving you that perfect creamy texture. Cool it slowly Letting the cheesecake cool gradually in the oven prevents sudden temperature changes, which is one of the main reasons cheesecakes crack. Chill overnight for best flavor Even though it sets in

Pile of caramel banana nut muffins with chopped pecans on top stacked in white ceramic basket on white marble counter clean white background
Muffins

Caramel Banana Nut Muffins

One day I had a few overripe bananas sitting on my counter and didn’t feel like making the usual banana bread again. So I decided to try something different banana muffins with a caramel twist. I honestly didn’t expect much, but the moment they came out of the oven, the smell of warm caramel, banana, and toasted nuts filled the kitchen. They were soft, moist, and tasted like something straight from a bakery. Since then, these caramel banana nut muffins have become my quick fix recipe whenever I want something simple, cozy, and seriously satisfying with minimal effort. What Makes These Muffins Special? What really sets these caramel banana nut muffins apart is how everything comes together so naturally. The bananas keep them incredibly soft and moist, while the caramel adds a deep, buttery sweetness that feels a little more special than your regular banana muffins. The nuts bring a light crunch that balances the softness perfectly, so every bite has a mix of textures instead of just one flat flavor. And the best part? They taste like something from a bakery, but they’re actually super simple to make at home with everyday ingredients. Why We Love These Caramel Banana Nut Muffins These caramel banana nut muffins are the kind of treat that feel warm and comforting from the very first bite. They’re soft, moist, and full of natural banana sweetness, while the caramel adds a rich, cozy flavor that makes them taste bakery-fresh at home. What really makes them special is the texture fluffy muffins with little crunchy bits of nuts in every bite. They’re simple to make, use basic pantry ingredients, and come together quickly, which makes them perfect for busy mornings or sudden sweet cravings. Ingredients You’ll Need For Caramel Banana Nut Muffins Main Ingredients Dry Ingredients Add-ins (Flavor Boosters) How to Make Caramel Banana Nut Muffins Step 1: Prepare your oven and pan Start by preheating your oven to 350°F (175°C). Line a 12-cup muffin tray with liners or lightly grease each cup so the muffins don’t stick. Step 2: Mash the bananas In a large bowl, peel and mash the ripe bananas using a fork. Make sure they are soft and smooth so they mix easily into the batter and give that moist texture. Step 3: Mix wet ingredients Add softened butter, brown sugar, egg, and vanilla extract into the mashed bananas. Stir everything together until the mixture looks smooth and well combined. This is where the flavor starts building. Step 4: Combine dry ingredients In a separate bowl, mix flour, baking soda, baking powder, and salt. Take out about 1 tablespoon of this dry mix and keep it aside — you’ll use it later for coating the caramel pieces. Step 5: Make the batter Add the dry ingredients into the wet mixture and stir gently just until combined. Don’t overmix, or the muffins can turn dense instead of soft and fluffy. Step 6: Add caramel and nuts Toss the caramel pieces in the reserved flour (this helps them not sink to the bottom), then fold them into the batter along with chopped pecans. Step 7: Fill the muffin tray Divide the batter evenly into all 12 muffin cups, filling each about 3/4 full so they rise nicely without overflowing. Step 8: Bake Bake for 20–22 minutes, or until a toothpick inserted in the center comes out clean. The tops should look golden and slightly firm. Step 9: Cool and enjoy Let the muffins cool in the tray for a few minutes before removing them. They taste best slightly warm when the caramel is soft and gooey inside. Expert Tips for Perfect Caramel Banana Nut Muffins Use very ripe bananas The darker and softer the bananas, the better the flavor. Overripe bananas add natural sweetness and make the muffins extra moist without needing extra sugar. Don’t overmix the batter Once you add the dry ingredients, mix just until everything comes together. Overmixing can make the muffins dense instead of soft and fluffy. Coat caramel pieces in flour Always toss the caramel bits in a little flour before adding them to the batter. This simple trick stops them from sinking to the bottom while baking. Check baking time carefully Every oven is a bit different, so start checking around 20 minutes. The muffins are done when a toothpick comes out clean or with a few crumbs (not wet batter). Add nuts at the end Fold in pecans gently at the very end so they stay crunchy and don’t break down in the batter. Let them cool slightly I know it’s tempting, but giving them 5–10 minutes to cool helps the caramel settle and makes them easier (and safer) to eat without falling apart. Ingredient Variations for Caramel Banana Nut Muffins Chocolate Twist You can add chocolate chips along with or instead of caramel for a richer, dessert-style muffin. Dark chocolate works best if you don’t want it too sweet. Different Nuts If you don’t have pecans, try walnuts, almonds, or even hazelnuts. Each nut gives a slightly different crunch and flavor, so you can easily switch it up based on what you like. Caramel Alternatives If caramel squares aren’t available, you can use caramel sauce or toffee bits. Just keep the amount moderate so the muffins don’t become too runny. Healthier Swap You can replace half of the all-purpose flour with whole wheat flour for a slightly healthier version. It will make the muffins a bit denser but still delicious. Extra Banana Flavor If you love strong banana taste, add an extra half banana. It makes the muffins even softer and more naturally sweet. Dairy-Free Option You can swap butter with coconut oil or a plant-based butter alternative. This keeps the muffins moist while making them dairy-free. How to Store Caramel Banana Nut Muffins At room temperature If you plan to eat them within 1–2 days, store the muffins in an airtight container at room temperature. Keep them in a cool, dry place so they

Single peanut butter stuffed brownie square on white plate showing glossy chocolate ganache top and visible peanut butter chunks inside on white marble
Bars & Brownies

Peanut Butter Brownies

I still remember making these peanut butter brownies on a random rainy evening when I was craving something chocolatey but didn’t want to spend hours baking. I had a jar of peanut butter, basic pantry ingredients, and honestly very low expectations. But the moment I cut into those warm, fudgy brownies with melted peanut butter swirls on top, I knew this recipe was staying forever. These peanut butter brownies are rich, gooey, super chocolatey, and incredibly easy to make. They have that soft center, slightly chewy edge, and the perfect balance of sweet chocolate and creamy peanut butter in every bite. If your past brownies turned out dry or cakey, don’t worry this recipe keeps things simple and actually works. What Makes These Peanut Butter Brownies Special? These peanut butter brownies stand out because they deliver bakery-style results with simple ingredients and minimal effort. Every bite is rich, fudgy, and perfectly balanced. Why We Love These Peanut Butter Brownies These peanut butter brownies are everything you want in a homemade dessert rich, fudgy, chocolatey, and incredibly easy to make. The creamy peanut butter swirls melt right into the brownies, giving every bite the perfect mix of sweet and salty flavor. They taste like something from a bakery, but the recipe is simple enough for a casual weekend bake. Another reason we love this recipe is how reliable it is. The brownies stay soft and gooey in the center with slightly chewy edges, and they honestly taste even better the next day. Whether you serve them warm with ice cream or sneak one straight from the pan late at night, they never disappoint. Ingredients You’ll Need For Peanut Butter Brownies Peanut Butter Filling Brownie Batter Ganache How to Make Peanut Butter Brownies (Step-by-Step) Step 1: Prepare your pan Start by preheating your oven to 350°F (175°C). Lightly grease a 9-inch square baking pan and line it with parchment paper, leaving some overhang on the sides. This makes it super easy to lift the brownies out later without breaking them. Step 2: Make the peanut butter filling In a medium bowl, mix peanut butter, sugar, and egg until everything is smooth and fully combined. Set it aside while you prepare the brownie batter. This layer will bake into a soft, creamy swirl inside the brownies. Step 3: Melt chocolate and butter In a large bowl, add chocolate chips and butter. Melt them in the microwave in 30-second intervals, stirring each time until smooth. This step creates the rich chocolate base for your brownies. Step 4: Build the brownie batter Stir in sugar and vanilla extract until combined. Then add eggs one at a time, mixing well after each addition. In a separate bowl, whisk cocoa powder, cornstarch, and salt, then add this dry mix into the wet mixture. Stir until smooth and thick. Finally, fold in mini chocolate chips. Step 5: Layer the brownies Pour about two-thirds of the brownie batter into the prepared pan and spread it evenly. Drop spoonfuls of the peanut butter mixture on top. Then add the remaining brownie batter and gently smooth it over the top. Don’t worry about perfection the swirls will look better while baking. Step 6: Bake Bake for 33–37 minutes, or until a toothpick inserted in the center comes out with a few moist crumbs. Don’t overbake that’s the key to keeping them fudgy. Let the brownies cool completely before moving to the next step. Step 7: Make the ganache Heat heavy cream until hot (but not boiling) and pour it over chopped chocolate. Let it sit for 5 minutes, then stir until smooth and glossy. If needed, microwave in short bursts until fully melted. Step 8: Finish and set Spread the ganache evenly over cooled brownies. Refrigerate until set, then lift out using parchment paper and cut into squares. The result is rich, fudgy peanut butter brownies with a smooth chocolate topping that tastes even better after chilling. Expert Tips for Perfect Peanut Butter Brownies Don’t overmix the batter Once you add the dry ingredients into the wet mixture, mix just until everything comes together. Overmixing can make your brownies more cakey instead of that dense, fudgy texture we want. Use room temperature eggs This might seem small, but it really matters. Cold eggs don’t blend smoothly, and I’ve noticed the batter can turn slightly uneven. Room temperature eggs help everything mix properly and give a better texture. Don’t rely only on baking time Every oven is a little different. Start checking your brownies around the 30-minute mark. A toothpick should come out with a few moist crumbs — that’s your sweet spot for fudgy brownies. Keep the peanut butter swirl light Instead of fully mixing the peanut butter layer into the batter, gently drop spoonfuls on top and swirl lightly. This keeps those beautiful layers and makes every slice look bakery-style. Let them cool completely I know it’s tempting to cut them right away, but patience makes a big difference. Cooling (or chilling) helps the brownies set properly, making them fudgy, firm, and easier to slice without falling apart. Ingredient Variations You Can Try Peanut Butter Options You can use crunchy peanut butter instead of creamy if you want a bit of texture in every bite. Natural peanut butter also works, but make sure to stir it well so the oil doesn’t separate and change the brownie consistency. Chocolate Choices Semi-sweet chocolate gives a balanced flavor, but dark chocolate makes the brownies richer and less sweet. If you prefer a milder taste, milk chocolate chips can also be used, though the texture will be slightly softer. Sugar Swaps You can replace part of the granulated sugar with brown sugar for a deeper, caramel-like flavor. It also makes the brownies extra moist and fudgy. Flour-Free Twist If you want a denser, more intense chocolate bite, you can skip extra flour-like additions and rely more on cocoa powder and chocolate chips. This keeps the brownies naturally fudgy and rich. Add-Ins for Extra

Fudgy Chewy Brookies
Cookies

Brookies Cookies – Fudgy Brownie Cookies with Crackly Top

The first time I made fudgy chewy brookies, I honestly couldn’t decide what I was expecting a cookie, a brownie, or something in between. What came out of the oven completely changed my mind. They looked like cookies on the outside, but the texture inside was pure brownie magic soft, fudgy, slightly chewy, and rich with chocolate flavor. And that crackly top? That’s the part that makes them look straight out of a bakery. After a few tries in my kitchen (and a couple of overbaked batches I won’t lie about), I finally understood the trick. Brookies are all about aerating the eggs properly and not overmixing once the flour goes in. Now they’re one of those recipes I turn to when I want something quick, chocolate-heavy, and honestly a little addictive. Why We Love Brookies Cookies Brookies sit in that perfect middle space between brownies and cookies, and that’s exactly why people love them. They’re rich like brownies but still have that handheld cookie shape, which makes them easy to snack on without cutting slices or plating anything fancy. Another reason they’re so popular is the texture contrast slightly crisp edges with a soft, gooey center. Every bite feels like a mix of fudgy chocolate and light cookie structure. And honestly, they don’t require any complicated ingredients or techniques. Once you understand the mixing order, they’re surprisingly easy to make at home. Ingredients You’ll Need For Brookies Dry Ingredients Chocolate Base Wet Ingredients Add-ins How to Make Brookies Cookies Step 1: Melt chocolate and butter Start by melting dark chocolate and butter together over a double boiler. Stir gently until smooth and glossy. Add vanilla extract at the end and mix well. This becomes your rich chocolate base. Step 2: Whip eggs and sugar In a separate bowl, beat eggs with caster sugar and demerara sugar using an electric whisk. Keep whisking until the mixture turns thick, pale, and fluffy. This step is what creates that signature crackly top. Step 3: Mix dry ingredients In another bowl, combine flour, cocoa powder, baking powder, salt, and chocolate chips. Mixing them separately helps everything distribute evenly in the batter. Step 4: Combine chocolate and egg mixture Slowly fold the melted chocolate mixture into the whipped eggs. Do this gently so you don’t lose the air you created while whipping. Step 5: Add dry ingredients Fold dry ingredients into the wet mixture carefully. Stop mixing as soon as everything comes together — overmixing will make the cookies dense instead of fudgy. Step 6: Bake Scoop spoonfuls of batter onto a lined baking tray, leaving space between each cookie. Bake at 160–170°C (320–338°F) for about 12–14 minutes until the tops look crackly but centers still feel soft. Step 7: Cool and finish Let them rest on the tray for 10 minutes before transferring to a rack. Sprinkle a pinch of sea salt on top while still warm for extra flavor depth. Expert Tips for Perfect Brookies Cookies Brookies look simple, but the texture really depends on a few small things. I’ve had batches turn out amazing and a few turn a bit too dense or dry and every time, it came down to these details. Whip the eggs properly (this is the real secret) If there’s one step you shouldn’t rush, it’s this one. Whipping eggs with sugar until thick and pale is what gives brookies that shiny, crackly top. If you stop too early, the cookies will still taste good but won’t have that bakery-style finish. Don’t rush the folding stage Once you add the melted chocolate mixture, fold everything gently. I learned the hard way that aggressive mixing knocks out the air and makes the brookies heavier instead of light and fudgy. Use good-quality chocolate Since chocolate is the main flavor here, the quality really shows. I’ve tried both basic and premium chocolate, and the difference in richness is actually noticeable in the final bite. Slightly underbake for fudgy texture Brookies should come out of the oven when the centers still look a little soft. They continue to set as they cool, and that’s what keeps them gooey instead of dry. Chill the batter if it feels too loose Sometimes the batter can feel slightly runny depending on room temperature. A short chill (10–15 minutes) helps control spreading and makes scooping easier. Use parchment paper always These cookies are soft and sticky when warm. Parchment paper prevents sticking and helps them lift cleanly without breaking. Add sea salt at the end A tiny pinch of sea salt on top while they’re still warm completely changes the flavor. It balances sweetness and enhances the chocolate taste in a really nice way. How to Store Brookies Cookies Brookies are the kind of cookies that stay soft and fudgy for a few days if you store them the right way. I’ve had batches dry out before just because I left them uncovered on the counter so storage really does matter here. Store at room temperature (best option) If you’re planning to eat them within a couple of days, keep them in an airtight container at room temperature. This helps maintain that soft, brownie-like center. They stay fresh for about 2–3 days this way. I usually place a small sheet of parchment paper between layers so they don’t stick together. Refrigeration (for longer freshness) You can store brookies in the fridge if your kitchen is warm. Just keep them in a sealed container so they don’t dry out or absorb fridge odors. They last up to 5 days in the refrigerator, but I recommend letting them sit at room temperature for 10–15 minutes before eating so the texture softens again. Freezing (best for long-term storage) Brookies freeze really well. Once completely cooled, place them in a freezer-safe bag or container with parchment paper between layers. They can be frozen for up to 2 months without losing much quality. When you want to eat them, just thaw at room temperature for 30–40 minutes, or warm

Hi, I’m Bia! I share my favorite recipes, tips, and kitchen hacks to make every meal memorable and delicious.

Recent Posts

  • All Posts
  • Bars & Brownies
  • Bread
  • Breakfast
  • Brownies
  • Cake
  • Cheesecakes
  • Cookies
  • Cupcake
  • Desserts
  • Muffins
  • Pie Recipes
  • Pound Cake
  • Recipes
  • Trifles

Contact Us

© 2026 Created with Bia Flavors 

Hi, I’m Bia! I share my favorite recipes, tips, and kitchen hacks to make every meal memorable and delicious.

Recent Posts

  • All Posts
  • Bars & Brownies
  • Bread
  • Breakfast
  • Brownies
  • Cake
  • Cheesecakes
  • Cookies
  • Cupcake
  • Desserts
  • Muffins
  • Pie Recipes
  • Pound Cake
  • Recipes
  • Trifles

Contact Us

©  2026 Created with Bia Flavors 

Hi, I’m Bia! I share my favorite recipes, tips, and kitchen hacks to make every meal memorable and delicious.

Scroll to Top