Chocolate Swiss Roll – Bakery Style Soft & Creamy Cake Roll
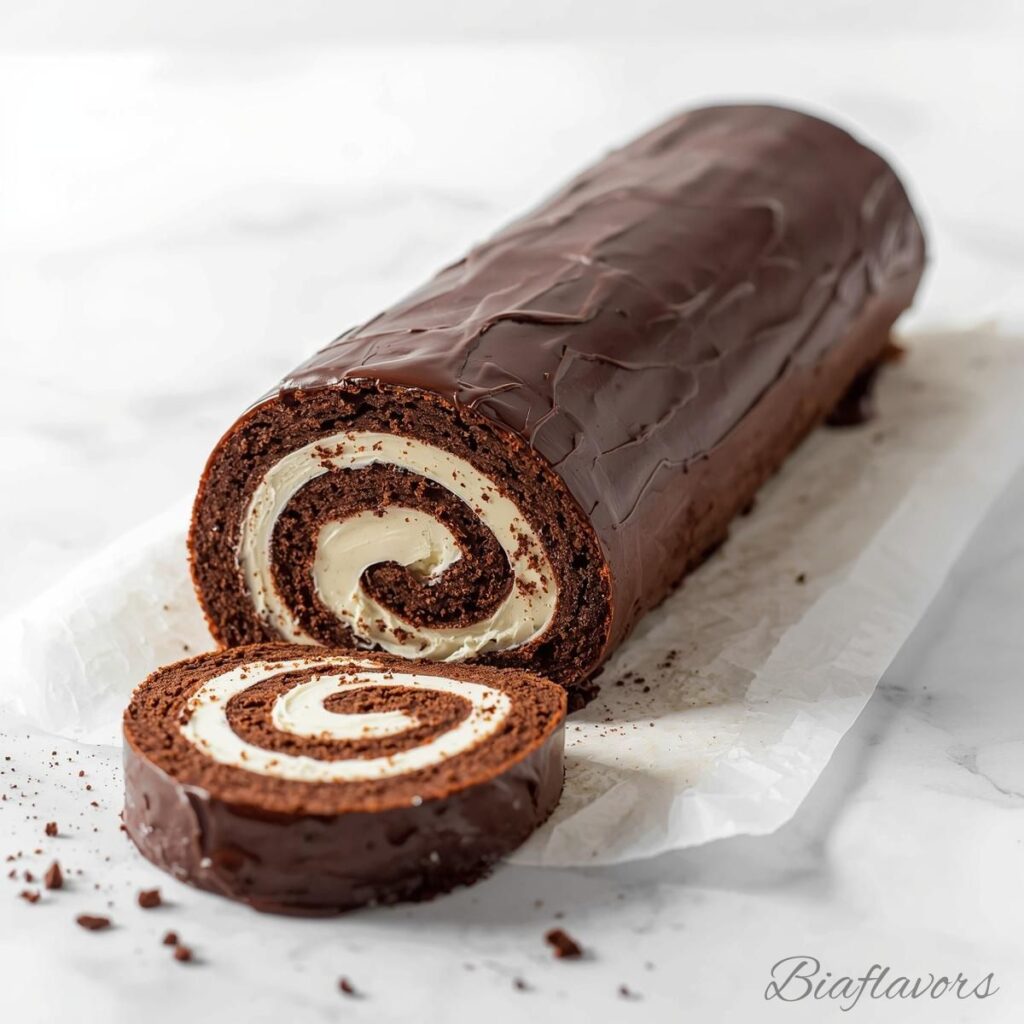
I still remember the first time I tried making a Chocolate Swiss Roll at home. It looked so simple when I saw it online a thin chocolate sponge, rolled up neatly with cream inside. But the reality? My first attempt cracked badly the moment I tried to roll it. That moment honestly taught me something: Swiss roll isn’t difficult, it’s just very sensitive. Timing matters more than effort. After a few tries (and a couple of messy kitchen disasters), I finally figured out how to get that soft, flexible sponge that rolls beautifully without breaking. And now it’s one of my favorite quick desserts to make when I want something impressive but not complicated. Let’s break it down the way I wish someone had explained it to me in the beginning. Why You’ll Love This Chocolate Swiss Roll There’s something special about Swiss roll that always feels a bit “bakery-level,” even though it’s made with simple ingredients. The sponge is light and airy, not heavy like regular cake. And when you bite into it, you get that soft chocolate layer with smooth cream filling that melts instantly. What I personally love is how customizable it is. You can make it extra creamy, lightly sweet, or even add fruits like strawberries or bananas if you want to switch things up. Also, it chills beautifully meaning the next day it tastes even better. Ingredients You’ll Need for Chocolate Swiss Roll For Chocolate Cake Sponge For Whipped Cream Filling For Chocolate Ganache Topping How to Make Chocolate Swiss Roll (Step-by-Step) Step 1: Prepare your baking pan Start by preheating your oven to 350°F (180°C). Line a 17×12-inch jelly roll pan with parchment paper, making sure the paper slightly hangs over the edges. This little detail makes it so much easier to lift the cake out later without breaking it. Step 2: Mix dry ingredients In a bowl, combine flour, cocoa powder, baking powder, espresso powder, and salt. Mix everything well so the cocoa and leavening agents are evenly distributed. This helps the sponge bake evenly and prevents any dry or bitter spots in the cake. Step 3: Whip eggs and sugar In a separate large bowl, beat the eggs, sugar, and vanilla extract on high speed until the mixture becomes pale, thick, and fluffy. This step is really important because it adds air to the batter, which is what makes the sponge soft and flexible enough to roll later. Step 4: Combine dry ingredients gently Now add the dry ingredients into the whipped egg mixture in two parts. Gently fold everything together using a spatula instead of mixing hard. The goal is to keep the air inside the batter so the sponge stays light and doesn’t turn dense. Step 5: Add warm milk and butter Heat the milk and butter together until the butter melts and the mixture is hot. Slowly pour it into the batter and gently mix until smooth. This adds moisture and richness, giving the sponge that soft, bakery-style texture. Step 6: Bake the sponge Spread the batter evenly into the prepared pan and bake for about 10–12 minutes. The cake is ready when it springs back lightly when touched and a toothpick comes out clean. Be careful not to overbake, or it will dry out and crack while rolling. Step 7: Roll while it’s hot As soon as the cake comes out of the oven, lift it out using the parchment paper. While it’s still warm, gently roll it up from the shorter side with the parchment inside. Let it cool in this rolled shape so it holds its form and doesn’t crack later. Step 8: Fill and re-roll Once the cake has completely cooled, carefully unroll it. Spread the whipped cream filling evenly across the surface, leaving a small border around the edges. Then gently roll it back up without parchment paper and wrap it in plastic before chilling. Step 9: Add chocolate ganache Heat the cream and pour it over chopped chocolate. Let it sit for a few minutes, then stir until smooth and glossy. Pour the ganache over the chilled cake roll and spread it evenly. Let it set before slicing for clean, beautiful pieces. Expert Tips for Perfect Chocolate Swiss Roll After making this Chocolate Swiss Roll a few times, I realized it’s not really a “hard” recipe it’s a timing game. Small kitchen habits make a huge difference between a clean roll and a cracked one. These are the tips I personally wish I followed from the beginning. Pay attention to egg whipping stage Don’t rush the eggs and sugar step. When they turn pale, thick, and fluffy, that’s your foundation for a soft sponge. If this step is underdone, the cake will feel dense and won’t roll easily later. Keep your folding technique gentle Once flour goes in, think “soft folding,” not mixing. I used to be too aggressive here and ended up losing all the air I worked hard to create. A light hand keeps the sponge airy and flexible. Don’t rely on baking color This is a big one. The cake might still look slightly soft or pale when it’s done and that’s actually perfect. If you wait for it to look “fully baked brown,” you’ll probably overbake it and risk cracks. Roll immediately, not after cooling The sponge must be rolled while it’s still warm. I learned this the hard way. If you wait too long, it sets flat and becomes stiff, which almost guarantees cracking when you try to roll it later. Avoid thick sponge layers Make sure you spread the batter evenly and thinly in the pan. A thick sponge might look nice, but it’s much harder to roll cleanly and usually breaks at the center. Chill before slicing Once assembled, don’t rush slicing. Letting the roll chill helps everything set properly. The cream firms up, the flavors blend, and you get those clean bakery-style slices instead of messy ones. How to Store Chocolate Swiss Roll Refrigeration