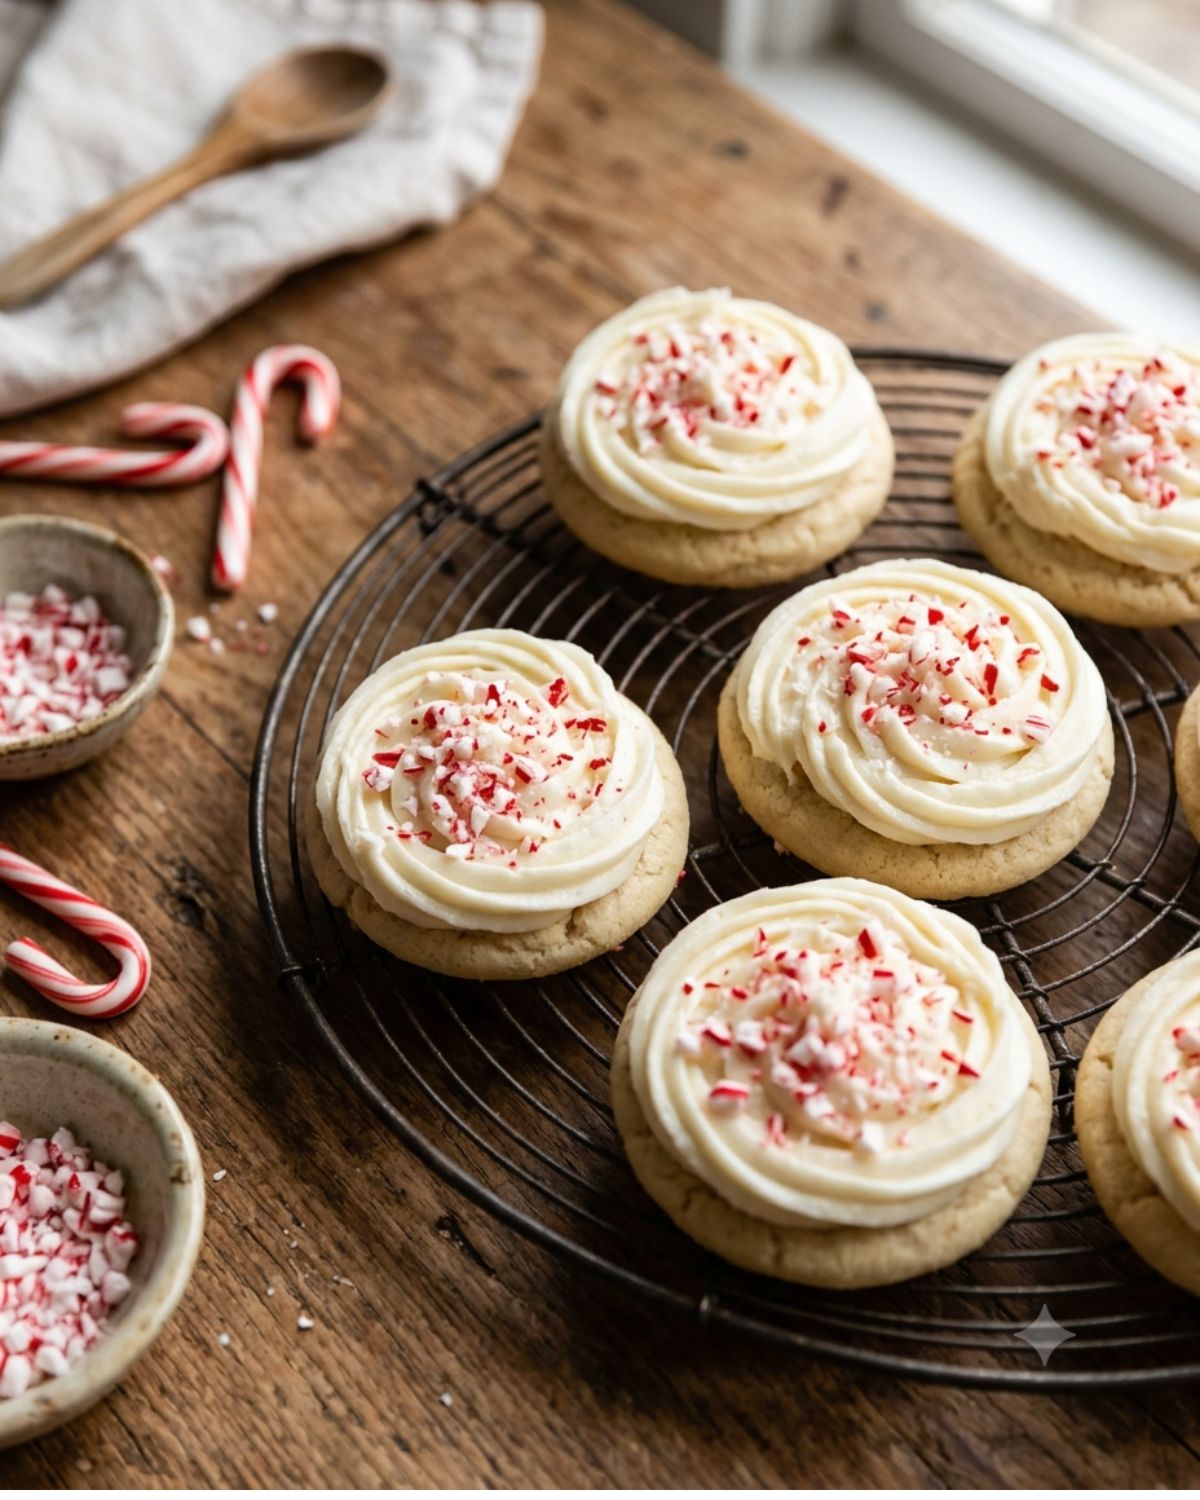
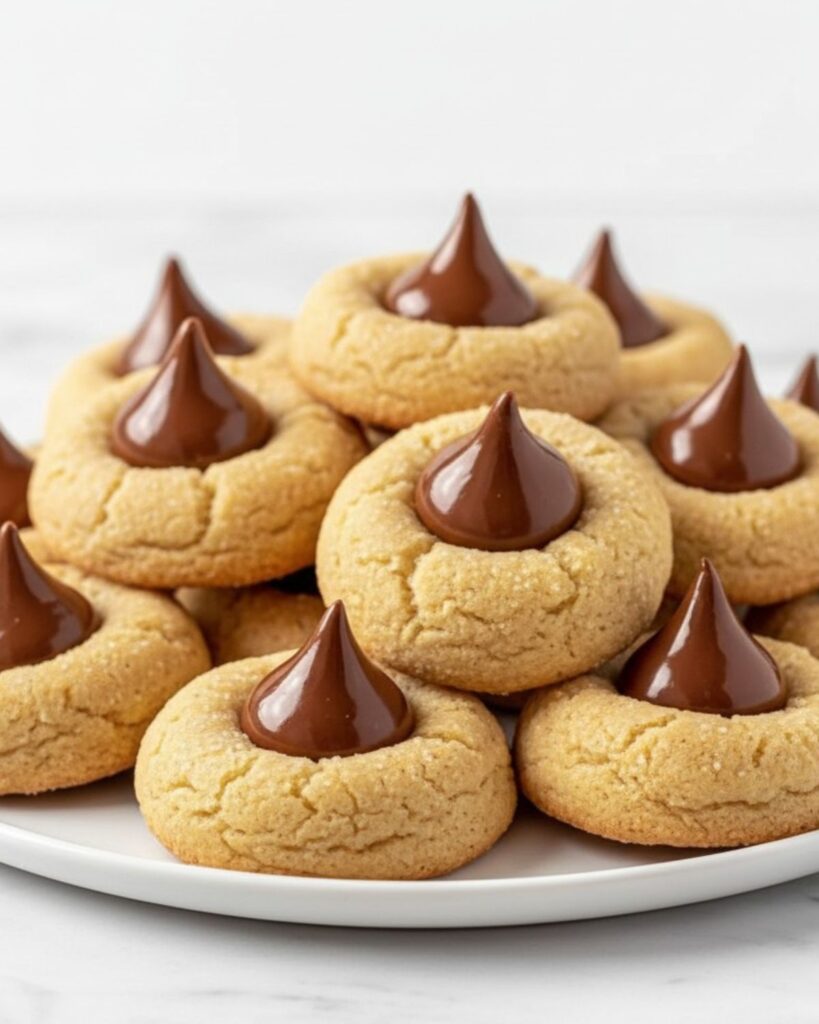
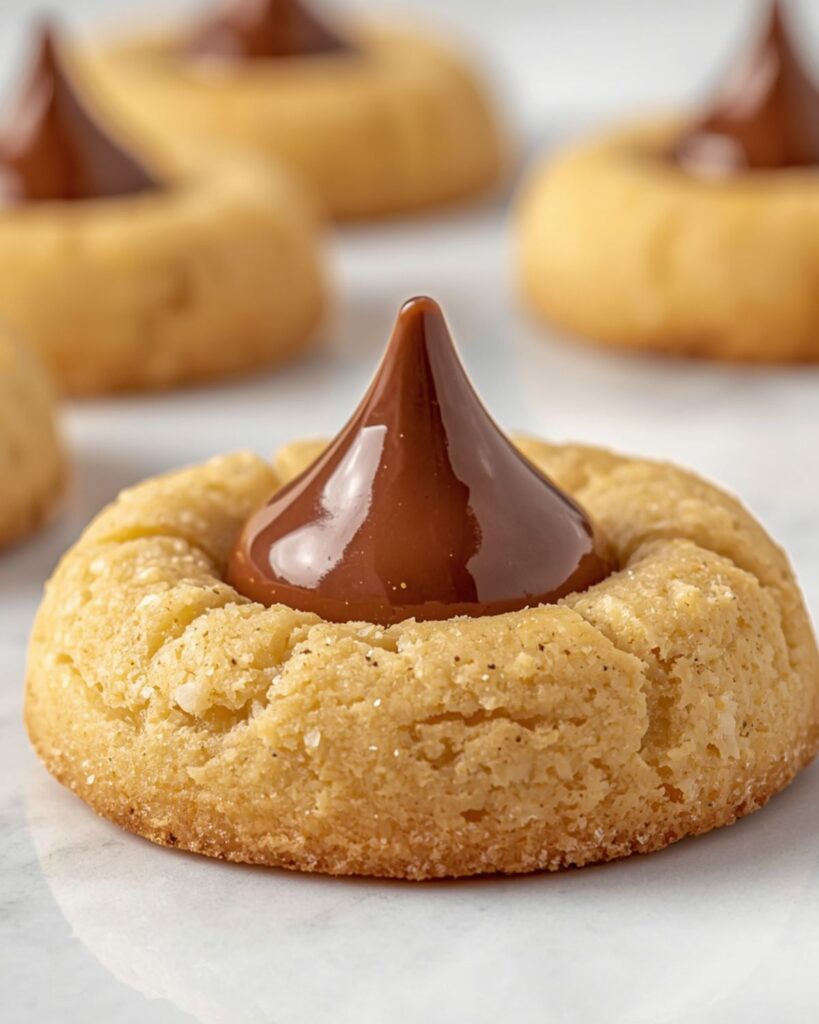
My neighbor knocked on my door the afternoon I first made these peanut butter blossoms. She had smelled them baking from across the yard not even joking. I handed her one straight off the cooling rack, still slightly warm with the chocolate kiss glossy on top.
She stood in my doorway, ate it, and then quietly said, “Can I have another one?” That was the moment I knew this recipe was a keeper. Peanut butter blossoms have this way of stopping people mid-conversation. The combination of a soft, chewy peanut butter cookie rolled in sugar and pressed with a Hershey’s Kiss is just impossible to walk past without grabbing one.
These are the cookies that disappear first at every holiday cookie exchange, every bake sale, and every family gathering. And once you know how simple they are to make from scratch, you will never reach for the store-bought version again.
Why You’ll Love These Peanut Butter Blossoms
One bowl. A hand mixer. Less than two hours from start to finish, including the chill time. These homemade peanut butter blossoms use simple pantry ingredients nothing fancy, nothing you need to hunt down at a specialty store.
The butter and peanut butter get creamed together until they are pale and fluffy, and that step alone is what gives these cookies their signature soft, thick texture. The sugar coating adds a gentle crunch on the outside while the inside stays tender and chewy for days.
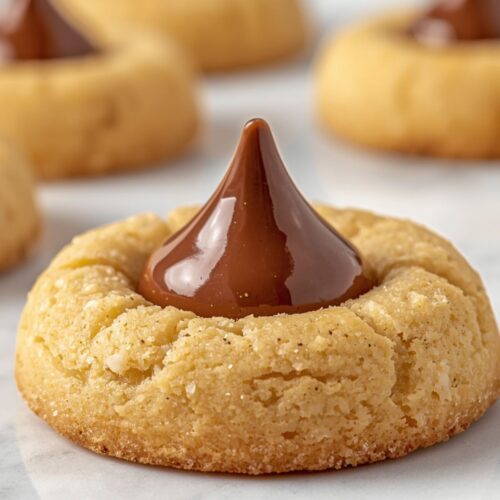
The chocolate kiss on top melts just enough when you press it in, then sets into a smooth chocolate center as the cookies cool. Whether you are baking these for Christmas, a school event, a weekend treat, or just because you have a jar of peanut butter sitting on the counter, this recipe delivers consistent, bakery-quality results every single time you make it.
Ingredients for Easy Peanut Butter Blossom Cookies
- 1 1/2 cups (195g) all-purpose flour — Spoon into the measuring cup and level off. Do not scoop directly from the bag or the cookies may turn out dense and dry.
- 3/4 teaspoon baking soda — Helps the cookies rise properly. Make sure it is fresh for the best texture.
- 1/2 teaspoon baking powder — Works with the baking soda to give the cookies a balanced rise.
- 1/2 teaspoon salt — Balances the sweetness and enhances the peanut butter flavor.
- 1/2 cup (112g) unsalted butter, room temperature, Soft butter creams properly and creates a smoother dough.
- 1/2 cup (140g) creamy peanut butter — Shelf-stable peanut butter like Jif or Skippy works best. Natural peanut butter can make the cookies oily and flat.
- 1/4 cup + 2 tablespoons (78g) granulated sugar — Used in both the dough and for rolling.
- 1/2 cup (112g) packed light brown sugar — Adds moisture and keeps the cookies soft for days.
- 1 large egg + 1 large egg yolk — The extra yolk adds richness and creates a chewy center.
- 1 teaspoon vanilla extract — Adds warmth and enhances the overall flavor.
- 3–4 tablespoons additional granulated sugar — For rolling the dough balls before baking to create a crisp exterior.
- 40–45 Hershey’s Chocolate Kisses, unwrapped — Press into the cookies immediately after baking while they are still warm.
How to Make Peanut Butter Blossoms (Step by Step)
Follow these steps exactly and your cookies will come out thick, soft, and perfectly chewy. I have included the lessons I learned the hard way so you do not have to repeat my mistakes.
Step 1: Mix the Dry Ingredients
Whisk together the flour, baking soda, baking powder, and salt in a medium bowl. Set this aside. Doing this dry mix separately ensures everything distributes evenly into the dough skipping this step and adding dry ingredients directly can create pockets of baking soda in your cookies.
Step 2: Cream the Butter and Sugars
In a large bowl, beat the butter, peanut butter, granulated sugar, and brown sugar together on medium speed until the mixture is light in color and visibly fluffy this takes a full 3 to 4 minutes. Do not rush this step. I once stopped after 90 seconds and the cookies spread way too thin. The color change is your cue: it should go from golden-tan to a pale, almost cream color.
Step 3: Add the Eggs and Vanilla
Add the egg, egg yolk, and vanilla extract to the butter mixture and mix on medium until fully combined, about 1 minute. Scrape down the sides of the bowl so everything incorporates evenly.
Step 4: Combine Wet and Dry Ingredients
Add the dry ingredients to the wet ingredients and mix on low just until the dough comes together. Do not over-mix once the flour is in over-mixing develops the gluten and makes the cookies tough instead of tender.
Step 5: Chill the Dough
Wrap the dough tightly in plastic wrap and refrigerate for at least 1 hour. If you can refrigerate it overnight, do it. Overnight chilling gives you thicker, chewier cookies with deeper flavor. I tested both, and the overnight dough made noticeably better cookies.
Step 6: Prepare for Baking
When ready to bake, preheat your oven to 350°F (175°C). Line baking sheets with parchment paper or a silicone baking mat. Let the chilled dough sit at room temperature for 5 to 10 minutes so it is pliable enough to roll.
Step 7: Roll the Dough Balls
Scoop exactly 1 tablespoon of dough per cookie and roll into smooth balls between your palms. Do not go larger. I made that mistake once and the cookies spread into puddles. Roll each ball in the granulated sugar until fully coated.
Step 8: Bake the Cookies
Place the sugar-coated balls 2 inches apart on the prepared baking sheets. Bake for 7 to 9 minutes, until the edges are just set and the tops look slightly underdone. They will firm up as they cool. While they bake, have your unwrapped chocolate kisses ready on the counter.
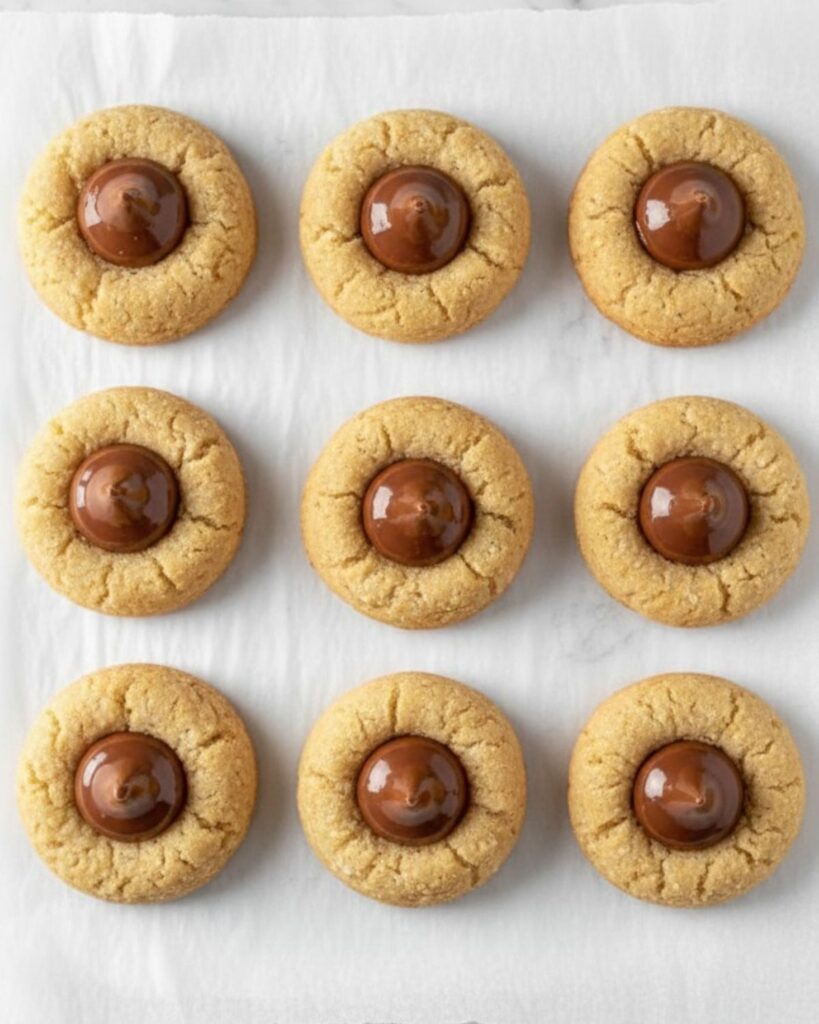
Step 9: Add the Chocolate Kisses
Remove the cookies from the oven and immediately within 5 seconds press one chocolate kiss firmly into the center of each cookie. The cookie will crack slightly around the edges and that is completely normal and exactly what you want. The chocolate will soften but will firm back up once fully cooled at room temperature.
Step 10: Cool and Store
Let the cookies cool on the baking sheet for 5 minutes, then transfer to a wire rack. If you need to speed up the chocolate setting, place the baking sheet in the refrigerator for 10 minutes. Store cooled cookies in an airtight container at room temperature for up to 5 to 7 days.
Expert Tips for Perfect Peanut Butter Blossoms Every Time
Tip 1: Cream the Butter and Peanut Butter Properly
I cannot stress this enough. I rushed this step on my second batch and the cookies came out greasy and dense. The creaming process incorporates air into the fat, which is what gives the cookies their structure and lift. Set a timer for 4 minutes and let the mixer run. You will see the mixture go from a dark tan color to something noticeably lighter and fluffier.
Tip 2: Use Properly Softened Butter
Use room temperature butter not cold, not melted. Cold butter will not cream with the peanut butter properly, and melted butter will make your dough too wet and your cookies spread flat. If you forgot to take the butter out ahead of time, cut it into cubes and let it sit at room temperature for 20 to 30 minutes. That is usually enough.
Tip 3: Do Not Skip the Extra Egg Yolk
The full egg gives structure, but that extra yolk is what adds richness and creates the slightly fudgy center that makes these cookies so irresistible. I once tried making a batch without the yolk to save a small amount of egg, and the texture was noticeably drier and less satisfying.
Tip 4: Always Chill the Dough
I have baked these from un-chilled dough out of impatience and the cookies spread thin and lost their shape completely. The chill time firms up the fat so the cookies hold their ball shape during baking and come out thick and chewy. Overnight chilling is best, but even 1 hour makes a dramatic difference compared to baking right away.
Tip 5: Add the Chocolate Kiss Immediately
Press the chocolate kiss in immediately when the cookies come out of the oven. If you wait even 60 seconds, the cookies start to firm up and the kiss will not bond properly it will just sit on top instead of pressing into the center with those beautiful cracks around it. Have every kiss unwrapped and within arm’s reach before the timer goes off.
Tip 6: Slightly Underdone Is Perfect
Pull the cookies out when they still look slightly underdone on top. The tops should look just barely set and the edges should be firm. They will continue baking on the hot pan for a few minutes after you remove them from the oven. If you wait until they look done in the oven, they will be overbaked and dry by the time they cool.
Common Mistakes to Avoid When Making Peanut Butter Blossoms
- Using natural peanut butter instead of creamy shelf-stable — Natural peanut butter has separated oils that can make the dough greasy and cause the cookies to spread too much. Use creamy shelf-stable peanut butter like Jif or Skippy for the best texture.
- Scooping flour directly from the bag — Packed flour adds too much dryness to the dough, leading to dense and crumbly cookies. Spoon the flour into the measuring cup and level it off, or weigh exactly 195g.
- Baking dough that is too warm — Warm dough spreads too quickly in the oven and creates thin cookies instead of thick, chewy ones. Chill the dough until firm before baking.
- Adding the chocolate kiss too late — The cookies begin setting immediately after baking, so the chocolate kiss may not stick properly if you wait too long. Have all kisses unwrapped and ready beforehand.
- Overbaking the cookies — The cookies continue cooking on the hot baking sheet after leaving the oven. Remove them when the edges are set but the centers still look slightly soft.
Ingredient Substitutions for Peanut Butter Blossoms
- Butter substitute: You can use salted butter instead of unsalted butter simply reduce the added salt to 1/4 teaspoon. Avoid margarine, as it can make the cookies spread too much.
- Peanut butter alternative: Almond butter or sunflower seed butter can work in place of creamy peanut butter, though the cookies will be slightly softer with a milder flavor. Avoid natural or overly oily nut butters.
- Egg-free option: Replace the egg and egg yolk with 1/4 cup unsweetened applesauce. The cookies will be a bit softer and more cake-like but still delicious.
- Chocolate alternatives: Instead of classic Hershey’s Kisses, try dark chocolate kisses, caramel-filled chocolates, mini peanut butter cups, or Rolo candies.
- Gluten-free option: Use a 1:1 gluten-free baking flour blend in place of all-purpose flour. The cookies may be slightly more delicate, so chilling the dough is especially important.
How to Store Homemade Peanut Butter Blossom Cookies
- Room temperature: Store the cookies in an airtight container for up to 5–7 days. Adding a slice of bread to the container helps keep the cookies soft longer. Replace the bread after 2 days if needed.
- Refrigerator: Keep in an airtight container for up to 10 days. Let the cookies sit at room temperature for a few minutes before serving, or warm one briefly in the microwave for a softer texture.
- Freezer (baked cookies): Freeze the cooled cookies in a freezer-safe container or bag for up to 3 months. Thaw at room temperature before serving.
- Freezer (unbaked dough): Freeze the rolled dough balls until firm, then transfer to a freezer bag. Bake directly from frozen and add 1–2 extra minutes to the baking time. Add the chocolate kiss after baking.
More Cookie Recipes You’ll Love
- Brookies Cookies
- Lemon Crinkle Cookies
- Chocolate Chip Cheesecake Cookies
- Double Chocolate Sandwich Cookies
- Chocolate Chip Biscoff Cookies
- Peppermint Snowball Cookies
- Chocolate Mint Cookies
- Pecan Pie Cookies
- Caramel Stuffed Cookies
- Red Velvet Cookie Sandwiches
- Chocolate chip banana cookies
FAQs About Peanut Butter Blossoms
Q: How do you make peanut butter blossoms from scratch?
Cream butter and peanut butter with sugar until fluffy. Add eggs and vanilla, then mix in flour, baking soda, baking powder, and salt. Chill the dough for at least 1 hour, roll into balls, coat in sugar, and bake at 350°F for 7 to 9 minutes. Press a chocolate kiss into each cookie the moment it comes out of the oven.
Q: Why are my peanut butter blossoms flat?
Flat blossoms are almost always caused by one of three things: butter that was too warm or melted before creaming, natural peanut butter instead of creamy shelf-stable, or skipping the dough chill time. All three cause the fat to spread too quickly in the oven. Chill your dough for a full hour and use standard creamy peanut butter for best results.
Q: Can I freeze peanut butter blossom cookie dough?
Yes, absolutely. Roll the dough into balls, coat in sugar, then freeze on a baking sheet until solid. Transfer to a zip-lock bag and freeze for up to 2 months. Bake straight from frozen at 350°F and add 1 to 2 extra minutes. Press the chocolate kiss in immediately when they come out of the oven, same as fresh-baked.
Q: Do I have to refrigerate peanut butter blossom dough?
Yes this step is not optional. Chilling the dough is what keeps the cookies from spreading flat and losing their thick, chewy center. Without refrigeration, the butter in the dough is too warm and the cookies will spread thin and crispy. Minimum 1 hour; overnight is even better if you can plan ahead.
Q: How long do peanut butter blossoms last?
At room temperature in an airtight container, they stay fresh and soft for 5 to 7 days. In the refrigerator, they last up to 10 days. In the freezer, baked cookies keep well for up to 3 months. They are one of the best make-ahead holiday cookies because of how well they hold their texture over time.
Q: Can I use crunchy peanut butter for peanut butter blossoms?
You can, but it is not recommended. Crunchy peanut butter changes the texture of the dough the pieces of peanut create weak spots in the cookie and the dough does not bind as smoothly, which can cause cracking when you press in the chocolate kiss. Creamy peanut butter gives a much more consistent result.
Q: Why does my chocolate kiss fall off after the cookies cool?
This happens when the kiss is not pressed in quickly enough, or when it is pressed too gently. Press it in firmly within 5 seconds of the cookies coming out of the oven. The heat from the cookie slightly melts the base of the kiss, which is what bonds it to the dough as everything cools. A gentle press will not create that bond.
Final Thoughts
Peanut butter blossoms are one of those classic cookies that never go out of style. The combination of a soft peanut butter cookie rolled in sugar with a chocolate kiss in the center just works every single time. Whether it is for holiday cookie trays, bake sales, parties, or a random weekday craving, these cookies always disappear fast.
The secret to perfect peanut butter blossoms is simple: properly cream the butter and sugars, use creamy shelf-stable peanut butter, chill the dough, and press the chocolate kiss in while the cookies are still hot. Follow those steps and you will get soft, chewy cookies with the perfect texture every time.
If you try this recipe, leave a comment and let me know how they turned out. I would love to hear if you tried any fun chocolate variations or made your own twist on the recipe.
Peanut Butter Blossoms
Ingredients
- 1 1/2 cups 195g all-purpose flour
- 3/4 teaspoon baking soda
- 1/2 teaspoon baking powder
- 1/2 teaspoon salt
- 1/2 cup 112g unsalted butter, room temperature
- 1/2 cup 140g creamy peanut butter
- 1/4 cup + 2 tablespoons 78g granulated sugar
- 1/2 cup 112g packed light brown sugar
- 1 large egg + 1 large egg yolk
- 1 teaspoon vanilla extract
- 3 –4 tablespoons granulated sugar for rolling
- 40 –45 Hershey’s Chocolate Kisses unwrapped
Instructions
- Whisk dry ingredients (flour, baking soda, baking powder, salt).
- Cream butter, peanut butter, and sugars until light and fluffy.
- Add egg, egg yolk, and vanilla; mix well.
- Add dry ingredients and mix until dough forms.
- Chill dough for at least 1 hour.
- Roll into balls, coat in sugar.
- Bake at 350°F (175°C) for 7–9 minutes.
- Press chocolate kiss into each cookie immediately after baking.
- Cool on tray for 5 minutes, then transfer to rack.
Notes
- Always use creamy, shelf-stable peanut butter for the best texture and structure.
- Chilling the dough for at least 1 hour is essential to prevent spreading and keep cookies thick.
- Cream the butter and sugars properly until light and fluffy — this step creates soft, bakery-style cookies.
- Press the chocolate kiss into the cookies immediately after baking so it bonds properly as they cool.
- Do not overbake — the cookies should look slightly soft in the center when removed from the oven.
- Store in an airtight container at room temperature for 5–7 days or freeze for longer storage.